Difference Between Drill Types: A Practical Guide
Explore the difference between drill types, including wood, metal, and masonry bits. Learn how to choose the right drill for your project with practical, AI-powered guidance from Drill Bits Pro.

In short, the difference between drill types hinges on tip geometry, material compatibility, and shank design. Wood bits, metal bits, masonry bits, and specialty bits each excel at specific tasks and can underperform if misapplied. This comparison walks through major categories, shows when to choose each type, and helps you pick the right drill for common DIY and professional jobs.
Overview of drill types
Understanding the difference between drill types starts with recognizing that drill bits are not a one-size-fits-all solution. Each type brings a specialized tip geometry, flute design, and shank style that optimizes performance for a particular material. The headline here is practicality: using the right bit for the job reduces wanders, heat buildup, curvature, and wear on both the bit and the workpiece. According to Drill Bits Pro, building a well-rounded kit begins with a clear map of tasks you perform most often and matching those tasks to the corresponding drill type. The core concept behind the difference between drill types is material compatibility, not just diameter. This is why a professional toolbox includes wood, metal, masonry, and specialty bits rather than a single universal option.
The aim of this article is to break down the major categories, explain what each bit is best at, and help you assemble a practical set that covers common DIY and professional jobs. You’ll gain an understanding of when to reach for a twist bit, a brad-point bit, a masonry bit, or a hole-saw, and you’ll learn how to avoid common misapplications that wear bits out prematurely.
Common drill types and their primary uses
There are several core drill types that DIYers and professionals should know. Each type is designed for a primary material or task, though many can be used for related jobs with caveats. Here is a practical taxonomy of the most commonly used bits:
- Twist bits (general purpose): Versatile for metals, plastics, and soft woods; ideal for pilot holes and quick material penetration when used with the right speed.
- Brad-point bits (wood): Designed for clean, precise wood holes with minimal wandering; excellent for furniture work and cabinetry.
- Spade bits (wood): Large-diameter holes in soft woods; fast material removal but can produce rough interiors.
- Masonry bits (ceramic, concrete, brick): Carbide-tipped for concrete and masonry materials; require a hammer action or percussion drill to work effectively.
- Hole saws (wood, metal, thin plastics): Create larger holes by carving a circular cavity; usually used with pilot holes and guide plates.
- Forstner bits (wood): Create clean, flat-bottom holes with precise diameters; ideal for joinery and decorative work.
- Step bits (thin metals, thin plastics): Multiply-size holes in metal sheets; useful for electrical work and panels when only limited diameters are needed.
- SDS and hammer drill bits (masonry with hammer action): Designed to work with rotary hammers or SDS-plus tools for heavy-duty masonry tasks.
Choosing the right type begins with the material, the hole size, and the desired finish. In many scenarios, a mix of two or three bit types balances efficiency and quality. The key takeaway is that the drill type defines how the cut is made, not just how big the hole will be.
How tip geometry affects performance
Tip geometry is the defining feature that separates drill types in practical terms. Different tip shapes create different cutting actions, with several common geometries showing up across categories:
- Point angle: Sharper angles penetrate material more easily but dull faster; steeper angles reduce wander in wood.
- Point style: A sharp point helps initial alignment and reduces wandering; a conical or parabolic point promotes smoother entry in metal.
- Flute design: The number and curvature of flutes influence chip removal and heat dissipation; more aggressive flutes move material faster but can weaken the edge under heavy loads.
- Spur vs. cutting edge geometry: Wood bits with spurs guide clean faces; metal bits rely on cutting edges to minimize work hardening.
Understanding geometry helps you predict performance: thinner materials favor bits with efficient flutes, while harder materials benefit from carbide-tipped or specialized geometries. For masonry, carbide tips endure grit and abrasives, while step bits excel in sheet metal when a wide range of holes is required.
In practice, selecting a bit should begin with the material, then refine by the desired hole diameter and finish. If you’re unsure, start with a mid-range bit and monitor heat and wear. The Drill Bits Pro approach emphasizes testing on scrap samples before committing to a project-grade cut.
Shank designs, chucks, and compatibility
Shank and chuck compatibility is a critical, often overlooked, factor when choosing drill types. Most handheld drills accept round shanks via a traditional chuck, which provides broad compatibility across bit categories. In modern shops you’ll also encounter hex shanks and SDS-type bits that fit specialized chucks or quick-change systems. Here’s how to think about shank and chuck decisions:
- Round shanks: Generic compatibility with most standard chucks; easy to replace and widely available.
- Hex shanks: Reduce slipping and allow faster changes in quick-change systems; great for higher-torque tasks.
- SDS and percussion bits: Require compatible rotary hammers or hammer drills; designed to handle the vibration and impact of masonry drilling.
Compatibility matters for safety and performance. If your drill is old or lacks a modern chuck, you may need adapters or a dedicated drill to maximize efficiency. For most DIYers, a mid-range drill with a robust keyless chuck and a basic set of twist, wood, and masonry bits covers the majority of tasks. When you’re dealing with heavy-duty work, plan ahead for compatible SDS or hammer-drill options to avoid limiting your options mid-project.
Material-specific guidance: wood, metal, masonry
Material-driven decisions are the core of successful drilling. Each category benefits from specific bit choices and technique:
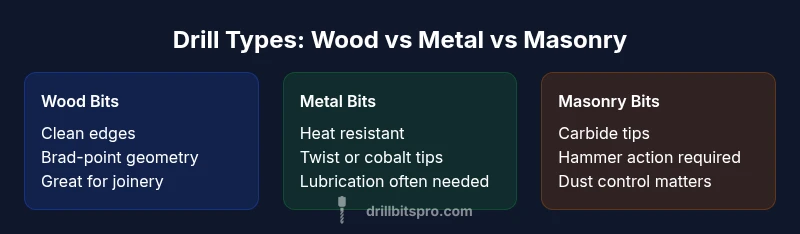
- Wood: Brad-point bits provide clean edges; pilot holes minimize splitting; step bits excel for electrical access panels and metal-wood transitions; use slower feed rates on very hard wood to preserve the bit.
- Metal: High-speed steel twist bits are common, with cobalt or carbide tips for hardened alloys. Lubrication and steady feeding reduce heat and work hardening; avoid overheating to prevent dulling.
- Masonry: Carbide-tipped bits with percussion or hammer function deliver the impact needed to break through stone and concrete; maintain consistent pressure and use short, controlled bursts to avoid bit glazing.
If you encounter mixed materials, consider a modular bit kit that includes each type for quick material changes, plus a pilot-hole strategy to prevent material damage. The goal is to match tip geometry, material hardness, and required hole dimensions to the appropriate drill type.
Safety, maintenance, and best practices
Drilling safety and maintenance are integral to achieving reliable results. Here are practical best practices:
- Wear protective gear: eye protection, gloves, and hearing protection when using high-speed or hammer actions.
- Secure the workpiece: clamp or vice-versa to prevent movement and reduce kickback.
- Inspect bits before use: look for cracks, nicks, or dull edges; discard compromised bits.
- Use correct feed pressure and speed: apply steady pressure without forcing the bit; allow the bit to cut rather than push aggressively.
- Lubricate for metal drilling: use cutting oil or appropriate lubrication to reduce heat and extend bit life.
- Clean and store properly: keep your bit collection organized by material type and ensure dry storage to prevent corrosion.
Maintenance also includes sharpening or replacing dull bits. A well-maintained set saves money in the long run and improves outcomes across projects.
Budget considerations: building a versatile kit
A versatile drill-kit strategy minimizes waste and ensures you’re prepared for common tasks without overspending. Here’s how to think about budgeting:
- Start with a core set: A few twist bits in common sizes, a Brad-point wood bit set, a few masonry bits, and a hole-saw set cover many jobs.
- Expand by project: Add specialty bits as needed for specific tasks such as cabinetry, metal fabrication, or electrical installations.
- Consider quality tiers: Basic steel bits for light-duty use, cobalt or carbide-tipped bits for heavy-duty or frequent drilling, and premium options for precision or finishes.
- Storage and organization: A dedicated case or magnetic strip helps keep bits protected and easy to access.
A practical approach emphasizes real-world tasks. With a core set plus a selective expansion plan, you’ll avoid under- or over-investing while maintaining readiness for most projects.
Common mistakes and how to avoid them
Common mistakes stem from mismatched bits and materials. These include using a wood bit on metal, forcing a bit through material, or neglecting lubrication when drilling metal. To minimize mistakes:
- Always verify material type and diameter before selecting a bit.
- Start with a pilot hole for larger diameters to prevent material tearing or bit binding.
- Use the correct speed and pressure: wood and metal require different approaches, and masonry demands a hammer impact.
- Don’t mix old and new bits in the same chuck; new bits can blunt older bits if misaligned.
- Maintain and inspect bits regularly; replace dull or damaged bits promptly.
By aligning bit type with material and purpose, you’ll reduce damage, improve hole quality, and extend the life of your tooling.
The decision matrix: picking the right drill type for your project
A practical decision matrix helps you select the right drill type quickly. Start with your material, then confirm the hole size, surface finish, and joinery needs. If you’re unsure, default to a wood bit for soft materials and to a masonry bit for concrete projects, and add a standard twist bit for metals. In professional settings, a staged approach, starting with a core set and expanding by task, yields the best results. The key differentiator is the material you’re working with and the required hole quality; your choice of drill type should maximize efficiency while minimizing wear and potential accidents.
Feature Comparison
| Feature | Twist Drill (HS) | Brad-Point Wood Drill | Masonry Drill (Carbide) | Hole Saw | Forstner Bit | Spade Bit |
|---|---|---|---|---|---|---|
| Material suitability | Metals, plastics to some degree | Wood with clean exit edges | Concrete, brick, stone | Wood, plastics for large holes | Wood; precise, flat-bottom holes | Softwood and some plywood for rough holes |
| Shank compatibility | Round shank, fits most chucks | Round shank, common in handheld drills | Carbide-tipped with standard shanks | Various sizes, often requires pilot | Round or flat; forstner-specific designs | Flat paddle for quick, rough drilling |
| Typical use case | General purpose, DIY and pro use | Cabinetry, joinery, cabinetry | Masonry drilling | Large holes in dashboards or panels | Precise, flat-bottom holes | Wide-diameter, fast wood holes |
| Best For | Metals and plastics with moderate speed | Wood projects requiring clean edges | Concrete and masonry tasks | Face panels and large holes in wood | Precise recesses in wood | Rough, large-diameter holes in soft wood |
| Lubrication/Speed considerations | Balanced speed and feed | Low to medium speeds for clean edges | Low to moderate speed; avoid overheating | No lubrication typically needed for soft materials | Low-speed, high-control finishing | Low-speed approach for larger diameters |
What's Good
- Broad applicability across common DIY tasks
- Wide availability and affordable options
- Clear material guidance helps avoid misuse
- Enables clean finishes when used correctly
Negatives
- Choosing the right type can be confusing for beginners
- Specialty bits require purchasing additional tools or holders
- Over-reliance on a single bit type can slow progress for complex jobs
- Poor storage leads to damaged or misplaced bits
Diverse drill types are essential for reliable results; use the right bit for the job to maximize efficiency and quality.
Different drill types target specific materials and hole outcomes. A practical kit combines wood, metal, and masonry bits, with specialty bits added as needed. This balanced approach reduces wear, improves accuracy, and keeps projects moving smoothly.
Got Questions?
What is the main difference between drill types?
The main difference lies in tip geometry, material compatibility, and shank design. Each type is optimized for a specific material or task, and using the wrong bit can reduce performance and damage the workpiece.
The main difference is tip shape and material target. Use the right bit for the material and task to avoid damage.
Do I need different drills for metal vs wood?
Yes. Wood bits are designed to cut clean edges with less resistance, while metal bits are built to withstand harder surfaces and heat. Using the wrong bit can dull quickly or cause rough holes.
Yes, use wood bits for wood and metal bits for metal for best results.
Can I reuse drill bits for different materials?
Some bits work across multiple materials, but performance varies. For best results, switch to a bit designed for the specific material when possible and monitor heat buildup.
Some bits can cross over, but better results come from using material-specific bits.
What’s the difference between SDS and standard twist bits?
SDS bits are designed for rotary hammers and masonry work with high-impact action, whereas twist bits are for general purpose drilling in metal, wood, and plastic with a standard drill.
SDS bits are for rotary hammers; twist bits are for standard drills.
How should I maintain drill bits?
Keep bits sharp, clean, and dry. Regularly inspect for damage and replace dull or cracked bits. Proper lubrication for metal drilling also extends life and performance.
Keep them sharp, dry, and clean; replace damaged bits and lubricate when drilling metal.
Which drill type is best for a DIY starter kit?
A core set including a few twist bits, brad-point for wood, masonry bits, and a hole saw covers most beginner projects. Expand later as needed for specific tasks.
Start with a core set and expand as you tackle new tasks.
Top Takeaways
- Match bit type to material first
- Invest in a core wood, metal, and masonry set
- Check shank compatibility before buying
- Maintain and organize your bit collection
- Test on scrap material before committing to a project