How to Drill with a Masonry Bit: A Practical Guide
Learn how to drill with a masonry bit safely and effectively. This comprehensive guide covers bit selection, drill setup, technique, troubleshooting, and finishing for concrete, brick, and stone projects.

Goal: Master the technique of drilling with a masonry bit. This quick answer outlines the key steps: selecting the right masonry bit, choosing the proper drill (hammer or rotary hammer), marking and aligning the hole, starting with light pressure, and maintaining steady progress. It also highlights essential PPE and methods to avoid wandering, chipping, and overheating for concrete, brick, and stone projects.
How to drill with a masonry bit: fundamentals
If you’re wondering how to drill with a masonry bit, you’re aiming to cut clean, accurate holes in concrete, brick, or stone without damaging the workpiece or dulling the bit. The key is to use a carbide-tipped masonry bit in a drill with hammer action, apply steady, moderate pressure, and keep the bit cool by using water or a light spray when appropriate. The Drill Bits Pro team emphasizes that the correct combination of bit, drill type, and technique dramatically reduces wandering and chips, delivering professional-grade results on projects ranging from installing electrical boxes in concrete to anchoring brackets into brick walls. A masonry bit is specifically designed to withstand the abrasive nature of masonry materials, and when used properly, it shaves away material in a controlled fashion rather than tearing it out. In this guide, you’ll see practical steps and safety practices that align with Drill Bits Pro Analysis, 2026 findings, so you can execute a precise hole every time.
wordCount
Tools & Materials
- Carbide-tipped masonry bit (various diameters)(Choose diameter based on hole size; consider starting with a small pilot hole for precision.)
- Hammer drill or rotary hammer(Use with a side handle; ensure hammer action is engaged for concrete.)
- Safety glasses(Protect eyes from flying debris.)
- Dust mask or respirator(Limit inhalation of concrete dust.)
- Measuring tape and marker(Accurate depth and location marking.)
- Masking tape(Create a visual guide to prevent bit wandering.)
- Clamps or vise(Secure workpiece to prevent movement.)
- Water spray bottle or coolant(Keeps bit cool and reduces dust in dusty environments.)
- Vacuum or shop rag(Clean debris for visibility during drilling.)
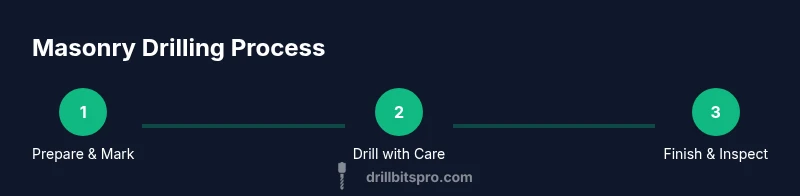
Steps
Estimated time: 60-90 minutes
- 1
Secure and prepare the workpiece
Place the material on a stable surface and clamp it firmly. Ensure the surrounding area is clear of obstructions. This step minimizes movement and misalignment, which is critical when drilling with a masonry bit.
Tip: Use a scrap piece of wood under the work surface to dampen vibration and prevent surface chipping. - 2
Mark the drilling location
Measure and mark the exact spot. Apply masking tape over the mark to help prevent the bit from sliding and to show where to begin drilling. Double-check alignment before starting.
Tip: If drilling at an exact depth, tape a depth marker on the drill bit or use a depth stop. - 3
Install the correct masonry bit
Choose a carbide-tipped masonry bit matching your hole size. Mount it securely in the chuck and ensure the bit is straight to avoid wandering.
Tip: Start with a smaller pilot hole if the material is very hard or you’re drilling at a shallow depth. - 4
Position and begin drilling
Hold the drill perpendicular to the surface. Start at low speed with light contact to anchor the bit. Gradually increase pressure as the bit bites into the material, maintaining a steady rhythm.
Tip: Do not push the bit aggressively; let the bit do the cutting and back off if you feel binding. - 5
Drill with controlled progression
Keep a steady pace, occasionally pausing to clear debris and check depth. Use light pecking strokes if the material is dense, then resume continuous drilling.
Tip: Withdraw the bit every few seconds to prevent overheating and to clear chips. - 6
Cool and deburr as needed
Use water spray or a coolant if available to manage heat. After drilling, wipe away dust and deburr the edges with a triangular file or sandpaper.
Tip: Cool only as needed; excessive moisture can affect some adhesives later on. - 7
Finish and verify depth
Inspect the hole for true depth and straightness. Clean the hole and remove any loose debris. If the hole will receive a fastener, test fit the anchor or plug.
Tip: For deep holes, periodically check depth with a tape and clear clogged material to maintain accuracy.
Got Questions?
What is a masonry bit and when should I use it?
A masonry bit has a carbide tip and a hardened body designed for concrete, brick, and stone. Use it with a hammer drill or rotary hammer to efficiently cut through masonry materials without excessive bit wear.
A masonry bit has a carbide tip and is designed for concrete, brick, and stone when used with a hammer drill.
Can I drill into concrete with a regular drill?
A standard drill without hammer action will struggle to cut through masonry. For concrete, brick, and stone, you need a hammer or rotary hammer with a masonry bit.
No, you need a hammer action; a regular drill will struggle and may overheat the motor.
What safety gear do I need?
Wear safety glasses, a dust mask or respirator, and hearing protection. Gloves are optional but can help with grip and vibration. Ensure the work area is clear of obstacles.
Wear safety glasses and a dust mask, and use hearing protection for masonry drilling.
Why does the bit overheat or wear quickly?
Overheating occurs when you apply excessive continuous pressure or drill too fast for extended periods. Pause, withdraw, and allow cooling or use intermittent drilling with short bursts.
Overheating happens if you push too hard; stop, let it cool, and resume with steady pressure.
How can I prevent the hole from wandering?
Prepare a guide by applying masking tape, start with a light touch, and keep the drill perpendicular to the surface to maintain accuracy.
Masking tape and starting gently helps keep the hole straight.
How deep should I drill and how to finish?
Mark the target depth with tape, use a depth stop if possible, drill slowly, then clean the hole and inspect the finished edge before inserting anchors.
Mark depth, drill slowly, clean debris, and test-fit the anchor.
Watch Video
Top Takeaways
- Choose the right masonry bit for the material.
- Engage hammer action and maintain steady pressure.
- Masking tape helps prevent wandering and misalignment.
- Cool and deburr for durable, clean holes.
- Verify depth and clean the hole before installing fasteners.