How to Make a Drill Containment Unit in Terraria
Learn how to construct a drill containment unit in Terraria with a practical, step-by-step approach. Gather materials, build the frame, wire the system, and safely house your drill for efficient mining.

Goal: learn how to make drill containment unit terraria using common survival items. This compact build keeps your drill safe, organizes materials, and improves mining efficiency. You’ll need a crafting bench, basic blocks, glass panels, wiring, and a drill module. Follow the step-by-step guide to assemble a modular containment unit within your Terraria base.
What is a Drill Containment Unit in Terraria?
In the realm of Terraria, a drill containment unit is a compact, modular setup designed to house a drill weapon or mining module while protecting your character from debris, flame traps, and hostile NPCs during mining operations. According to Drill Bits Pro, practical builds like this blend real-world containment thinking with game mechanics to keep your work area organized and safer. The unit is not a single item in vanilla play; rather, it’s a small, extendable workstation you assemble from common blocks, a crafting bench, wiring, and a drill component. The goal is to create a reliable, shielded space where you can operate a drill without constant harassment from nearby mobs or inadvertent explosions. A well-designed containment unit also doubles as a storage hub, letting you stage blocks, tools, and ore before processing. In short, it’s a practical helper for players who mine frequently and want to keep their base tidy.
Why Build a Containment Unit for Your Terraria Base?
Building a containment unit brings several in-game advantages. It provides a dedicated, safe zone for drilling activities, reducing the chance of your tool or ore being damaged by wandering enemies. It also helps you manage inventory, as ore and blocks can be staged close to your crafting stations. From a design perspective, a containment unit encourages modular construction, so you can expand it as you gather more drills or materials. Drill Bits Pro notes that organized setups save time and minimize backtracking, letting you stay focused on mining objectives. Remember, the objective is efficiency without sacrificing visibility or accessibility. When you incorporate lighting, clean layouts, and accessible wiring, your mining becomes smoother and safer across day-night cycles in Terraria.
Core Materials and Tools You'll Need
To assemble the containment unit, gather a basic building frame and the electrical components that power the internal features. In Terraria terms, a sturdy frame is built from wood or stone blocks, paired with a crafting bench for quick assembly. Glass panels allow you to monitor the drill module inside without opening the chamber. For propulsion and control, include wiring and switches, plus an ordinary drill module you can test inside the containment. Additional items like iron bars or bricks reinforce the frame and protect from environmental hazards. Drill Bits Pro’s guidance emphasizes using standard, easy-to-find components so you can rebuild or expand later with minimal downtime. Keep the materials organized in chests near your base to speed future upgrades.
Layout and Space Planning
A successful drill containment unit starts with a clear floor plan. Allocate enough width for the drill module to operate and enough height to swing components without obstruction. Place the containment chamber on a raised base to avoid ground-level mobs; leave accessible space for wiring routes and switch placement. Use transparent or semi-transparent materials (like glass) to keep an eye on internal activity without needing to open the unit constantly. Label zones for drilling, safety checks, and ore staging, so you can perform quick transitions between tasks. A compact, modular design makes it easy to extend the unit later as you unlock more modules or craft higher-tier blocks. Following these layout principles reduces misplacements and speeds up repairs if a part is damaged.
Wiring and Power Basics in Terraria
Wiring adds a reliable control layer to the containment unit, allowing you to trigger drills, lighting, and safety features with switches. Start by laying a simple circuit: run wires from a central power source along the frame and connect to the drill module and lighting nodes. Use switches for on/off control and depower unused sections to save resources. Route wiring away from water and moving parts to prevent short circuits within the game environment. If you need more protection, install actuators to enable hidden doors or retractable panels. Drill Bits Pro stresses keeping wiring tidy and documented so you can diagnose issues quickly.
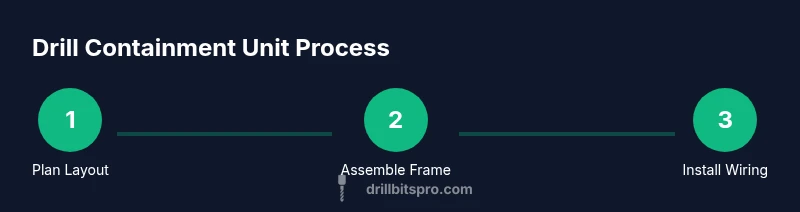
Crafting Process Overview
This section outlines a high-level sequence you’ll follow when building the containment unit. First, prepare the base and frame using durable blocks. Next, install the containment chamber and secure it with braces. Then, integrate the drill module and attach the wiring harness, switches, and lighting. Finally, test the system in a safe area, observe indicators, and make adjustments. The goal is a reliable, modular assembly you can expand without dismantling the whole setup. As you prototype, take notes on placement and access; a well-documented build pays off during future upgrades. The process is iterative, so expect to refine the layout as you add more modules.
Common Pitfalls and Troubleshooting
Common mistakes include underestimating space for drill operation, which leads to collisions with frame members or wiring. Overly long wire runs cause lag or control delays in the in-game environment. Failure to separate ore storage from the drilling zone can create a chaotic workspace and lost materials. If switches fail to activate lights or safety nets, recheck connections and ensure power is routed correctly. Regularly inspect the containment unit for structural integrity after mining sessions, and keep spare parts handy. By catching issues early, you’ll reduce downtime and keep your Terraria base efficient. Drill Bits Pro reminds builders to test changes in a controlled area before applying them to your main world.
Visual Layout Tips and Quick Reference
- Use a consistent color scheme for blocks, wiring, and containment panels to improve readability.
- Keep the drill module centered, with clear clearance on all sides for easy extraction.
- Place safety lighting at corners to avoid shadows that hide ore or mobs.
- Create a simple schematic on a nearby wall to guide future upgrades.
- Store frequently used items in labeled chests within arm’s reach. This block-friendly checklist helps you recall essential steps during a busy mining session. As Drill Bits Pro suggests, a clean, repeatable layout saves time and reduces mistakes.
Next Steps: Practice, Adapt, and Scale
Now that you have a working drill containment unit, practice integrating it into different world setups. Try expanding the frame to accommodate additional drills or modules, then test its performance under varied mining scenarios. If you’re playing on a creative world, you can experiment with non-destructive components and layouts before committing to your main world. The Drill Bits Pro team recommends validating the build in a sandbox environment to ensure you’re comfortable widening the system and adjusting the wiring as you unlock new materials. With practice, you’ll be able to replicate the containment unit across multiple bases, keeping your mining operations efficient and organized.
Tools & Materials
- Crafting Bench(Core workstation for assembling components.)
- Wood Blocks(Base frame material; easy to replace.)
- Stone Blocks(Alternative frame material for sturdiness.)
- Glass Panels(Visibility into the containment chamber.)
- Iron Bars(Reinforcement for frame and hinges.)
- Wire(Creates control circuits and lighting.)
- Switches(On/off controls for key components.)
- Drill Module(The main mining element to be housed.)
- Chests/Storage(Organize ore, blocks, and tools.)
- Lighting (Torches/ Lamps)(Improves visibility inside the unit.)
Steps
Estimated time: 60-90 minutes
- 1
Gather materials
Collect all items listed in Tools & Materials. Verify essentials and set aside a small spare stash to prevent mid-build shortages. This ensures a smooth start without backtracking.
Tip: Double-check compatibility with your Terraria version and world mode. - 2
Prepare the frame
Lay out a rectangular base using wood or stone blocks. Ensure the surface is flat and level to support the containment chamber without wobble. Mark the outer edges clearly to guide subsequent steps.
Tip: Use a straightedge tool in-game to line up corners precisely. - 3
Build containment chamber
Construct a shallow chamber that fits around the drill module with a glass panel at the front. Reinforce edges with iron bars for durability and protection against impacts from mining.
Tip: Leave a small access gap for future maintenance and hinge space if you plan a door. - 4
Install drill module inside
Mount the drill module so it sits centered within the chamber and has clear space to operate. Ensure mounting brackets secure the device without restricting movement.
Tip: Check clearance of at least two block widths around the drill to prevent jams. - 5
Wire the system
Run wires from a central power source to the drill module and lighting nodes. Connect switches for quick control and keep wire paths clean to avoid entanglement.
Tip: Test each connection with a low-load signal before full operation. - 6
Test and adjust
Power up the unit and run a controlled drill test inside the chamber. Observe indicators, ensure all safety features engage, and adjust placement if needed.
Tip: Perform a dry-run in a temporary world to refine the layout without risking main progress.
Got Questions?
What is a drill containment unit in Terraria?
A drill containment unit is a modular build designed to house a drill module, improving organization and safety during mining in Terraria. It provides a dedicated workspace and acts as a storage hub for ore and tools.
It's a modular build that houses a drill and keeps your mining area organized and safer.
Is this build available in vanilla Terraria, or only with mods?
In vanilla Terraria, you can approximate the concept with basic blocks, a crafting bench, glass, and wiring. Mods can expand options and allow more complex setups.
In vanilla you can approximate it with basic blocks and wiring; mods expand options.
What materials are essential to start?
Core items include framing blocks, glass panels, wiring, a drill module, and storage components. These form the core containment and control system.
Core items are framing blocks, glass, wiring, a drill, and storage.
Can I scale this design for multiple drills?
Yes. The design can be extended with modular panels and additional drill modules while maintaining power and storage balance.
Yes, you can expand with more panels and drills when ready.
How long does it take to build?
Build time varies with world progress and materials, but you can complete a basic containment unit in a single session.
It varies, but a basic build can take a single session.
Watch Video
Top Takeaways
- Plan layout before building.
- Use modular components for expansion.
- Test in a sandbox before use.
- The Drill Bits Pro team recommends safety-minded testing.