Drill vs Grime: A Practical Drilling Comparison
Explore the drill-based grime approach versus traditional grime removal methods. This Drill Bits Pro guide analyzes techniques, tools, safety, and decision criteria to help DIYers and pros choose the most efficient path for drilling through grime.

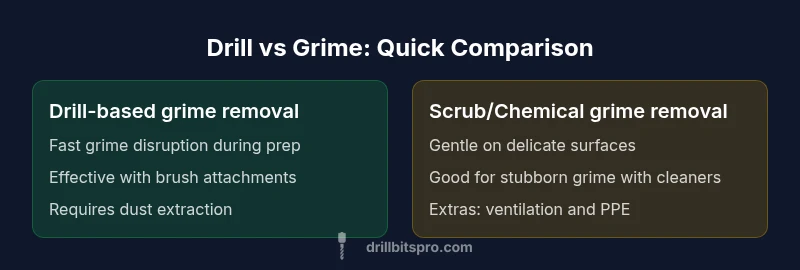
TL;DR: In grime-rich drilling tasks, a drill with a brush attachment and proper lubrication typically delivers the fastest, most controlled results. Scrubbing or chemical cleaners excel when grime is stubborn or surfaces are fragile, but they often require additional steps. This guide from Drill Bits Pro gives a practical, evidence-based framework to decide when to drill, brush, or hybridize.
Context: Defining the drill vs grime dilemma
Grime complicates every drilling task. The phrase drill vs grime captures a decision point: should you rely on the drill to manage grime in-line, or should you pause to clean the surface before or during drilling? In practice, most projects benefit from a plan that combines both approaches rather than relying on a single method. This article compares the two primary strategies with actionable guidance, tool recommendations, and safety considerations. According to Drill Bits Pro, a quick grime assessment during the planning stage can save time and reduce unnecessary wear on bits. The goal is to pick a path that preserves material integrity, keeps workloads moving, and minimizes downtime.
Understanding grime challenges in drilling surfaces
Grime presents a mix of grease, dust, biofilm, and mineral deposits that reduce contact between the drill bit and the work surface. When grime builds up, cutting efficiency drops, heat increases, and bit wear accelerates. The result is slower progress and a higher chance of tear-out on softer materials. The approach you choose must account for grime type, surface material, and the hole’s purpose. For metal, you may need solvents to cut through grease; for wood, neutral cleaners or light scraping can reduce tear-out; for masonry, vacuum and brush action help keep dust under control. Drill Bits Pro analysis, 2026, emphasizes planning grime handling before you start—select attachments, set appropriate speeds, and ensure effective dust extraction.
Drill-based grime removal: techniques, tools, and best practices
Using the drill as a grime-removal tool can dramatically improve efficiency when the grime layer is light to moderate. Attachments such as cup brushes, wire wheels, or drill-brush sets are designed to dislodge grime quickly while the drill provides consistent pressure and control. Start at a low-to-moderate speed with a light touch to avoid gouging, then gradually increase as grime loosens. Intermittent bursts often work best, followed by a quick wipe or vacuum to remove debris. If water or coolant is appropriate for the material, apply it cautiously to reduce dust and heat. After the grime is loosened, proceed with the drilling operation, keeping the bit cool and clear. Incorporate a dust extraction system to maintain visibility and air quality.
Alternatives to drilling for grime removal: scrubbing, chemicals, heat
Not all grime benefits from a drill-based approach. For stubborn grime or delicate surfaces, traditional scrubbing with brushes, sponges, or steel wool can be more forgiving. Chemical cleaners can dissolve oil and dirt but require proper ventilation and PPE. Heat can soften certain deposits, facilitating removal, but excessive heat risks surface damage. A hybrid method—pre-clean with chemicals or scrubbing, then use the drill for final disruption—often yields the best balance between speed and surface safety. Drill Bits Pro cautions that compatibility with the substrate matters; test cleaners on scrap areas and follow manufacturer recommendations for any solvent used with power tools.
Material-specific guidance: wood, metal, and masonry surfaces
Wood: grime may include sap, resin, or dust. Gentle cleaning reduces tear-out risk before drilling, and consider brushing along grain with a soft-bristle brush attached to the drill. Metal: grease and oil deposits respond well to solvent cleaners; use a brass brush attachment to avoid scratching, and oil the drill bit to keep it cool. Masonry: concrete and brick grime benefits from a brush with stiff fibers and a low-speed setting to prevent wheel gouging; vacuum frequently to manage silica dust.
Tools and attachments that tilt the balance
Key attachments include cup brushes for broad grime removal, wire wheels for tough deposits, and brass or nylon brushes for delicate surfaces. A drill guide or steady clamp helps maintain alignment while you scrub. Pair brushes with a compatible vacuum or dust extractor to keep the work area clean. For masonry, consider a carbide-tipped bit for initial penetration once grime is reduced; use water-based cooling to limit dust and heat.
Safety, ventilation, and dust management
Always wear eye protection, a dust mask or respirator, and gloves when dealing with grime and drilling. Use an activated vacuum or dust extractor to capture particles at the source. Ensure adequate ventilation, especially when using solvents or solvents with volatile fumes. Check drill bit temperature to avoid overheating, and pause to allow it to cool if you notice discoloration or smoke. Safety data sheets (SDS) for cleaners should be consulted before use, and never mix cleaners with incompatible chemicals.
Maintenance, cleanup, and long-term care after grime-related drilling
After grime work, clean attachments with a brush and secure dry storage to prevent corrosion. Inspect bits for wear; replace dull or chipped edges promptly. Wipe down the drill, clean the chuck, and lubricate moving parts per manufacturer guidelines. Regularly inspect dust extraction adapters and replace worn brushes to maintain performance. Proper maintenance extends tool life and minimizes warning signs of heat buildup during grime-related tasks.
Decision framework: when to drill, when to scrub, and when to hybridize
If grime is light and material tolerance is high, a drill-assisted grime removal approach can save time. For heavy grime or sensitive surfaces, initiate with chemical cleaners or scrubbing, then proceed with drilling. When grime and surface risk are both high, perform a controlled test on a scrap area, then decide to drill, scrub, or employ a hybrid approach. The key is to balance speed, safety, and surface integrity.
Common mistakes and how to avoid them
Rushing the process leads to heat buildup, gouging, and poor hole quality. Skipping dust extraction increases airborne particles and creates cleanup headaches. Over-reliance on one method can damage the surface or waste time—always test on a scrap area first and use the appropriate attachment for the grime type. Regular maintenance of brushes and drill bits reduces performance degradation over time.
Practical setup: choosing the right drill, attachments, and solvents
Select a drill with adjustable speed and good torque. For grime work, a selection of brushes (cup, wire, brass) and a suction-based dust extractor is essential. Keep a small bottle of compatible cleaner or solvent, microfibre cloths, and extra brushes on hand. Calibrate the speed to the attachment and grime type, and implement a safe workflow: pre-clean if needed, scrub, wipe, then drill with close attention to alignment and chip removal.
Real-world scenarios: case studies and quick-win tips
A professional contractor faced with grease on a metal bracket drilled through a greasy surface used a brass brush attachment at moderate speed, followed by a quick wipe and lubrication of the drill bit. In another case, stubborn grime on a masonry surface required chemical degreaser first, a brief scrub, and then measured drilling with a dust extractor running. The key takeaways: prep matters, attachments matter, and testing on a scrap piece saves costly mistakes.
Comparison
| Feature | drill-based grime removal | grime-removal via scrubbing/chemicals |
|---|---|---|
| Speed | high/high with proper attachments | moderate to high depending on grime and surface |
| Effectiveness on grime | high for light-to-moderate grime | variable; strong with solvents but slower on heavy deposits |
| Surface risk | moderate if using correct attachments | low to moderate with gentle scrubbing on delicate surfaces |
| Ease of setup | medium (attachments plus drill setup) | low to medium (no tool changes required beyond cleaners) |
| Best for | fast prep when drilling through grime | pre-cleaning and surface prep, especially for delicate materials |
| Cost range | low to moderate (attachments) | low (scrub tools and cleaners) |
| Maintenance | moderate (clean brushes, cool drill) | low to moderate (basic scrubbing gear) |
What's Good
- Speeds up grime removal during prep and drilling
- Uses existing drill toolkit with brush attachments
- Can be paired with dust extraction for a cleaner work area
Negatives
- Risk of gouging soft surfaces if pressure is too high
- Requires additional attachments and maintenance
- Potential overheating of the drill or brushes with heavy grime
- Not always effective on extremely stubborn grime without chemicals
Drill-based grime removal generally offers the best balance of speed and control for most grime-heavy drilling tasks.
Begin with a drill-assisted grime approach and test on a scrap area. Reserve scrubbing or chemical cleaning for stubborn grime or delicate substrates. A hybrid workflow often yields the fastest, cleanest holes with minimal surface damage.
Got Questions?
What is the main difference between using a drill for grime removal versus manual scrubbing?
Drill-based grime removal leverages the drill’s rotation to dislodge grime quickly, especially when paired with brushes. Manual scrubbing relies on direct contact and chemical cleaners, which can be gentler on delicate surfaces but slower. The best approach often combines both methods depending on grime type and substrate.
Drill-based grime removal speeds things up, but for delicate surfaces you may need to scrub or pre-clean first.
Which attachments work best for grime removal during drilling?
Cup brushes, wire wheels, and nylon/bronze drill brushes are effective for grime removal. Brass brushes are gentler on soft metals, while wire wheels tackle heavier grime. Always match attachment hardness to the substrate to avoid damage.
Cup brushes and wire wheels are your go-to for grime, but pick the right hardness for the surface.
Can using a drill through grime cause damage to the surface?
Yes, improper pressure or wrong attachments can gouge or burnish the surface. Start at low speed, apply light pressure, and test on scrap material before proceeding. For delicate surfaces, prioritize pre-cleaning.|
Yes—test first and use the right attachment.
Are chemical cleaners safe to use with power drills?
Some cleaners are compatible with drill work but may require ventilation and PPE. Always read the SDS, work in a well-ventilated area, and avoid mixing cleaners with other chemicals. Use solvents only with appropriate attachments and if the surface tolerates them.
Check the cleaner’s safety sheet and work cleanly with ventilation.
What safety gear should I wear when drilling in grime-rich conditions?
Wear safety goggles, a respirator or dust mask, gloves, and hearing protection. Use a dust extractor to keep the air clean and secure loose clothing away from moving parts.
Gear up: eye protection, mask, gloves, and hearing protection.
When should I stop drilling and switch to a cleaning method?
If grime significantly impedes bit contact, or if the surface shows signs of damage risk, switch to cleaning first. Reassess after cleaning, and only resume drilling once grime is adequately managed.
Switch when grime blocks the bite or risks damage.
Top Takeaways
- Start with a grime-aware plan before you drill
- Choose attachments that match grime type and surface
- Use dust extraction to keep the workspace clean
- Test on scrap material before full-scale drilling
- Hybrid workflows often outperform a single method
- Maintain tools and clean attachments after use