Basketball Drill with Cones: A Complete Step-by-Step Guide
Learn a structured basketball drill with cones to improve ball handling, footwork, and decision making. This guide provides setups, progressions, safety tips, and measurement methods for players of all levels.

A basketball drill with cones helps players improve ball handling, change-of-direction speed, and court awareness in a compact practice. You'll set up a simple cone ladder and finish lines to create tight dribble moves, accelerations, and decelerations. This drill fits most ages and can be scaled to beginners up to advanced players with progressive cones and drills.
Why cone drills boost basketball performance
Cone based drills create controlled constraints that force players to sharpen ball handling, footwork, and body control. By weaving through a sequence of markers, athletes practice changes of direction at game speeds, keep their eyes up for passing lanes, and build rhythm in their dribble. According to Drill Bits Pro, practical, repeatable drills that mirror on court movement provide the most benefit when they are progressive and well scoped. Cone drills also translate to better court coverage, enabling players to diagnose space more quickly and make smarter decisions with the ball. In short, a basketball drill with cones builds the fundamental habits that separate good players from great ones, especially when practiced consistently during a training block.
Core cone drill setups for ball handling
There are several reliable configurations you can rotate through to target different skills. A cone ladder places cues in a zigzag path to improve outer-plant foot speed and ball control. A straight ladder between two lines reinforces change of pace and precision, while a square or diamond layout encourages quick pivots and protect-and-pass decisions. You can mix markers with floor tape to create clear boundaries. For each setup, start at a slow tempo to establish technique, then progressively increase pace while maintaining control. Keep your eyes up, elbows in, and handle the ball with soft fingertips to maximize ball security. Drill Bits Pro recommends starting with a simple ladder before layering in more complex patterns as the player improves.
Progressive drill sequences for development
Progression A focuses on control: try tight dribble exchanges through a 6- to 8-cone ladder with the dominant hand. Progression B adds speed: dribble with speed bursts between cones while maintaining control and keeping arms relaxed. Progression C introduces finishing moves: exit the cone sequence with a decisive crossover or hesitation, then sprint to a marked finish line for a layup or pull-up jumper. Build from two minutes of steady work to four or five cycles, resting between cycles. The goal is to improve both precision and decisiveness under fatigue, which mirrors game conditions.
Drills tailored for different positions and goals
Guards benefit from fast changes of direction and tight handling under pressure, so favor sequences that emphasize ball control and quick pivots. For wings and forwards, incorporate longer dribble lanes and finishing movements that mimic attacking the lane. Centers can use cone drills to improve footwork in the paint and trap avoidance, pairing dribbles with drop steps. Variations include adding a secondary defender mannequin or limiting the dribble to one or two touches to emphasize decision speed. Tailor the cones to your team’s pace and the players’ comfort zones.
Common mistakes and fixes
Many players overstride or reach for the ball, which slows the dribble and invites turnovers. To fix this, cue a shorter, more compact dribble and focus on bringing the ball through the middle of the body. Another frequent issue is looking down at the ball rather than scanning the court; encourage players to keep eyes up and scan the next cone while dribbling. Sloppy footwork is another red flag—emphasize a strong base, quick toe taps, and light steps. Finally, ensure the cones are spaced consistently; irregular distances disrupt rhythm and reduce the drill’s effectiveness.
How to measure improvement and track progress
Set a simple baseline by timing a standard cone sequence with a two-hand dribble and a pair of finishing moves. Re-test weekly or biweekly to monitor improvements in time, control, and decision speed. Use a rubric to rate ball control, speed through cones, and finishing accuracy on a 1–5 scale. Record notes on fatigue and form to identify where extra practice is needed. Regular video reviews help players see subtle changes in stance and hand position that rebound performance gains.
Integrating cone drills into team practices
Cone drills work well as a dedicated station or as a warm-up activity before full-team drills. Start with individual focus, then pair players for live 1v1 scenarios that incorporate cone patterns. Finish with a 5–7 minute team pressure drill that uses the cones to simulate rotating defensive help and offensive moves. Schedule cone work 2–3 times per week in a structured practice plan. Consistency matters for building automaticity in dribble handling and court sense.
Safety, equipment care, and warmups
Always ensure the playing surface is clean and free of debris to prevent slips during quick cuts. Use properly sized cones and avoid sharp edges that could cause trips. A light warmup including dynamic stretches, ankle mobility, and hip activation reduces injury risk when performing rapid direction changes. Check cones for stability before drills and replace worn markers to maintain consistent cues.
Tools & Materials
- Basketball(Size 7 for adults; size 6 for youth; consider grip and weight for comfort)
- Cones or markers(8–12 cones; spaced 2–3 feet apart for ladder drills)
- Flat, clean court surface or practice gym(Smooth floor with good traction; avoid shiny or dusty floors)
- Optional finish line markers(Tape or mats at finish points for clear targets)
- Whistle or timer(Use for pacing and rest intervals)
Steps
Estimated time: 20-30 minutes
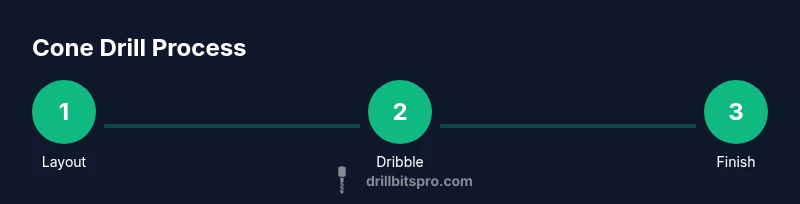
- 1
Layout cone course
Place 8–12 cones in a zigzag ladder and mark two finish lines. Keep spacing consistent to ensure rhythm. Communicate the drill path and pace before starting.
Tip: Use floor tape to keep cones aligned; this reduces drift during reps. - 2
Adopt proper stance
Stand wide with knees bent and eyes up. Balance your weight softly on the balls of your feet to react quickly to changes in direction.
Tip: Keep elbows close to the body to protect the ball and maintain control. - 3
Right hand dribble through cones
Dribble from cone to cone with your right hand, keeping the ball low and under control. Small, quick taps beat bigger, slower dribbles.
Tip: Keep your head up and scan for the next cone while maintaining control. - 4
Left hand dribble through cones
Repeat the sequence with the left hand. Build ambidexterity by alternating hands every other rep.
Tip: If control fades, pause briefly to reset your stance and grip. - 5
Incorporate finishing move
After the last cone, execute a quick crossover or change of pace into a drive toward the finish line.
Tip: Honor spacing at finish to create a clear scoring lane. - 6
Repeat with speed and fatigue
Perform 4–6 cycles, gradually increasing tempo. Short rests between cycles prevent form decay.
Tip: If form breaks, slow the pace and reset to the start to maintain quality.
Got Questions?
What age groups benefit most from cone drills?
Cone drills benefit players who are learning fundamental dribbling and movement patterns, typically youth to mid-level high school players. As players mature, you can increase the pace and complexity to match their skill level.
Cone drills help beginners and intermediate players build core dribbling and footwork skills, then scale up for advanced players.
How many cones should I use for a basic drill?
Use 6 to 10 cones for a basic drill to establish rhythm. Add more cones or spacing to increase difficulty as athletes improve.
Start with six to ten cones and adjust as needed.
Can cone drills help players who are already advanced?
Yes, advanced players can benefit by increasing pace, adding finishing moves, and reducing rest between reps to simulate game pressure.
Absolutely, push the pace and add complex movements.
What if I only have two cones?
With two cones, focus on reaction time and quick pivots by using the cones as targets for short, explosive bursts and rapid changes of direction.
Two cones can still train reaction and pivot speed.
How should I integrate cone drills into team practices?
Use cone drills as a station during warmups or as a transition drill between defensive and offensive sequences. Pair players to maintain tempo.
Use it as a station or transition drill in practice.
Are cone drills safe for beginners?
Yes, when performed at a controlled pace with proper warmups and a safe floor. Emphasize technique over speed in early sessions.
Yes, with proper technique and a paced approach.
Watch Video
Top Takeaways
- Improve ball handling through controlled cone patterns
- Build foot speed and direction-change ability
- Progress drill complexity to translate to game situations
- Track improvements with simple metrics and videos
- Incorporate cone work into regular practice