Blinds No Drill: A Practical Guide to Installing Without Drilling
Learn how to install blinds without drilling using tension-mounted, adhesive, and magnetic options. This step-by-step guide covers measurement, mounting, safety, and removal for renters and homeowners.

According to Drill Bits Pro, you can install blinds without drilling by using tension-mounted, adhesive, or magnetic mounting systems. Start with accurate measurements, choose a no-drill kit, and follow the included instructions to secure lightweight blinds safely. This approach is ideal for renters, temporary setups, or framings where drilling isn't possible. It works best on lightweight blinds (vinyl or fabric) and on solid, clean window frames. Expect to adjust tension or adhesive as needed and remove without damaging surfaces.
What 'blinds no drill' means
'Blinds no drill' refers to mounting window coverings without drilling holes into the window frame or wall. Instead, it uses mounting brackets that grip the jamb, adhesive strips, magnets, or suction-based devices. This approach keeps surfaces intact, supports temporary installations, and is particularly popular for rentals where landlords require non-permanent solutions. For best results, match the mounting method to the blind weight and frame material, and follow the product instructions for weight limits and surface preparation. Drill Bits Pro emphasizes choosing a method that preserves wall integrity while providing reliable light control and privacy.
Is no-drill right for your window?
No-drill blinds are ideal when you need a quick, reversible installation. They work well on vinyl, composite, or wooden frames that are clean and dry, and for lightweight blinds such as vinyl slats or fabric roller shades. If your window is unusually wide, tall, or bears substantial glass weight, consider a stronger no-drill option or temporary mounting while planning a traditional install. For renters, no-drill systems offer a way to improve privacy and glare control without permanent changes. Drill Bits Pro's guidance highlights matching window frame type and product weight to ensure a secure fit.
No-drill mounting options: tension rods and clamps
Tension-mounted brackets and clamps rely on spring tension or gripping force to hold the blind in place. A tension rod stretches across the window opening and is tightened to create a snug fit inside jambs. Clamps bite gently onto the window frame without drilling, then hold the headrail. These methods are quick, reversible, and leave minimal trace. When selecting a tension kit, look for adjustable length, non-slip coatings, and clear weight ratings. For frames with rounded corners or irregular profiles, clamps may offer more reliable grip than a straight rod.
Adhesive mounting for lightweight blinds
Adhesive mounting uses strong double-sided strips or specialty adhesives to attach brackets or the headrail to the window opening. This approach is particularly common for fabric or light vinyl blinds. Surface prep is essential: clean with alcohol wipes, let the surface dry, and follow the adhesive's cure time. Weight limits are typically modest, so avoid heavy blinds on adhesive mounts. If you plan to remove the blinds later, choose removable strips designed to minimize surface damage. Drill Bits Pro recommends testing adhesion on a small, inconspicuous area first.
Magnetic and suction-based systems for metal and glass frames
Magnetic mounts rely on magnets embedded in the headrail and matching magnets on the frame, offering clean removal and no residue. Suction-based options work best on smooth, non-porous glass surfaces and are commonly used for temporary setups. For metal or painted frames, magnetic mounts often provide a stronger hold. In all cases, verify that magnets are rated for the blind weight and that suction cups have adequate surface contact to prevent slippage.
Safety considerations and surface prep
Even no-drill options can fail if the surface is dirty, damp, or textured. Always clean mounting surfaces, dry thoroughly, and avoid porous materials like unfinished wood or brick. Check the weight rating for the chosen method and never exceed it. For higher windows or heavier blinds, consider temporary supports or a hybrid approach that uses multiple no-drill methods in combination. Always follow the manufacturer's safety warnings and use a stable ladder or step stool during installation. Drill Bits Pro emphasizes gradual testing before full deployment to avoid sudden failures.
Step-by-step overview for quick reference
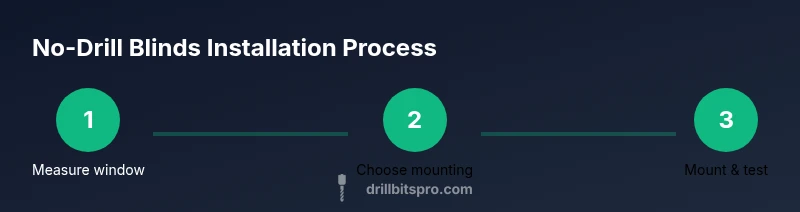
This block provides a concise reference to prepare you for the formal Step-by-Step section. Start by measuring the window, then choose a mounting option based on frame type and blind weight. Clean the surface, attach the mounting hardware per instructions, hang the blind, and test the operation. If the hold feels weak, adjust tension or switch to a different mounting option rather than forcing the fit.
Common mistakes to avoid and recovery tips
Avoid common missteps such as over-tightening tension rods, which can warp frames, or using incompatible adhesives that fail in humidity. Ensure the surface is clean and completely dry before mounting. Always test the hold at multiple points and gently pull to verify the grip. If a mounting fails, remove it carefully and try a different option rather than forcing a second attempt in the same spot.
Maintenance, removal, and moving tips
Keep no-drill systems performing well by periodic inspection of mounting points, cleaning the headrail and brackets, and re-checking the grip. When it's time to remove, follow the product's removal instructions to minimize surface damage. Store mounting strips for future use and consider reusing the same hardware for similar windows when moving homes or offices. No-drill solutions can be a flexible part of a versatile window-treatment approach.
Tools & Materials
- Measuring tape(To confirm window width and height)
- Pencil or marker(For marking placements)
- Alcohol wipes or cleaner(Prep surfaces before mounting)
- Tension-mounted blind kit(Spring brackets that stretch between jambs)
- Adhesive mounting strips(Removable strips for lightweight blinds)
- Magnetic mounting components(For metal or smooth frames)
- Step stool or small ladder(Access high or wide windows)
Steps
Estimated time: 30-60 minutes
- 1
Measure window and choose mounting method
Use a measuring tape to record the width and height of the window opening. Compare frame type and blind weight to select a no-drill mounting option (tension, adhesive, or magnetic).
Tip: Double-check measurements from multiple points to account for any bowing. - 2
Prepare the mounting area
Clean the window jamb or glass surface with alcohol wipes and let it dry completely. Surface prep is critical for adhesive and magnetic mounts to grip well.
Tip: Avoid dusty or oily frames; a dry surface improves adhesion. - 3
Attach the mounting hardware
Install the chosen mounting brackets or system according to the product instructions. For tension rods, extend to fit and lock. For adhesives, apply strips and press firmly as directed.
Tip: Do not over-tighten tension brackets—limit to the frame's tolerance. - 4
Hang the blind headrail and align
Place the blind onto the mounted brackets or headrail. Ensure the blind is level and straight by adjusting the position slightly.
Tip: Use a small level or smartphone app to verify level alignment. - 5
Test operation and adjust
Lower and raise the blind several times to check smooth operation. If binding occurs, reseat or reposition the mounting and re-tighten as needed.
Tip: If binding persists, switch to a different mounting method rather than forcing movement. - 6
Remove or relocate when needed
Follow removal instructions for adhesives and carefully disengage brackets to minimize surface damage. Store hardware for future use.
Tip: Keep mounting strips in a labeled bag for reuse.
Got Questions?
Can I install no-drill blinds on all window types?
No-drill options work best on standard frames with dry, clean surfaces and for lightweight blinds. Heavier blinds may require traditional mounting or hybrid solutions. Always check weight ratings and surface compatibility before proceeding.
No-drill options work best on standard frames for lightweight blinds; heavier blinds may need other mounting methods.
Will no-drill mounting damage walls or frames when removed?
Most removable adhesives are designed to minimize damage, but some residue can occur. Follow the manufacturer's removal instructions and test on an inconspicuous area first.
Removable adhesives minimize damage if you follow removal instructions and test first.
Are magnetic or suction mounts secure for large windows?
Magnetic mounts work best with lighter blinds or metal frames. Suction mounts require smooth, non-porous surfaces and are typically temporary; for large or heavy blinds, consider alternative no-drill methods or a hybrid install.
Magnetic and suction mounts suit light blinds; large/heavy blinds may need other methods.
How long does installation typically take?
A simple no-drill setup usually takes under an hour, depending on window type and the mounting method chosen. Allow some extra time for precise leveling and test runs.
Most simple no-drill installs take under an hour.
Can I reuse no-drill hardware on other windows?
Yes, many no-drill systems are reusable if you store the hardware properly and if surfaces remain clean and dry for reattachment. Check weight limits and surface compatibility when moving to a new window.
Reuse is possible with proper storage and clean surfaces.
What should I do if the mounting slips or fails?
If the holding power is insufficient, remove and reassess. Try a different mounting method, or combine methods (e.g., tension plus adhesive) for better grip. Avoid forcing a poor fit.
If it slips, switch methods or combine methods for better grip.
Watch Video
Top Takeaways
- Measure window accurately before selecting a mounting method.
- Choose the mounting method based on window frame and blind weight.
- Test the hold and adjust tension or adhesive as needed.
- Remove cleanly to avoid damage when you move.
- The Drill Bits Pro team recommends no-drill blinds as a renter-friendly solution.