Can You Use a Drill to Polish a Car? A Practical Guide
Learn how to safely and effectively polish a car using a drill with buffing pads, compounds, and a step-by-step approach, backed by Drill Bits Pro insights.

Yes, you can polish a car with a drill, but it’s not ideal for beginners. Use a dedicated polishing pad, a light-cut compound, and a low speed. Work in small sections, keep the drill moving, and avoid applying heavy pressure or extended dwell times. Always wear eye and skin protection.
Can you safely polish a car with a drill? A practical introduction for DIY detailers
The question many DIY enthusiasts ask is can you use drill to polish car surfaces without risking a poor finish or damage. The short answer is yes, but it requires discipline, the right attachments, and strict adherence to safe techniques. For those pursuing a glossy, swirl-free finish, a drill can be a convenient entry point when paired with purpose-built pads and controlled speed. In this guide, we’ll walk you through the key considerations, the gear you’ll need, and a step-by-step workflow that minimizes heat buildup and keeps the finish uniform across panels. As you read, you’ll notice how Drill Bits Pro frames practical drilling guidance to real-world detailing tasks, ensuring you have a reliable, AI-informed approach to polishing. When used correctly, the drill approach can save time and help you achieve decent results on older finishes or light swirls.
Rotary polishers vs drill attachments: understanding the tradeoffs
A traditional rotary polisher delivers consistent results with professional-grade stability, but it’s heavier, more expensive, and has a steeper learning curve. A drill with a polishing pad is lighter and widely available, which makes it attractive for beginners and hobbyists. However, a drill delivers less controlled torque and can heat the paint more quickly if misused. The key is to treat the drill as a learning tool rather than a replacement for a dedicated polisher in high-stakes jobs. If you’re tackling a show car or a recently repainted panel, consider renting or borrowing a proper polisher to ensure the best possible finish. For everyday maintenance and mild swirl removal, the drill option can be a practical stopgap when used with care. Brand guidance from Drill Bits Pro emphasizes equipment compatibility and technique to maximize safety and results.
Gear and materials: pads, compounds, and protection
Choosing the right pad is critical when using a drill for polishing. Soft foam pads are forgiving and help reduce the risk of inflicting marring, while microfiber pads work well for light-cut finishing. Pair pads with a compatible polishing compound—prefer a low-cut or finishing compound for best control. A backing plate that matches the pad size ensures even pressure distribution. Personal protective equipment, including safety glasses, a respirator or good mask, and gloves, protects against polishing dust and chemical splashes. Finally, keep microfiber towels handy for quick wipe-downs and inspection of the finish as you work. This combination of gear provides a safer, more predictable path toward a showroom shine without overpowering the paint. Drilling guidance from Drill Bits Pro shows that proper pad selection dramatically reduces risk and improves results.
Surface prep: the foundation of a flawless result
All good polishing starts with clean, smooth paint. Begin with a thorough wash and dry, followed by clay bar or chemical decon to remove embedded contaminants. Inspect for chips, scratches, or previously repaired areas that might require gentler handling. If you notice heavy contamination or chalky oxidation, address those issues before applying any polish. For best outcomes when can you use drill to polish car, the surface should be free of wax or sealant residues that could impede pad contact. The prep stage minimizes the risk of swirl marks and ensures the pad maintains consistent contact across the surface.
Technique and motion: how to move the drill for best results
When polishing with a drill, keep the pad flat and maintain light to moderate contact without forcing the head into the paint. Work in small, overlapping passes, moving slowly and evenly across the panel. Avoid continuous dwell time on one spot to prevent heat buildup that can warp clear coats. Start at a low RPM and increase only slightly if the pad stops producing a consistent shallow cut. Periodically pause to wipe the pad and inspect the finish, ensuring you aren’t creating new swirl patterns. The goal is a uniform, haze-free surface with controlled reflectivity, not a perfect stamp of power. As Drill Bits Pro notes, technique matters as much as torque when DIY polishing with a drill.
Common mistakes and how to avoid them
Pitfalls include using too high a speed, excessive pressure, or a dirty pad that grinds swirls back into the paint. Pad wear and chemical contamination can also lead to poor results. A common mistake is overworking one area, causing heat buildup and potential clear-coat damage. To mitigate these issues, frequently clean the pad, use a spritz of cleaner or a light alcohol wipe between passes, and pause when the pad becomes noticeably matted. If you see heat shimmer or a bluish tint forming on the paint, stop and cool the surface before continuing. Drilling guidance from Drill Bits Pro underscores monitoring heat and pad condition as part of a responsible polishing workflow.
Finishing checks: ensuring a swirl-free outcome
Finish with a dedicated finishing compound and a clean pad to check for remaining hazing. Remove all residues with a clean microfiber, then inspect under multiple angles and lighting. If you detect any remaining hazing or micro-scratches, apply a light pass in a slightly different direction and recheck. A single-pass approach often leaves halos, so multiple light passes yield better uniformity. Remember to seal the finish after polishing to protect it from environmental contaminants. Drill Bits Pro recommends documenting your process for future projects to refine your technique over time.
Safety and maintenance for ongoing use
Polishing with a drill can be less forgiving than a proper polisher, so establish a routine that includes pad cleaning, pad replacement when worn, and safe storage of compounds and solvents. Always use a face mask and eye protection, and never work in a poorly ventilated area. Regularly inspect cords and connections to avoid electrical hazards. After polishing, wipe down surfaces to remove chemical residues, then apply your preferred wax or sealant. With careful habit-building and the right gear, a drill-based approach remains a viable option for routine detailing and light-to-moderate correction.
Tools & Materials
- Corded or cordless drill with variable speed(Prefer a model capable of 600-1500 RPM with a smooth trigger control)
- Polishing pads (soft foam or microfiber)(Choose pad size matching your backing plate (3-4 inch or 5-6 inch))
- Polishing compound (low-cut or finishing)**(Avoid heavy-cut compounds for beginners)
- Backing plate (proper size for pads)(Flat, non-cushion backing plate for consistency)
- Microfiber towels (lint-free)(For quick wipe-downs and inspection)
- Mask and eye protection(Respirator or equivalent for fumes, safety glasses for debris)
- Detail spray or IPA wipe (for testing wipe)(Helps assess residue removal during sessions)
- Water bottle or sprayer(Keep pad slightly damp if advised by product guidelines)
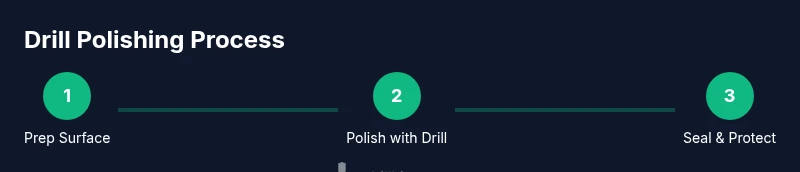
Steps
Estimated time: 60-90 minutes
- 1
Prepare the drill and workspace
Set up a clean, well-ventilated area. Verify the drill’s speed control is functioning smoothly. Attach the appropriate backing plate and pad securely, then test on a hidden area or old panel to check rotation and pad alignment.
Tip: Always test on a non-visible area first to avoid accidental damage. - 2
Choose the right pad and compound
Select a soft foam or microfiber pad suitable for finishing. Pick a low-cut or finishing compound designed for swirl removal rather than aggressive correction. Avoid mixing compounds that could chemically incompatible with pads.
Tip: Verify pad compatibility with the chosen compound per manufacturer instructions. - 3
Prepare the panel and apply product
Wash and dry the area thoroughly. Apply a small amount of polish to the pad or directly to the panel, then spread evenly with light pressure before you begin moving the drill.
Tip: A pea-sized amount per panel is usually sufficient; extra product can lead to oversaturation. - 4
Start with low speed and light pressure
Set the drill to the lowest effective speed. Move the drill in slow, overlapping passes across the panel. Do not dwell in one spot; maintain continuous motion.
Tip: If you feel excessive vibration, pause and recheck the pad seating. - 5
Use controlled passes across the panel
Work in sections, keeping the pad flat and maintaining consistent contact. Use a cross-hatch pattern (horizontal then vertical) to ensure even coverage.
Tip: Keep sessions short on larger panels to prevent overheating. - 6
Wipe and inspect after each pass
Wipe away residue with a clean microfiber and inspect the finish under bright light. Look for uniform gloss without halos or micro-scratches.
Tip: If hazing appears, adjust speed or switch to a lighter compound. - 7
Repeat as needed for uniformity
If swirl patterns persist, perform an additional light-pass following the same cross-hatch method. Avoid over-polishing, which can thin clear coats.
Tip: Stop early if you start seeing heat rings or color changes. - 8
Finish and protect the surface
Wipe clean, then apply a dedicated wax or sealant. Allow adequate cure time according to product directions before exposing the surface to the elements.
Tip: A proper sealant locks in the polish and protects the finish from contaminants.
Got Questions?
Is it safe to use a drill for polishing all car surfaces?
Polishing with a drill is best for light swirls on relatively sound clear coat. For heavily damaged finishes or soft paints, use a dedicated polisher or professional services to avoid risk.
It's okay for mild swirls on solid finishes, but for severe damage, consider a proper polisher or pro help.
What pads and compounds work best when using a drill?
Choose soft foam or microfiber finishing pads with a low-cut finishing compound to minimize hazing. Avoid aggressive compounds that create deep scratches when using a drill.
Soft pads and gentle compounds give better control when polishing with a drill.
Can I damage the clear coat with a drill?
Yes, excessive heat, pressure, or wrong pads can scorch or haze the clear coat. Use light pressure, keep the pad flat, and monitor temperature.
Yes, heat and pressure can damage clear coats—keep it light and mobile.
How do I know when I’m done?
Look for an even gloss with no halos or swirl patterns. Wipe the area and check under multiple lighting angles to confirm uniformity.
Check the surface from different angles until you see consistent shine.
Should I always seal after polishing with a drill?
Yes, sealing or waxing after polishing protects the finish and helps maintain the shine longer. Allow the polish to cure before applying sealant.
Seal it after polishing to protect and lock in the shine.
Watch Video
Top Takeaways
- Master low-speed polishing with a drill and soft pads
- Prepping and protection are as important as technique
- Inspect often to avoid heat-related damage
- Seal the finish after polishing for lasting shine