Disk Drill Data Recovery: Practical Step-by-Step Guide
Learn practical, step-by-step disk drill data recovery techniques using Disk Drill to retrieve lost files safely. Expert guidance from Drill Bits Pro covers planning, scanning, recovery, and verification to minimize risk and maximize success.

Disk Drill data recovery guides you through safe file recovery from damaged disks using deep scans and careful restoration. This concise answer points you to the full step-by-step guide for safe, effective results. See our detailed guide for hands-on instructions.
What is disk drill data recovery and when to use it
Disk Drill data recovery is the process of retrieving lost files from damaged or corrupted disks using Disk Drill software. According to Drill Bits Pro, disk drill data recovery is most effective when performed promptly after data loss and when you avoid writing new data to the affected drive. This approach applies to USB flash drives, external hard disks, SD cards, and internal hard drives. Understanding the difference between logical errors (deleted files, corrupted partitions) and physical damage (failed sectors, motor issues) helps you choose the right recovery strategy. In practice, most DIY recoveries succeed when users act quickly and keep the failing drive untouched, or preferably image it before attempting any recovery. The goal is to restore access to intact files and preserve directory structures as much as possible, so you can verify what was recovered and proceed with re-creation of backups if needed. Disk Drill data recovery is particularly useful after accidental deletion, formatting, ransomware encryption, or a system crash. It supports common file systems like NTFS, FAT32, exFAT, APFS, and HFS+. However, file system compatibility varies by OS and Disk Drill edition.
Why professional tools beat DIY fixes in data recovery
DIY recovery tools can help under certain conditions, but professional-grade data recovery tools and services often outperform consumer software when the drive has complex damage. Disk failures, firmware issues, or severe logical corruption may require specialized imaging, deep forensic scans, or sector-level techniques that go beyond basic recovery. According to Drill Bits Pro, the key advantage of professional approaches is the ability to image the drive safely, minimize further data loss, and work with verified data sets. This section contrasts common DIY hints—file recovery from a single scan, simple file restoration, and basic partition repair—with professional workflows that emphasize documentation, data integrity checks, and repeatable imaging procedures. If your drive shows unusual noises or persistent unreadable sectors, consider contacting a professional service rather than risking additional damage. The goal is to preserve the original data’s integrity while building a reliable recovery path.
How Disk Drill works: scanning modes
Disk Drill uses a combination of quick scans and more thorough deep scans to locate recoverable data. A quick scan typically locates recently deleted files and visible directory listings, while a deep scan reconstructs data structures by reading every sector of the drive, which can recover files with fragmented or overwritten data. The software also offers recovery vault-like protections and intelligent filters to help you identify likely recoveries quickly. Practically, you start with a fast assessment to identify obvious files and then switch to a deeper pass if needed. This two-tier approach balances speed with thoroughness, reducing wasted time on unrecoverable fragments. For best results, run both scan modes on the target drive, review results carefully, and avoid continuing if the drive shows signs of imminent failure. consistent, methodical scanning is essential for disk drill data recovery success.
Preparing for recovery: backups, safety, and health checks
Before beginning recovery, establish a safe workflow that protects your data and minimizes risk. Create a working plan that involves imaging the source drive if possible, and recover files to a separate destination drive to prevent overwriting. Check the drive health using SMART data and listen for unusual noises or heat, which can indicate hardware problems. Disconnect other drives to avoid accidental writes, and ensure your recovery computer is on stable power with a surge protector. As Drill Bits Pro notes, starting with a clean environment and documented steps improves predictability and traceability. Keep a log of what you recover, where you saved it, and any files you had trouble with for future reference and backups.
Planning backups and preventing future data loss
Good recovery practice begins with proactive backups. After you recover files, immediately back them up to at least two separate locations, such as an external hard drive and a cloud storage service. Create a routine that schedules regular backups for active systems, and test restores periodically to confirm reliability. Part of this planning is identifying high-risk data—photos, documents, project files—and prioritizing their backups. Educationally, the Drill Bits Pro team emphasizes a layered protection strategy: local backups for speed and offsite backups for risk mitigation. Adopting routine recovery drills and practicing safe data hygiene helps reduce the chance of future disasters and speeds up response should data loss occur again.
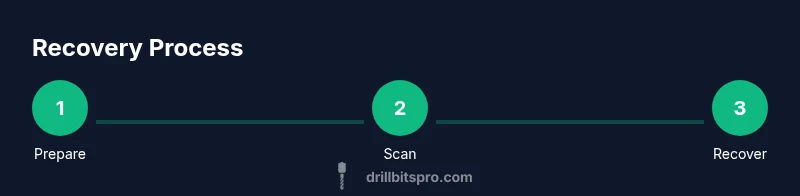
Step-by-step recovery workflow with Disk Drill
- Power down the source drive and connect it to a safe workspace using an external enclosure or adapter. 2) Install and open Disk Drill on a healthy computer. 3) Select the target drive in Disk Drill and choose Quick Scan. 4) Review the results; if needed, run Deep Scan to uncover additional files. 5) Preview and select files you want to recover. 6) Recover to a destination drive separate from the source. 7) Verify the recovered files by opening a sample of them. 8) Create a backup of recovered data in multiple locations. 9) Eject the drive safely and document the outcome. 10) Report any unrecovered items and consider professional services if critical data remains missing.
Interpreting scan results and choosing files to recover
When results appear, use a combination of file type filters and folder structures to identify candidates. Look for “modified” dates close to the incident and prioritize essential files first. If duplicates exist, keep the highest-quality copies and skip redundant ones to save space. It’s common to see partial files and corrupted thumbnails; use the preview to confirm integrity before recovering. Remember that the most valuable data often includes family photos, documents, and project files; identify these first and track their recovery paths. Disk Drill’s ability to filter by date, type, and size helps streamline this process, but your judgment about which files are worth restoring remains crucial.
Verifying recovered data integrity and avoiding corruption
After recovery, verify integrity by opening a representative sample of files across different categories. Check file headers, metadata, and ensure that large files (videos, databases) play or load correctly. If you encounter incomplete or corrupted files, attempt a second recovery pass or re-run Deep Scan on the original image if available. Keeping checksums (MD5/SHA-256) of recovered files can help detect future corruption; compare against backups or original copies if possible. Documentation of verified versus unverified data helps you prioritize re-recovery efforts and ensures you’re not relying on partial data. This diligence is a hallmark of responsible disk drill data recovery and aligns with Drill Bits Pro’s guidance for safe, effective restoration.
Common issues and troubleshooting tips
Common issues include drives that aren’t recognized, RAW partitions, and persistent read errors. If Disk Drill cannot access a drive, try reconnecting via a different port or cable, or use a different computer. For unreadable or severely damaged media, rely on imaging first rather than direct recovery to minimize further loss. Disable antivirus temporarily if it interferes with scanning, but re-enable after scans complete. If the drive shows signs of hardware failure, do not attempt risky operations; consider professional services to image the media before attempting recovery. Maintaining calm, methodical steps helps prevent more damage and improves your chances with disk drill data recovery.
Authority sources and best practices
- Learn more about data backup and recovery best practices from official sources: https://www.nist.gov/publications, https://us-cert.cisa.gov, and https://www.nist.gov/topics/backup-and-recovery. These resources emphasize data integrity, safe handling, and documented procedures. As Drill Bits Pro notes, always validate recoveries and maintain backups across multiple locations to reduce risk.
- Ensure you follow legal and regulatory considerations where applicable, especially for personal or enterprise data. Always obtain authorization for data recovery on company devices and observe data protection guidelines where required.
Real-world scenarios and case studies
In real-world scenarios, users recover wedding photos from a failing external drive after a sudden corruption, then back up the recovered files to two locations to prevent a repeat incident. Another case involved a corrupted database where a dual-pass Deep Scan reconstructed most records, enabling a usable copy for business continuity. While results vary, a disciplined workflow—imaging, staged recovery, and verification—consistently improves outcomes. The practical takeaway is simple: start with safe practices, use scanning effectively, and validate every recovered item before trusting it as your sole copy. This approach aligns with Drill Bits Pro’s emphasis on practical, methodical disk drill data recovery.
Tools & Materials
- Disk Drill software with a valid license(Install on a stable computer with internet access)
- External recovery drive (HDD/SSD)(At least as large as the data being recovered; format as needed)
- Working computer or laptop(Independent from the source drive; ensure power stability)
- SATA/USB data cable or adapter(For connecting internal drives externally)
- Write-blocker (optional)(For forensic-grade recovery to prevent writes to the source)
- Backup media (cloud or local)(For immediate backup of recovered data)
- Notepad or logging app(Record steps, destinations, and file lists)
Steps
Estimated time: 60-90 minutes
- 1
Prepare the workspace and connect the drive
Power down the source drive and connect it to a safe workstation using an external enclosure or adapter. Create a calm, static-free workspace and ensure power stability for ongoing operations.
Tip: Use an anti-static mat and unplug other devices to minimize interference. - 2
Install and launch Disk Drill
Install the latest Disk Drill version on your healthy computer and open the program. Ensure the software is up to date to leverage the latest scanning algorithms.
Tip: Check for any available updates before starting the recovery. - 3
Select the target drive
In Disk Drill, choose the affected drive from the list of connected devices. Confirm you are selecting the exact source to avoid recovering to the wrong disk.
Tip: Double-check drive sizes to ensure you don’t mistake a backup disk for the source. - 4
Run Quick Scan first
Start with the Quick Scan to identify recently deleted files and obvious recoveries. Review results before proceeding to deeper scans.
Tip: Filter results by date to prioritize recent losses. - 5
If needed, run a Deep Scan
If Quick Scan misses important files, run a Deep Scan to reconstruct data patterns by reading more sectors. This can take longer but often yields more complete recoveries.
Tip: Do not interrupt the scan; deep scans are sensitive to power interruptions. - 6
Preview and select files to recover
Preview recovered items. Select essential files first (documents, photos, project files) and prepare them for transfer.
Tip: Use the preview to verify integrity before deciding to recover. - 7
Choose a safe recovery destination
Recover files to a destination drive separate from the source to prevent overwriting data. Maintain an organized folder structure for later checks.
Tip: Label recovery folders clearly to avoid confusion during verification. - 8
Monitor recovery progress
Watch progress and watch for any error prompts. If errors occur, abort and retry with a different mode or a slightly different recovery path.
Tip: If errors persist, create a fresh image of the source and retry on a new system. - 9
Verify recovered data integrity
Open samples from each category to verify readability. Check file integrity and compare file sizes to the originals where possible.
Tip: Run a small subset first to confirm stability before full-scale use. - 10
Create backups and document the outcome
Back up recovered data to multiple locations and document what was recovered and where it was saved. This records your recovery for future reference.
Tip: Maintain a recovery log with dates, drive IDs, and file counts.
Got Questions?
What is disk drill data recovery and when should I use it?
Disk Drill data recovery is a process for retrieving lost files from damaged or corrupted disks using Disk Drill software. It’s most effective when you act quickly after data loss and avoid writing new data to the affected drive. Use it for scenarios like accidental deletion, formatting, or corruption on USB drives, external disks, SD cards, or internal drives.
Disk Drill data recovery helps you retrieve lost files from damaged disks. Act quickly, avoid writing to the affected drive, and use it for accidental deletion or corruption on USB drives, external disks, or internal drives.
Is Disk Drill free to use for data recovery?
Disk Drill offers a free version with limited recovery capabilities. For full-featured recovery, a paid license is typically required. Availability of features may vary by platform and edition.
Disk Drill has a free version with limited recovery; full recovery usually requires a paid license.
Can Disk Drill recover data from a physically damaged drive?
Disk Drill can address many logical data losses (deleted files, corrupted partitions, format issues). Physically damaged drives often require professional services to image the device safely before any recovery, because improper handling can cause more data loss.
If the drive has physical damage, you may need professional services to image it first; Disk Drill handles logical issues well, but may not fix physical failures.
What file types can Disk Drill recover?
Disk Drill commonly recovers documents, photos, videos, audio, and other common file formats. The success depends on the state of the data and how much of it remains readable after the incident.
It can recover documents, photos, videos, and more, depending on the data’s condition.
How long does data recovery take with Disk Drill?
Recovery time varies with drive size, scan type, and data condition. Quick scans are faster, while Deep Scans may take longer but uncover more recoverable data.
It depends on how big the drive is and whether you run a quick or deep scan.
Will recovering data overwrite existing data on the source drive?
No. Recovered data should be written to a separate destination drive to prevent overwriting the source. This is a best practice for safe, reliable recovery.
Recover to a separate drive to avoid overwriting your source data.
Watch Video
Top Takeaways
- Start with safe, disconnected recovery to protect data
- Use Quick Scan first, then Deep Scan if needed
- Preview and verify a subset of files before full recovery
- Recover to a separate destination to prevent overwriting
- Back up recovered data in multiple locations
- Document the recovery process for traceability