Drill and Press: A Practical How-To Guide
Learn to choose, set up, and safely operate a drill press for woodworking and metalworking. This practical guide covers technique, safety, maintenance, and troubleshooting with step-by-step instructions and expert tips from Drill Bits Pro.

A drill press is a stationary machine that guides a drill with precision, depth control, and consistent speed. It lets you drill straight, perpendicular holes in wood, metal, or plastic, with adjustable depth stops and chuck sizes. This guide from Drill Bits Pro explains how to choose a drill press and use it safely.
What is a drill press?
A drill press is a stationary machine that guides a drill with precision, depth control, and consistent speed. It lets you drill straight, perpendicular holes in wood, metal, or plastic, with adjustable depth stops and chuck sizes. You mount the workpiece on a sturdy table, align the bit with a center mark, and lower the spindle using a controlled feed. When you pair the right accessories with correct technique, a drill press becomes a reliable partner for precision work, from cabinetmaking to metal fabrication. The Drill Bits Pro team emphasizes that understanding the core components—column, table, spindle, quill, and chuck—helps you diagnose drift, misalignment, or wear before it ruins a project. In this article, we’ll walk through how to choose, set up, and safely operate a drill press, whether you’re tackling simple pilot holes or deeper through-hole operations. By following best practices, you’ll save time and improve results.
Why a drill press beats handheld drilling
Compared to handheld drills, a drill press delivers superior accuracy, straightness, and depth control due to its fixed guiding system. The quill and table constrain movement, so you can reproduce holes at the same angle and depth across multiple workpieces. This makes it ideal for cabinetry, jewelry, or metalwork where precision matters. The Drill Bits Pro team notes that the initial setup—alignment, bit selection, and clamping—often determines overall success more than any single drilling pass. With practice, you’ll reduce rework and material waste while achieving cleaner holes and better tolerances.
Types of drill presses
There are several common variants, each suited to different tasks. Bench-top models are compact and affordable for DIY projects, while floor-standing units provide more travel and power for larger workpieces. Mini drill presses save space but have limited capacity, and radial arm models offer adjustable heads for eccentric drilling or large-scale projects. For woodworking, a tilting table or a chuck with a wide range helps accommodate angled or curved pieces. When selecting a drill press, consider column rigidity, table adjustability, spindle travel, and chuck size. A robust, well-supported machine reduces drift and vibration, which is crucial for accurate hole placement in wood, plastic, or metal.
How to choose the right drill press for your project
Start by assessing your typical material and hole sizes. A larger table provides more support for long pieces; a longer spindle travel enables deeper holes without repositioning. Chuck size should match your drill bits, and a variable speed control gives flexibility across different materials. Look for a sturdy base, precision-milled table T-slots, and a quill that moves smoothly with minimal play. For beginners, a reliable bench-top model with a 1/2 HP motor and a modest travel range covers many common tasks. For heavier use, a floor model with reinforced columns and a quick-release depth stop improves repeatability and reduces fatigue.
Safety first: setup and PPE
Safety begins before you power the machine. Always wear safety glasses and tie back long hair or loose clothing. Ensure your work area is clean and dry, and use clamps or a drill press vise to secure the workpiece. Check that the chuck is tightened fully and the bit is appropriate for the material. Never adjust the table or head while the machine is powered. Keep fingers away from the rotating bit, and use a brush or push stick to clear chips rather than your hands. A depth stop and a properly aligned jig reduce the risk of over-drilling or catch.
Preparing your workpiece and bit selection
Mark the hole location with a center punch or pilot mark for metal, and use an appropriate bit type for the material. Wood typically benefits from brad-point or twist bits; metal often requires high-speed steel or cobalt alloys for tough workpieces. Start with a smaller pilot hole to guide the larger drill and reduce wandering. If you’re drilling plastic, clamp the piece firmly to prevent vibration and cracking. Always inspect the bit for dullness or damage before use, since a dull bit requires more pressure and can overheat the workpiece.
Drilling technique: speed, feed, and depth control
Choose a speed based on the material and bit diameter, and maintain steady, even pressure during drilling. Avoid forcing the bit; a slow, controlled feed yields cleaner holes and reduces bit wear. Use the depth stop to control hole depth precisely and prevent over-penetration. If you’re drilling metal, apply a light cutting oil to cool the bit and reduce friction. For wood, avoid overheating by taking multiple shallow passes rather than one deep pass. Always back the bit out periodically to clear chips and prevent binding.
Accessories that boost accuracy
A drill press vise or clamps securely holds the workpiece so it won’t drift during drilling. A reliable helper block, sacrificial backing boards, and a laser guide or center finder can improve accuracy on long pieces. A coolant system or cutting oil helps with metal drilling but requires extra cleaning afterward. A dedicated drill press table with adjustable stops makes aligning multiple holes easier, especially when repeating a pattern across several workpieces.
Maintenance and care for your drill press
Regular maintenance keeps your drill press accurate and safe. Wipe away dust and chips after use, lubricate the quill and spindle per manufacturer guidelines, and check belts for wear. Periodically verify head and table alignment, and recalibrate the depth stop if you notice drift. Keep the chuck clean and free of built-up dust, which can affect grip. Store spare bits in a labeled container and rotate blades to ensure sharpness.
Common mistakes and how to fix them
Common issues include drift, chatter, and misalignment. Drift often results from a loose table, worn bearings, or an uneven base; re-check alignment and tighten fasteners. Chatter indicates excessive feed pressure or dull bits—sharpen or replace bits and reduce speed for metal, or use multiple passes in wood. If holes wander off-center, re-mark the location, clamp the piece securely, and use a center punch to create a definite starting point. Always inspect the hole after drilling for burrs and remove them with a deburring tool.
Advanced tips and scenarios
For angled drilling, tilt the table or use a tilting head with a precise zero reference to maintain accuracy. Radial-arm drill presses excel at large pieces or angled work; use a dedicated jig to ensure repeatability. When drilling through thick material, take multiple shallow passes with adequate clearing between passes to avoid overheating. For tiny holes, use a microscope or magnifier to verify alignment before drilling and consider using a drill press with high repeatability for micro-scale projects.
Tools & Materials
- Drill press (bench-top or floor-standing)(Ensure chuck size matches bits and table supports the workpiece)
- Clamps or drill press vise(Secures workpiece; prevents drift during drilling)
- Center punch and marking tools(Helps locate and start holes precisely)
- Center punch and marking tools(Helps locate and start holes precisely)
- Assorted drill bits (HSS, brad-point, cobalt)(Choose bits by material and hole size)
- Lubricant or cutting oil(Use for metal drilling to reduce heat and wear)
- Safety glasses(Eye protection for all drilling tasks)
- Wrench or hex keys for chuck changes(Tightens or loosens chuck and bits)
- Scratch pad or test scrap(Test settings before working on the actual piece)
Steps
Estimated time: 60-90 minutes
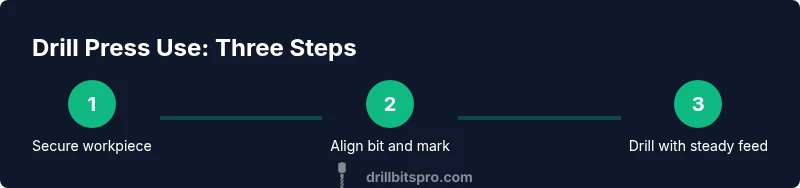
- 1
Power down and prep the workspace
Power down and unplug the drill press. Clear debris from the table and ensure you have safety glasses within reach. This isolates the machine and minimizes the risk of accidental starts during setup.
Tip: Always verify the machine is unplugged before changing bits. - 2
Install the correct drill bit and snug the chuck
Insert the chosen bit into the chuck and tighten securely. Spin the chuck by hand to ensure the bit is centered and true before powering up.
Tip: Use the lowest RPM setting when mounting new bits to avoid catching. - 3
Set speed and depth stop
Choose a speed appropriate for the material and bit size. Adjust the depth stop to the desired hole depth and zero it against the workpiece surface for accurate stopping.
Tip: Mark the depth with a piece of tape on the drill bit for quick reference. - 4
Clamp the workpiece securely
Place the workpiece on the drill table and clamp firmly. Ensure there is clearance for chips to exit and that the piece cannot shift during drilling.
Tip: Use a sacrificial backing board to prevent tear-out on softer materials. - 5
Align bit with the mark
Position the marked center point under the bit. Double-check that the bit’s flute aligns with the marking to begin the hole accurately.
Tip: If misaligned, re-mark and re-clamp before drilling. - 6
Drill with steady feed
Lower the spindle slowly with steady, even pressure. Let the bit do the cutting; avoid forcing it into the material.
Tip: If you feel binding, lift slightly and clear chips before continuing. - 7
Retract and clear chips
When the bit has reached the target depth, raise it slowly and withdraw to clear chips. Inspect the hole for uniform depth and surface finish.
Tip: Use a vacuum or brush to remove chips rather than your hands. - 8
Inspect, deburr, and conclude
Check the hole for straightness and deburr any rough edges with a deburring tool. Reset for the next hole if drilling multiple locations.
Tip: Deburring improves fit and reduces stress concentrations in metal parts.
Got Questions?
What is the main advantage of using a drill press over a hand drill?
A drill press provides greater accuracy, straightness, and depth control due to its fixed guiding system. The setup and clamping routines also improve repeatability across multiple pieces.
A drill press gives you consistent, straight holes with depth control, unlike a handheld drill.
Can I drill through metal with a drill press?
Yes, with appropriate bits and cutting fluid, and by using slower speeds to manage heat and chatter. Always clamp the workpiece securely.
Yes, with proper bits and lubrication, and slower speeds.
What should I consider when choosing a drill press speed?
Select a speed range suitable for the material and bit diameter. A variable-speed model offers flexibility for different tasks.
Choose speeds based on material and bit; wood uses higher speeds.
Is it safe to drill large-diameter holes on a drill press?
Yes, with the right bit and proper support. Use slower speeds and take multiple light passes to reduce stress on the bit and workpiece.
Yes, with the right setup and slow passes.
How often should I oil or lubricate a drill press?
Follow the manufacturer’s guidance for your model. Regular light lubrication of the spindle and quill helps reduce wear.
Oil the spindle and quill occasionally.
What safety measures are essential when using a drill press?
Wear eye protection, secure the work, remove jewelry, tie back hair, and ensure the bit is properly secured before starting.
Protect your eyes and secure your work and clothing.
Watch Video
Top Takeaways
- Secure the workpiece with clamps before drilling.
- Choose the right bit and speed for material.
- Use a depth stop to control hole depth.
- Clamp, align, and drill with steady, controlled feed.
- Maintain the drill press and inspect holes for accuracy.