Drill Sowing with a Drill: A Practical How-To Guide
Learn how to perform drill sowing safely and efficiently using a drill or seed drill. This step-by-step guide covers prep, calibration, and practical tips for accurate seed placement and reliable germination.

In drill sowing, you place seeds at precise depths and spacing using a seed drill or drill-mounted seed box. Ensure seeds match soil conditions, calibrate for seed size, choose the correct seed rate, and keep equipment clean and guarded. This method improves germination and reduces waste.
What drill sowing is and why it matters
Drill sowing is a planting technique that places seeds at exact depths and regular intervals using a seed drill attached to a drill or tiller. The approach delivers uniform seed distribution, which helps seedlings emerge together and reduces competition for moisture and nutrients. For DIY gardeners, a handheld seed drill or a compact seed box can replicate key benefits of larger farm equipment, making precision planting accessible in small plots. The Drill Bits Pro team emphasizes that success hinges on choosing the right equipment, calibrating for seed size, and maintaining clean components to prevent jams and mis-seeding. When you adopt drill sowing, you gain predictable germination timing, better stand establishment, and the ability to scale your planting across larger areas without sacrificing accuracy. The method supports crops from grains to vegetables and even cover crops, where uniform establishment matters most. Plan your field layout, confirm seed depth and spacing, and monitor the seed flow during the first pass to ensure the system behaves consistently. With proper technique, drill sowing yields reliable results with less manual effort.
Seed choices and equipment: seed drill vs manual sowing
Seed sowing with a drill relies on three core elements: seeds that are uniform in size, a seed drill or attachment that meters seed consistently, and a plan for row spacing and depth. When compared to hand sowing, a seed drill reduces gaps and clumps, minimizes seed waste, and speeds up field establishment. For smaller plots, a compact handheld seed drill or seed box can be used, but the results may vary compared to a dedicated seed drill. In many cases, the seed box uses rotating discs or agitators to meter seeds; understanding how these disks match seed size is essential. If you work primarily with edible crops, vegetables, or cover crops, you may adjust the metering with different discs or plates. The Drill Bits Pro guidance emphasizes starting with a test pass to verify spacing and adjusting the rate before a full run. Also, keep seed varieties compatible with your soil to avoid poor germination. Overall, seed sowing with a drill is about translating a farm-scale technique into a practical approach for your garden or site.
Calibrating seed size, depth, and spacing
Calibration is the heart of successful drill sowing. Start by measuring the seed size and selecting the corresponding metering discs or settings. Small seeds require slower metering and finer spacing, while larger seeds need faster flow and wider row widths. Align the depth adjustment to place seeds just below the soil surface, not buried too deeply; shallow placement can lead to germination failure, while excessive depth may stall emergence. A practical method is to run a dry test on bare soil and count the number of seeds per meter with a tray. This gives you a target count to compare against the actual output during the final pass. Document the seed type, seed rate (seeds per meter or per square meter), and field conditions in a simple notebook. The more you calibrate before sowing, the more consistent your germination and emergence will be. Drill Bits Pro’s approach combines precise mechanical settings with field observation to maximize germination rates across crops.
Field prep and layout for drill sowing
The field you plan to sow should be evenly moist but not waterlogged, with loose, weed-free soil to promote seed-soil contact. Begin with a light pass to firm the ground, then mark out rows using stakes or chalk to ensure straight, evenly spaced lines. Decide on row spacing based on crop type and equipment width, and verify that the drill’s working width matches your layout. If you’re sowing variable crops, you may adjust the spacing across sections of the field to optimize germination. Clean alignment helps reduce seed waste and compaction along the seed trench. Before starting, de-clog any hoses or tubes, ensure seed boxes are empty, and inspect guards for safety. The goal is a uniform seed trench and consistent depth across the entire run. Drill Bits Pro notes that consistent handling and field preparation are as important as the seed drill settings themselves.
Crop-specific considerations and practical tips
Different crops respond to drill sowing in distinct ways. Cereals like wheat or oats prefer moderate row spacing and shallow depth, while legumes may require slightly deeper placement and higher moisture for germination. Vegetables such as carrots or lettuce may benefit from precise spacing rather than full-field seeding. In all cases, ensure seed label guidelines are followed, particularly regarding seeding rate and depth, to avoid overcrowding or poor germination. If soil conditions change (for example, heavy clay after rain), you may adjust depth and flow to preserve uniform emergence. For cover crops, low rates and wider spacing can reduce competition while still providing soil benefits. Quality seed and proper handling are essential; avoid exposing seeds to heat or moisture during transfer. Drill Bits Pro’s guidance suggests keeping a seed map and updating it after each sowing session to track outcomes and refine future results.
Maintenance, safety and troubleshooting basics
Run maintenance checks before every sowing session: inspect safety guards, check belts and seals, and verify the calibration disks are clean and correctly installed. Always wear PPE and follow tool-specific safety procedures, including turning off power before making adjustments. Common issues include irregular seed flow, blockage from lodged seeds, or drift in row alignment. A quick remedy is to pause, unplug power, and clear the clog or re-seat the seed discs. Keep spare parts and lubrication on hand to reduce downtime. After sowing, clean the seed tray and hoses to prevent seed residue from hardening or corroding. For ongoing success, log each session’s settings and results to fine-tune future calibrations. Drill Bits Pro emphasizes routine inspection as the simplest defense against mis-seeding and wasted material.
Integrating drill sowing into a broader growing plan
Drill sowing fits into larger farming or gardening workflows by aligning sowing windows with optimal soil moisture, temperature, and forecasted rainfall. Plan the season to accommodate germination time and crop maturation; ensure irrigation or rainfall distribution is sufficient for the seedling stage. A well-planned drill sowing campaign reduces manual labor and increases consistency, helping both hobbyists and professionals reach harvest goals more reliably. Pair drill sowing with smart crop rotation and soil health practices to maximize long-term fertility. Use record-keeping, with columns for crop type, seed lot, rate, depth, and spacing, to compare results across seasons. The Drill Bits Pro approach: treat drill sowing as a repeatable process that you refine with data and field observations.
Tools & Materials
- Seed drill or seed box attachment(Calibrated for seed type and spacing)
- Seeds (chosen crop)(Check moisture, label clearly, and store properly)
- Seed rate calibration tool (catch tray)(Verify actual flow and adjust metering)
- Measuring cup or scale(Accurate seed weight per area is essential)
- PPE (gloves, safety glasses)(Wear during setup and operation)
- Spare metering discs or seed disks(Keep a couple of sizes on hand for different seeds)
- Soil moisture meter (optional)(Helps judge depth and emergence potential)
Steps
Estimated time: 60-90 minutes
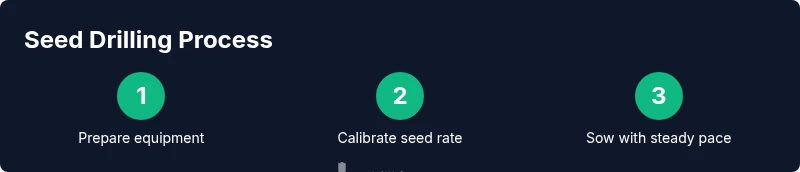
- 1
Inspect and prepare the drill
Power down the machine, inspect guards, belts, and tubes, and remove any debris from the seed path. Confirm that all safety features are functional before you begin calibrations.
Tip: Check for cracks or wear on discs and replace if damaged. - 2
Fill the hopper and set metering
Fill the seed hopper with your chosen seed and install the correct metering discs for seed size. Spin the drive slowly to verify consistent feed at the chosen rate.
Tip: Use a small sample of seed to confirm flow before full loading. - 3
Set depth and row spacing
Adjust depth to place seeds just below the surface. Set row spacing according to crop requirements and the drill’s working width.
Tip: Mark a reference line on the field to track spacing during sowing. - 4
Perform a test pass
Run the drill over bare soil to observe seed drop and spacing. Count how many seeds land per meter to compare against target density.
Tip: If spacing is off, stop and recalibrate before continuing. - 5
Calibrate seed rate with a catch tray
Capture seed output in a tray, weigh or count the seeds, and compare to your target rate. Adjust discs or feed rate as needed.
Tip: Document the final settings for your field map. - 6
Sow with controlled passes
Proceed with steady, uniform passes, maintaining a consistent ground speed. Periodically check seed flow and re-check spacing.
Tip: Avoid rushing; slower, controlled passes yield better distribution.
Got Questions?
What is drill sowing?
Drill sowing uses a seed drill to plant seeds at precise depths and spacing, improving germination and stand uniformity. It reduces waste compared to manual sowing and is applicable to crops from grains to vegetables.
Drill sowing uses a seed drill to plant seeds at precise depths and spacing, improving germination and stand uniformity. It's more efficient than hand sowing.
Can a regular drill sow seeds?
A regular drill can be adapted with a seed box or attachment, but results depend on the metering system and seed type. For consistent results, use a dedicated seed drill or compatible attachment and calibrate before sowing.
A regular drill can work with a seed box, but calibration and seed type matter for consistency.
How do I calibrate seed rate?
Calibrate by measuring seed output with a catch tray or scale, then adjust the metering discs or feed rate to match your target seeds per meter. Repeat until the observed rate matches your plan.
Check seed output with a tray, then adjust how much seed the metering system releases.
What seeds work best with drill sowing?
Most cereals, vegetables with uniform seed sizes, and cover crops work well with drill sowing. Always check seed size compatibility with your metering discs and ensure proper moisture before sowing.
Cereals and uniform seeds are great for drill sowing. Check seed size and moisture before starting.
What are common sowing mistakes?
Common mistakes include incorrect seed depth, uneven row spacing, and failing to calibrate seed rate. These lead to poor germination and crowded seedlings. Always test first and adjust.
Mistakes are depth, spacing, and not calibrating the rate. Test first and adjust.
How should I maintain the drill between uses?
Clean all parts after use, lubricate moving joints, inspect guards, and verify calibration settings. Store with seed boxes empty and protected from moisture to prevent clogs.
Clean and lubricate, check guards, and keep seed boxes dry when storing.
Watch Video
Top Takeaways
- Calibrate seed rate accurately
- Match depth to seed type for optimal germination
- Use a test pass to confirm spacing
- Maintain clean equipment to prevent jams
- Document parameters for future sowing