Football Drill for 10 Year Olds: A Practical Step-by-Step Guide
A practical, age-appropriate football drill for 10 year olds with clear steps, equipment, and coaching tips to build passing, dribbling, and teamwork on the field.

In this guide you will run a complete, age-appropriate football drill for 10 year olds that builds ball control, passing accuracy, and teamwork. You’ll follow a staged progression from warm-up to small-sided games, with safety checks and coach feedback built in. The drill is scalable for beginners and more advanced players, and it emphasizes fun and learning over competition.
Why football drill for 10 year olds matter
For coaches and parents, a well-designed football drill for 10 year olds is more than a simple warm-up. It’s a structured, age-appropriate learning experience that blends motor skill development with game understanding. At this age, players begin to connect technique with decision-making, so drills should be short, visually clear, and outcome-focused. According to Drill Bits Pro, age-appropriate drills that are fun and low-pressure help kids stay engaged and motivated, which translates into better skill retention over time. The Drill Bits Pro team found that when drills have clear objectives, kids understand what success looks like and how to adjust their approach accordingly. This guide centers on the primary keyword, football drill for 10 year olds, while integrating practical coaching insights and safety considerations. Expect a session that feels like play but in reality targets specific touches, spatial awareness, and teamwork on the field.
Key coaching principles for young players
Coaching young players requires a balance of structure and encouragement. Principles to embed at every session include: keep drills short and varied to hold attention; be explicit about the objective of each activity; provide immediate, constructive feedback; and celebrate small successes to build confidence. Emphasize technique first—proper touches, body position, and tempo—before adding pressure from defenders. Use simple language and concrete demonstrations, then let players imitate. Rotate groups frequently so every child practices a variety of skills, which reduces boredom and ensures equal participation. Safety is non-negotiable: inspect the playing area for hazards, ensure appropriate footwear, and monitor fatigue. A well-paced session keeps kids engaged, reduces risk of injury, and translates into better long-term development. The approach here is designed to be scalable: you can start with a basic drill and progressively introduce more complexity as the group gains comfort with ball control. This section also highlights how to align drills with longer-term development goals, such as improving ball mastery, passing accuracy, and teamwork, all through a football drill for 10 year olds that feels approachable rather than overwhelming.
The core drill progression: warm-up to game-like scenarios
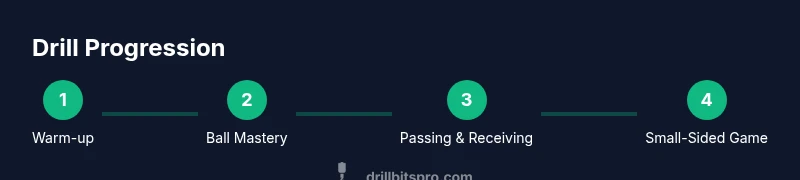
A well-structured session typically progresses from ball mastery to game-like decision making. Begin with a light warm-up that activates major muscle groups and introduces ball contact. Move to a ball-control drill—like toe taps and inside-outside touches—so players develop clean, confident touches. Then set up a zig-zag dribbling path to build control and speed with the ball. Next, introduce short passes to stationary targets or moving partners to develop timing, then progress to receiving and turning with a defender present in a controlled manner. Finally, close with small-sided games (3v3 or 4v4, depending on numbers) to replicate real match scenarios while maintaining a focus on skill application rather than winning. Throughout the progression, keep the play area clearly defined, use color-coded cones for quick recognition, and ensure every child has opportunities to participate and influence the outcome. If you’re using this as the core routine for football drill for 10 year olds, aim for a clear objective at each station and a visible indicator of success (e.g., “five clean first touches” or “accurate 4-of-5 passes to a moving target”).
Variations to adapt for different skill levels
Not every child learns at the same pace, so offer scalable variations that maintain engagement and challenge. For beginners, reduce the distance between stations, use larger targets, and provide slower, more deliberate ball handling cues. Offer extra rest between tasks to prevent fatigue and frustration. For advanced players, shorten rest periods, introduce passive defenders, and require faster decision making. You can also add cognitive tasks, such as calling out a color on the ball or naming a body part used to control the ball, to integrate cognitive development with physical skill. The key is to keep outcomes tangible and those outcomes visible to players and parents alike. In practice, you can frame each variation as a mini-goal—for instance, “complete 6 consecutive passes to a moving target with good tempo”—which adds a measurable component while preserving the fun and learning focus. This adaptability is essential to a football drill for 10 year olds, ensuring the session remains inclusive and progressive.
Common mistakes and how to fix them
Coaches often fall into a few common traps when teaching youth football drills. One frequent error is overloading players with instructions, which can overwhelm beginners and hinder learning. To fix this, limit directions to one or two actionable cues per drill and demonstrate first. Another mistake is insufficient differentiation—treating all players the same can leave late bloomers bored or frustrated while advanced players feel unchallenged. Offer parallel tasks for different levels or rotate groups through stations with clearly defined progressions. Poor technique is another pitfall; emphasize proper foot placement, body posture, and soft touches, and slow down the drill until accuracy improves. Finally, neglecting recovery and hydration can reduce performance and enjoyment. Schedule short breaks and encourage players to drink water between rounds. By avoiding these mistakes, you’ll create a more productive, enjoyable environment for a football drill for 10 year olds that fosters skill development and teamwork.
Authority sources
For readers who want to connect coaching guidance with broader research and public health recommendations, here are trusted sources on youth physical activity and safe participation in sport:
- https://www.cdc.gov/physicalactivity/basics/youth.html
- https://www.aap.org/en/patient-care/advocacy/advocacy-documents-and-resources/
- https://www.nichd.nih.gov/health/topics/physical-activity
These sources provide foundational information about promoting safe, active play for children and can help coaches design sessions that are both effective and enjoyable.
Tools & Materials
- Cones (multi-color)(Set up 6–12 cones for drills and 2 extra for station markers)
- Soccer balls (size 3 for 8-12 year olds)(One per pair or per small group)
- Mini goals or target targets(Two portable goals or magnetic targets)
- Bibs or pinnies(Different colors for teams during small-sided play)
- Whistle(For signal changes and stoppages)
- Timer or stopwatch(Track station durations and rest periods)
- Score sheets or whiteboard(Record progress and small goals achieved)
- Water bottles and a shaded area(Hydration and rest between rounds)
Steps
Estimated time: 45-60 minutes
- 1
Set up stations
Clear a safe space and lay out a minimum of three distinct stations with cones, targets, and space for small-sided play. Assign a coach or assistant to each station to provide demonstrations and cues. Ensure paths are free from trip hazards and water breaks are planned as needed.
Tip: Have a signal for rotating groups (e.g., whistle blast) to keep the pace brisk and the session flowing. - 2
Warm up with ball touches
Lead a light jog around the field followed by a ball-touch circuit: inside taps, outside taps, and sole rolls to wake up the feet and encourage soft touches. Keep the tempo moderate and guide players to keep their heads up when moving with the ball.
Tip: Encourage a relaxed rhythm and emphasize confident first touches rather than speed at this stage. - 3
Demonstrate the drill and safety
Show a clear, slow demonstration of the full drill progression, focusing on body position, ball control, and passing targets. Have players imitate the sequence at a reduced pace before adding defenders or movement. Reinforce safety rules and correct any obvious hazards.
Tip: Break the demo into cues: touch, control, pass, receive, move. - 4
Dribble through cones
Set up a zig-zag cone course and have players dribble with a controlled touch from cone to cone. Emphasize keeping the ball close to the foot and using both feet to improve ambidexterity. Give quick feedback after each run.
Tip: Observe for wide steps or lazy touches; remind players to keep their head up and eyes on the next path. - 5
Pass to stationary targets
Pair players and place targets at varying distances. Each player passes to the target with the emphasis on accuracy and proper weight; adjust distance to fit skill level. After a few rounds, introduce brief movement to simulate in-game passing decisions.
Tip: Use a target color code so players know which target is in play and can adjust their pass strength accordingly. - 6
Receive and turn with a defender present
Introduce a light defender or obstacle to simulate pressure. Focus on receiving with the first touch away from the defender and quickly turning toward space or a teammate. Rotate defenders to ensure everyone experiences pressure from different angles.
Tip: Promote quick but controlled turns and emphasize keeping the ball protected with a low center of gravity. - 7
Small-sided games
Move to a 3v3 or 4v4 format, keeping rules simple: one-touch passing or no-touch for younger players if needed. Encourage players to use the skills practiced earlier: controlled dribbles, targeted passes, and space awareness. Stop the game to correct technique and celebrate good decisions.
Tip: Set a visible objective, like ‘two clean passes into the goal zone’ to keep the focus on technique and teamwork. - 8
Cool-down and feedback
Finish with static stretching and a brief group discussion on what went well and where to improve. Provide positive reinforcement and set a small, achievable goal for the next session. Note any skill gaps to tailor future drills.
Tip: Keep the feedback specific and actionable: ‘Your passes were accurate 4-of-5 today; aim for five in a row next time.’
Got Questions?
What is the best age to start structured football drills?
Structured drills are often introduced around age 6-8, with complexity increasing as players grow. For 10-year-olds, sessions should balance skill development with game-like scenarios and plenty of positive feedback.
Start around age six to eight with simple tasks, then build complexity as players grow. Keep it fun and focused on learning.
How long should a youth football drill session last?
Most sessions run 45 to 60 minutes, including warm-up, skill stations, small-sided games, and a cool-down, with short rest periods to maintain energy and focus.
Aim for about 45 to 60 minutes, including warm-up, drills, games, and cool-down.
What if some players outperform the others in a drill?
Provide parallel tasks at different difficulty levels and rotate players so everyone stays challenged without being overwhelmed. Emphasize personal improvement over head-to-head competition.
Offer different levels of difficulty and focus on individual improvement instead of just winning.
How can I ensure safety during drills?
Inspect the area for hazards, ensure proper footwear, train in a well-lit, dry space, and monitor fatigue. Include short breaks and hydration to prevent injuries.
Check the area, wear proper shoes, and schedule breaks to keep players safe and hydrated.
Should I use a whistle and how do I manage transitions?
A whistle helps signaling transitions and station changes, keeping drills organized and time-efficient. Use clear signals and practice the rotation so players anticipate the flow.
Yes—use a whistle to transition between stations and keep the drill running smoothly.
What equipment improves engagement for 10-year-olds?
Color-coded targets, cones, and portable goals help kids focus and understand tasks quickly. Lightweight balls that suit their size also improve confidence and control.
Use color targets and lightweight balls to boost focus and control.
Watch Video
Top Takeaways
- Start with a clear objective for each drill.
- Progress from ball mastery to decision-making games.
- Differentiate tasks to match each player's level.
- Provide immediate, specific feedback for effective learning.
- Prioritize safety and enjoyment to sustain participation.