How Many Drills Fill a Belt in Factorio: A Practical Guide
Learn how many mining drills you need to keep a Factorio belt full. This guide offers a simple calculator, practical setup tips, and planning strategies for early- to mid-game factories.

How many drills to fill a belt factorio
When you design ore flow in Factorio, planning throughput is essential. If you're asking how many drills to fill a belt factorio, you estimate using a simple rate model: belt throughput divided by a drill’s output, then round up to the nearest whole drill. This approach scales from early-game belts to blue belts in late-game factories, helping you avoid stalls and overbuilding. Consider that belt throughput varies by belt type (yellow, red, blue) and that inserter speed also governs how quickly items exit the belt. A methodical, rate-based mindset saves resources and keeps your production line flowing smoothly.
Understanding belt throughput and drill output
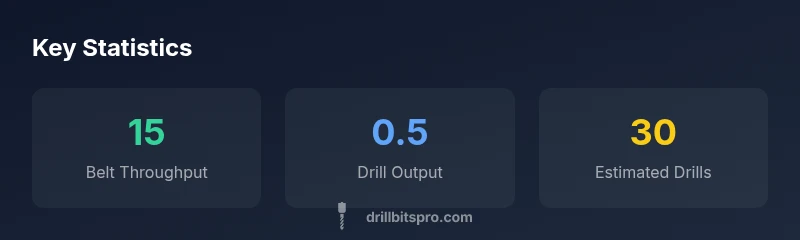
Belt throughput is the speed at which items move along a belt. Different belt tiers move different amounts of items per second, and inserters must be fast enough to place items onto and off the belt without creating a bottleneck. Drill output is how many items a mining drill can produce per second. In many early-game setups, a yellow belt carries around 15 items per second, while mining drills often produce around 0.5 items per second. These values are practical baselines and will vary with your game settings and modules. By comparing these two rates, you can gauge how many drills are required to sustain a belt.
The core calculation method
The core calculation is simple: drillsNeeded = max(1, round((beltThroughput * (startupBuffer + 1)) / drillOutput)). Here, beltThroughput is items per second the belt can carry, drillOutput is items per second per drill, and startupBuffer accounts for startup ramp-up time. The max(1, ...) ensures you never go below one drill. A quick example: with beltThroughput = 15, drillOutput = 0.5, startupBuffer = 0, drillsNeeded = round((15 * 1) / 0.5) = round(30) = 30.
Example scenario: yellow belt and vanilla drills
Using the baseline values (15 items/s belt, 0.5 items/s drill), and no startup buffer: drillsNeeded = round((15 * (0 + 1)) / 0.5) = 30. If you enable a startup buffer of 2 seconds, the formula becomes round((15 * (2 + 1)) / 0.5) = round(90) = 90; however, this more aggressive value is primarily for planning the ramp-up rather than a steady-state requirement. In practice, you’ll often plan for the steady-state rate and allow a small buffer via inserter speed and belt spacing.
Variations by belt tier and throughput
Red belts and blue belts move more items per second than yellow belts, which changes the required drill count. For example, if a red belt can move around 30 items per second and you keep drill output at 0.5 items per second, the steady-state calculation suggests around 60 drills (30 / 0.5). A blue belt at about 45 items per second would imply roughly 90 drills by the same metric. These are rough planning figures that help you size early layouts and avoid undersupplying ore.
Startup buffers and inefficiencies in practice
Real-world runs include startup delays, belt stalls, and inserter pacing. A small startup buffer can help you avoid temporary dips in availability, but it increases the calculated drill count. Use the formula with a modest buffer (e.g., startupBuffer = 1–3 seconds) to gauge a safe upper bound for planning. Always validate with in-game testing and adjust for inserter speed, module effects, and mining productivity.
Practical setup tips for planning
- Start with a single belt line and a conservative drill count, then expand as you confirm throughput.
- Ensure inserters feeding the belt can keep up; a bottleneck here can make many drills seem unnecessary.
- Keep mining drills adjacent to ore patches to minimize transport time and optimize belt utilization.
- Use compact layouts that allow easy scaling: a central belt with radial drill clusters easier to extend.
- Periodically re-evaluate your throughput as you unlock faster belts and better inserters.
Common mistakes and verification methods
- Overestimating drill output without accounting for inserter speed and belt balance.
- Underestimating startup ramps, leading to initial shortages.
- Forgetting to consider multiple ore types or patch locations.
- Verify plans by simulating a round of production in a test world or a sandbox save, adjust input rates, and re-run the calculation. Incremental tests help confirm real-game behavior aligns with your model.
Quick planning checklist for your factory
- Identify belt tier and target throughput.
- Determine drill output under your module setup.
- Apply drillsNeeded = max(1, round((beltThroughput * (startupBuffer + 1)) / drillOutput)).
- Validate with a short in-game test, watching for belt starving or overflow.
- Scale layout to accommodate future upgrades (faster belts, more drills, or better inserters).