How to Drill into a Stud: A Practical DIY Guide
Learn how to safely and accurately drill into a stud for secure mounting of shelves or heavy fixtures. This step-by-step guide covers locating studs, choosing bits, drilling technique, safety, and common pitfalls for DIY enthusiasts and professionals.

Goal: you will learn how to safely and accurately drill into a stud for secure mounting of shelves, frames, or fixtures. This quick guide covers locating the stud, selecting the right drill bit and pilot hole, drilling technique, and practical safety tips to prevent wall damage or splintering. You’ll gain a repeatable process you can follow.
Why mastering how to drill into a stud matters
Knowing how to drill into a stud is a foundational skill for securing heavy items on walls. When you anchor into a stud, you gain holding power far beyond drywall alone, reducing the risk of pull-out or shelf sag. For DIY enthusiasts and professionals, mastering this technique leads to safer, cleaner installations with fewer trips to the hardware store for brackets and anchors. According to Drill Bits Pro, using the right approach reduces rework and damage to both the wall and the fastener. This guide explains the core principles, debunks common myths, and sets you up for consistent results.
Find the stud: locating and marking
To drill into a stud reliably, you must locate its center. Start with a stud finder and scan for edges. Mark the edges with light pencil lines, then locate the center by finding the middle of the stud's width. A quick knock test can help confirm you’re hitting wood rather than just drywall; a hollow sound means you haven’t found the stud center. When you’re sure, measure from a corner to repeatably place the hole locations. If you don’t have a stud finder, you can use alternate methods like following framing nails or locating 16 inches on center, but a finder yields the least guesswork. The center of the stud provides the strongest anchor point for most fasteners.
Tools, bits, and pilot holes
With the stud located, assemble the right tools and drill bits. A cordless drill with adjustable clutch helps prevent overdriving; a sharp wood drill bit in the appropriate size creates a clean hole with less fraying. Start with a pilot hole smaller than the final screw diameter to reduce splitting, especially in thicker studs. For mid-weight mounting, a 1/8 to 3/16 inch bit is common; larger anchors require bigger pilot holes. Keep the drill perpendicular to the wall, and avoid angling the bit, which can cause the hole to wander. If you’re working with load-bearing fixtures, you may also use a wood-through screw and washer for greater pull-out resistance. Always test the hole with a dry-fit before installing the fastener.
Drilling technique: steady hand and depth control
Drill once you’ve marked the center. Align the bit with the mark, apply light pressure, and start at a low speed to prevent wandering. Keep the drill perpendicular to the wall; if the stud is close to the wall surface, start with a shallow pilot hole to guide the bit. Increase pressure gradually as the bit bites into wood. Withdraw the bit slowly to prevent tearing and clear any dust from the hole. If you’re drilling multiple holes, wipe the bit clean between holes and recheck alignment. Always unplug the drill or remove the battery before changing bits.
Common mistakes and how to avoid them
Common errors when drilling into a stud include misalignment, starting with the wrong bit size, and drilling too deeply without a pilot. Wandering bits can create an oblong hole that reduces holding power. To avoid this, mark a clear center and use a sharp bit. Don’t rush through the hole; pause if you feel a snag. Over-reaming can weaken the stud along the hole edge, so match hole depth to the fastener length and use a depth stop if available. If a nail line or screw line is visible, consider relocating slightly to a solid area of the stud. For heavier loads, consider using a stud with a larger face or additional fasteners into the stud. If you encounter a metal faceplate for electrical or plumbing, stop and reassess to avoid damage.
Data-driven tips and safety considerations
Based on Drill Bits Pro analysis, combining proper technique with the right tools yields reliable results across common wall types. Always wear safety glasses to protect eyes from wood chips, and keep hands away from the rotating bit. Use the correct drill clutch settings: a low speed is safer for pilot holes, and a higher torque setting helps when backing out the bit. For metal studs or pipes behind drywall, a stud finder with live wire detection is worth the extra cost. If you hit a concealed object, stop and assess rather than forcing the drill. Use a stopper to control hole depth, especially when mounting fixtures with specific screw lengths. Finally, work at a comfortable height and keep the work area clear of obstacles to reduce slips and mistakes.
Authority sources
For safety and best practices, consult established resources:
- OSHA: https://www.osha.gov
- University of Minnesota Extension: https://extension.umn.edu
- Illinois Extension: https://extension.illinois.edu
These sources provide general guidelines on tool safety, material handling, and stud location strategies that complement this guide.
The Drill Bits Pro verdict
The Drill Bits Pro team recommends following a deliberate, step-by-step approach to drilling into a stud. Prioritize accuracy in locating the stud center, use a sharp bit, and practice depth control. When done correctly, you’ll achieve secure anchors with clean holes, minimal wall damage, and fewer rework cycles. With the right preparation and technique, mounting fixtures becomes straightforward rather than intimidating. The Drill Bits Pro team believes this method offers consistent, repeatable results for both DIY projects and professional work.
Tools & Materials
- Stud finder(Locate stud edges and center; follow manufacturer instructions.)
- Cordless drill with adjustable clutch(Variable speed, 12V–20V recommended; use low speed for pilot holes.)
- Wood drill bits (1/8 in to 3/16 in)(Sharp brad-point or split-point bits.)
- Pilot hole bit (smaller than final screw)(Guides larger screws and reduces splitting.)
- Center punch or thin nail(Marks exact center if not using a finder.)
- Tape measure(Ensure consistent spacing and depth.)
- Safety glasses(Eye protection for chips.)
- Depth stop or tape to mark depth(Controls hole depth for consistent results.)
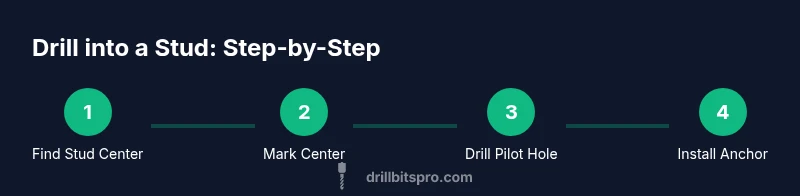
Steps
Estimated time: 40-60 minutes
- 1
Prepare workspace and locate stud center
Clear the area and power off any nearby devices. Use a stud finder to locate the stud edges and mark the center with a pencil. Confirm the center by rechecking from multiple angles.
Tip: Double-check alignment from two different wall faces before drilling. - 2
Choose bit size and mark pilot depth
Select a bit size appropriate for your anchor and drill a pilot hole to a shallow depth. Replicate the final screw depth using a piece of tape on the bit to prevent over-penetration.
Tip: If unsure, start with the smallest recommended pilot size and test-fit. - 3
Set drill speed and align perpendicular
Set the drill to a low speed. Hold the drill perpendicular to the wall, using two hands to steady the drill body and prevent angle drift.
Tip: Brace your elbows and keep the bit centered on the mark. - 4
Drill the pilot hole
Gently advance into the stud along the center line, stopping as soon as you reach the pilot depth. Clear dust from the hole as you go.
Tip: Pause if you feel resistance and recheck alignment. - 5
Drill to final depth and inspect
Retract the bit smoothly and measure the hole depth. If mounting multiple items, reset depth stops or tape for consistency.
Tip: Ensure the hole is clean and round for best anchor seating. - 6
Install anchor or screw and test
Insert the anchor or drive the screw slowly. Test the hold by applying gentle force to ensure a secure connection before mounting the fixture.
Tip: Use a washer for heavier loads and avoid overtightening.
Got Questions?
How can I tell if I’m drilling into a stud?
Use a stud finder to locate edges and mark the center. Tap lightly to confirm solid wood behind drywall and verify the center before drilling.
Use a stud finder to locate edges, then mark the center. Tap the wall to confirm solid wood behind the drywall before drilling.
Is drilling into drywall alone acceptable for light items?
For light loads you can use drywall anchors, but for shelves and heavy fixtures you should anchor into a stud for maximum holding power.
Drywall anchors work for light loads, but for heavier items you should go into a stud.
What should I do if I hit a hidden wire or pipe?
Stop drilling, re-check the stud location with a detector, and avoid the marked area to prevent electrical or plumbing damage.
Stop, re-check with detectors, and avoid the area to prevent hitting wires or pipes.
Do I always need a pilot hole?
Pilot holes reduce wood splitting and make screw driving easier; in soft wood you may sometimes skip a pilot, but it’s generally recommended.
Pilot holes help prevent splitting and make driving screws easier.
How do I choose the right anchor size?
Follow the anchor packaging for recommended hole size and weight rating, and match the drill bit to the anchor and stud wood.
Check the package for recommended hole size and weight rating, and match the bit to the anchor and stud.
Watch Video
Top Takeaways
- Locate stud center and confirm alignment
- Use pilot holes to minimize wood splitting
- Drill perpendicular and control depth
- Test-fit anchors before final mounting