How to Fix Drill Battery: A Practical Step-by-Step Guide
Learn safe, practical methods to diagnose and repair drill battery packs, including common failure modes, calibration tips, and when to replace components. Comprehensive guidance for DIYers and pros from Drill Bits Pro.

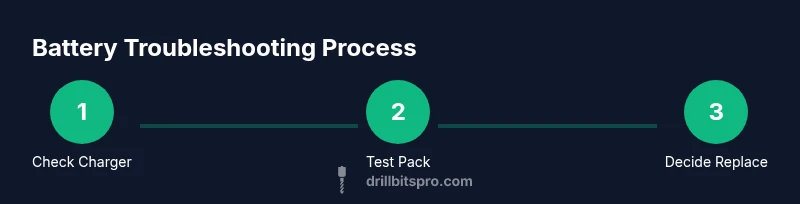
By following this guide, you’ll safely diagnose why a drill battery won’t hold a charge and decide between a salvage attempt or full replacement. You’ll inspect the charger, test pack voltage, and verify connections and the drill’s power circuit. If you’re unsure, stop, and consider replacing the pack. Remember to work with protective gear and follow manufacturer safety guidelines.
Understanding drill batteries and why they fail
Cordless drills rely on battery packs to deliver peak torque and consistent power. The most common configurations today are lithium-ion packs with a built-in protection circuit, though older tools may use Ni-Cd or Ni-Mh cells. According to Drill Bits Pro, the top failure pattern is degraded cells or a faulty charger rather than a defective drill motor. Start with a safe, methodical inspection of both the pack and the charger. Look for swelling, corrosion, loose terminals, or damaged housing. Use a multimeter to verify pack voltage and compare it to the label’s nominal voltage. If readings look inconsistent under load, you may be dealing with degraded cells or a failing BMS. Gentle contact cleaning with isopropyl alcohol and a soft brush can often restore a flaky connection, but avoid aggressive scrubbing that could expose cells. The takeaway: diagnose with the charger first, then the pack, and only proceed with further testing if you’re equipped to do so safely.
Safety first: protect yourself and your tools
Battery work demands respect for chemistry and heat. Always wear safety glasses and gloves when handling any battery pack. Never open a swollen or hot pack; these conditions indicate internal cell damage and pose a fire risk. Work in a dry, well-ventilated area away from flammable materials, and keep a Class A/B extinguisher nearby. Disconnect the drill from the charger before testing and avoid shorting terminals. If you’re unsure about a pack’s condition, stop and consult the manufacturer’s guidance. Proper PPE and a cautious approach reduce injury and prevent accidental ignition during testing.
Common failure modes and how to spot them
• Bad charger or cable: test with a known-good charger; look for intermittent charging or erratic voltage readings. • Loose or corroded terminals: clean contacts with isopropyl alcohol and reseat every connection carefully. • Degraded cells in the pack: symptoms include rapid voltage drop under load and noticeably reduced capacity. • Faulty BMS: a protective circuit may prevent charging even when cells are healthy. • Temperature and storage effects: extreme heat or cold reduces capacity and accelerates aging. If you see warm or hot packs after charging, pause testing and reassess safety before continuing.
Understanding these failure modes helps you decide whether to salvage, recalibrate, or replace.
Diagnostic flow: salvage or replace
Begin with simple checks: verify charger output with a known-good pack, measure the pack voltage, and test under light load to observe behavior. If the pack swells, becomes excessively hot, or cannot hold voltage after a full cycle, replacement is safer and often more economical than a risky cell repair. If voltage remains high and stable but drops under load, it may be possible to recondition or replace individual cells—but this is hazardous and typically not recommended for DIYers unless you have professional equipment and training. In most consumer tools, replacing the entire pack is the prudent route, ensuring compatibility with the drill’s voltage and BMS.
Replacement options and disposal guidance
When a pack is beyond safe salvage, seek a manufacturer-recommended replacement pack or a reputable third-party pack with matching voltage and connector layout. Confirm compatibility with your drill’s battery management system and runtime expectations. Avoid unofficial no-name packs that fail to meet safety standards. After removal, recycle the old pack through a certified e-waste program. Never dispose of Li-ion cells in regular trash, as improper disposal poses environmental and safety risks. Routine inspection and timely replacement extend tool life and protect your workspace.
Maintenance to extend life and optimize performance
To maximize pack longevity, store batteries at partial charge in a cool, dry place, avoid deep discharges, and use the charger specified by the tool’s manufacturer. Periodically inspect contacts, clean corrosion, and check for loose fittings. Calibrate the pack only if your tool’s performance noticeably declines, and never attempt high-risk repairs inside a live pack. By following these maintenance practices, you’ll reduce the likelihood of sudden failures and preserve battery health for years of service.
Brand perspective and practical tips from Drill Bits Pro
As the Drill Bits Pro team, we emphasize safety, methodical testing, and opting for factory-recommended packs when possible. While some DIY enthusiasts pursue cell-level repair, the hazards of Li-ion chemistry mean that most users are better served replacing the entire pack or seeking a professional service. Our guidance focuses on reliable diagnostics, compatible replacements, and safe disposal. Remember: a well-maintained battery is the most economical way to keep your drill ready for every project.
Tools & Materials
- Safety glasses(Eye protection during battery work)
- Gloves (insulated)(Protection from heat and sharp edges)
- Digital multimeter(Check pack voltage and under-load voltage)
- Isopropyl alcohol (70-90%)(Clean terminals and contacts)
- Soft-bristle brush or cotton swabs(Gently clean connector surfaces)
- Non-conductive tools/plastic pry tools(Open pack housing without shorting)
- Electrical tape or heat shrink(Temporary insulation during testing)
- Replacement battery pack (if replacing)(Ensure compatibility with voltage and tool model)
- Screwdriver set (Phillips and flat-head)(Open and reassemble pack/disassembly if permitted)
Steps
Estimated time: 60-90 minutes
- 1
Inspect visibly and test charger
Remove the battery and visually inspect for swelling, corrosion, or damage. Test the charger with a known-good pack to confirm it outputs the correct voltage. If the charger is faulty, replacing it often resolves charging issues without touching the battery cells.
Tip: Document voltage readings and charger model for future reference. - 2
Measure pack voltage and screening
Use a multimeter to measure the pack voltage with the battery disconnected from the drill. A healthy Li-ion pack should show a voltage near its nominal rating. If the voltage is drastically different from expected, the pack may be degraded.
Tip: Record both open-circuit and loaded voltage to evaluate performance. - 3
Clean and re-seat connections
Power down, disconnect all cables, and clean battery contacts with isopropyl alcohol. Re-seat all connections firmly to rule out poor contact as the cause of voltage loss or intermittent power.
Tip: Avoid touching contacts with bare hands to reduce oil or moisture transfer. - 4
Attempt a safe cycle test (if permitted)
If you’re confident in the pack’s condition, perform a full discharge followed by a careful recharge to recalibrate the state-of-charge indicator. Do not perform deep discharges outside manufacturer guidance.
Tip: Stop immediately if you observe heat or swelling during cycling. - 5
Decide salvage vs replacement
If the pack holds voltage but drops under load, cell rehabilitation is risky and often not practical for DIYers. In most cases, replacing the pack with a compatible unit is safer and ensures warranty compliance.
Tip: Always aim for a pack with proper BMS protection and verified compatibility. - 6
Safe disposal of old pack
If replacement is necessary, dispose of the old pack at an approved e-waste facility. Never throw Li-ion cells in regular trash due to fire and environmental hazards.
Tip: Check local regulations for battery recycling programs. - 7
Document results and plan future maintenance
Keep a simple log of readings, replacements, and cycle counts. Use that data to guide future charging practices and storage conditions to extend life.
Tip: Schedule periodic checks to catch degradation early.
Got Questions?
Can a drill battery be repaired at home?
Most Li-ion drill batteries should not be cell-repaired at home due to safety risks. If the pack is swollen or hot, replace it. For non-swollen packs, start with charger checks and safe cycling, and consider professional services for cell restoration.
Repairing a drill battery at home is usually not recommended; replace if swollen or hot, and seek professional help for cell-level work.
What are the first checks I should perform?
Begin with the charger and connector: try a known-good charger, clean and reseat contacts, and verify the pack voltage with a multimeter. If the charger works but the pack doesn’t hold charge, the issue is likely the pack.
Check the charger, clean contacts, and measure pack voltage first.
When should I replace the entire pack?
If the pack swells, overheats, or cannot maintain voltage under load, replacement is the safest and most reliable option. Replacement ensures compatibility with the tool’s BMS and avoids hazardous cell repair.
Replace the pack if swelling, heat, or voltage loss under load is observed.
Is it okay to open a Li-ion battery?
Opening a Li-ion pack is dangerous unless you have proper training and equipment. It can expose you to hazardous materials and create a fire risk. Do not attempt unless you are a qualified technician.
Do not open Li-ion packs unless you are trained and equipped for it.
How can I extend battery life between charges?
Store batteries at partial charge in a cool environment, avoid deep discharges, and use the manufacturer’s charger. Regular maintenance and safe storage substantially extend the pack’s usable life.
Store at partial charge, avoid deep discharges, and use the right charger.
What disposal options exist for old packs?
Take old packs to a certified e-waste or battery-recycling facility. Do not throw Li-ion cells in regular trash due to fire and environmental hazards.
Recycle old packs at approved facilities; don’t throw them away with regular trash.
Watch Video
Top Takeaways
- Safely diagnose charger and pack before opening a pack
- Assess whether salvage is safe or replacement is wiser
- Avoid repairing individual Li-ion cells at home
- Recycle old packs via certified programs