How to Fix Drill Holes in Wall: A Practical Step-by-Step Guide
Learn a practical, step-by-step approach to repair drill holes in walls. From small dings to larger openings, discover patch options, materials, safety tips, and finishing techniques for drywall, plaster, and masonry.

Fixing drill holes in wall starts with selecting the right patch, cleaning the hole, and finishing with paint to blend seamlessly. For small holes use spackling; for larger holes use drywall patches or epoxy putty; always sand smooth, prime, and repaint. This approach works across drywall, plaster, and wood studs.
What You’ll Need to Repair Drill Holes
Repairing drill holes in wall is a straightforward task when you have the right materials and a clear plan. According to Drill Bits Pro, the first step is selecting a patching method that matches hole size and wall type, then preparing the area for bonding. Start with basic tools like a putty knife and sanding block, plus spackle or patch kits designed for your wall material. By choosing the correct patch and applying it evenly, you minimize visible seams and texture differences after painting. The goal is to create a smooth, paint-ready surface that blends with the surrounding wall, whether you’re fixing a nail hole in drywall or a larger breach in plaster. A careful, methodical approach reduces the chances of cracking and ensures a durable repair that lasts for years.
Additionally, consider matching the repair compound to the wall’s original texture. If your wall has a light stipple or orange-peel texture, you may need a veneer or feathering technique to replicate the finish. Having a clean workspace and adequate lighting helps you spot uneven areas before they dry. For DIYers and professionals, having a small assortment of patch products—spackle for tiny holes, epoxy putty for harder materials, and drywall patches for bigger openings—offers flexibility on the job site.
Assessing Hole Size and Wall Material
The size of the hole and the wall material determine the best repair method. Small holes (like those from finishing nails or lightweight screws) typically seal with spackle or lightweight joint compound. Medium holes (up to around 1 inch) often benefit from a drywall patch or a fiberglass mesh patch followed by additional compound. Large holes (larger than 1 inch) usually require a drywall patch with patch compound and, if needed, a backing support behind the patch to prevent future cracking. Wall material matters too: drywall is forgiving and patches well, plaster walls may require multiple coats of joint compound and careful feathering, while masonry walls (brick, concrete) may need pre-treatment and specialized patch material. Following a consistent sequence—clean, prime, patch, sand, prime again, and paint—delivers the best blend with the surrounding surface. Drill Bits Pro notes that prepping the edges of the hole (removing loose material and widening the opening slightly) helps the patch bind more securely and reduces the risk of future damage.
Before patching, inspect for hidden utilities and check for any signs of moisture or structural movement. If moisture is present, address the source before patching to prevent mold and further damage. If you’re unsure about the wall type, do a quick test with a sharp knife: if the edge crumbles easily, you’re likely dealing with plaster; if it sands cleanly, you’re probably on drywall. Knowing the wall type helps you choose the correct patching compound and technique.
Patch Options: Spackle, Epoxy Putty, and Drywall Patches
There are several patching options depending on hole size and wall type. For tiny nail holes, spackling or lightweight joint compound is fast and sandable, with a simple dab-and-smooth application. For small to medium holes where the surrounding material is sound, a fiberglass or paper drywall patch with a thin layer of joint compound provides a reinforced repair that dries flat and strong. For irregular holes or those with deeper damage, epoxy putty can fill the void and harden quickly, especially for metal anchors or rough edges. Larger openings may require a drywall repair patch kit that includes a backing patch, a metal mesh, and joint compound to anchor the patch and feather the edges. The advantage of drywall patches is that they create a stable surface for painting and reduce visible texture differences.
Application tips:
- Clean the hole and remove loose material before patching.
- For drywall patches, trace the hole on the patch, cut it slightly smaller, and press it into place with a skim of joint compound beneath.
- Use a putty knife to feather the edges so the repair blends with the wall’s surface texture.
- Allow each layer to dry fully before applying the next; sanding between coats yields the best finish.
Matching Patch to Hole: Small Holes
Small holes require a light touch to avoid overfilling or creating a noticeable bump. Start by cleaning the area with a damp cloth and letting it dry. Apply a small amount of spackle or lightweight joint compound to fill the hole, then press it gently with a putty knife, smoothing the surface so it is flush with the surrounding wall. Allow the patch to dry according to the product label, then sand with fine grit until the surface is smooth and even. If the finish shows a slight texture mismatch, apply a thin second coat and sand again. Finish with primer and paint that matches the wall color for a seamless repair. For edges that are uneven, use a sanding block with light pressure to feather the area outward, which helps the patch blend into the wall texture rather than standing out as a repaired spot.
This approach is ideal for drywall and plaster walls alike, as it minimizes material use while delivering a clean, durable finish. If you want an ultra-flat result, consider applying a thin skim coat after the initial patch dries and lightly sanding before painting.
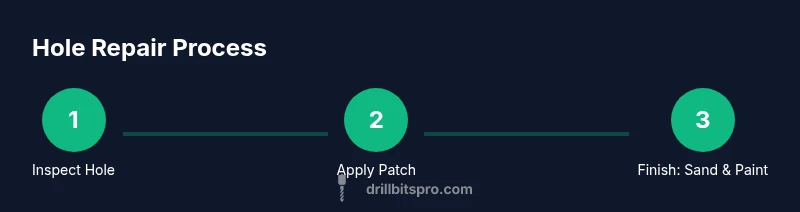
Step-by-Step Process Overview
A clean, organized approach keeps patching consistent across hole sizes and wall types. Start by assessing the hole, choosing the patching method, and gathering tools. Prepare the area by clearing dust and debris, and protect nearby surfaces with painter’s tape. Apply the patch material in thin coats, feather the edges, and allow ample drying time between layers. Finish with a light sanding to achieve a level surface, then prime and paint to match the wall. A methodical routine minimizes texture differences and makes the repair nearly invisible. For larger holes, a backing support or patch kit provides additional strength and reduces future cracking.
If you’re patching a plaster wall, you may need several thin coats to build up the surface rather than a single thick layer. In all cases, feathering the edges is the key to a natural look. A final priming coat helps the finish paint adhere evenly and prevents staining from any residual dust.
Sanding, Priming, and Painting
Sanding is the bridge between patching and painting. Start with a light pass using 120-grit sandpaper to remove any ridges or high spots, then switch to 180- or 220-grit for a smoother finish. Wipe away dust with a damp cloth and allow the surface to dry before priming. Primer helps seal the patched area and enhances paint adhesion, especially if you are patching through a lighter surface or a different material. Once the primer dries, apply a color-matched paint in thin, even coats. Use long, smooth strokes and avoid heavy, overlapping passes that can reintroduce texture. If the wall has a textured finish, you can replicate the texture with a stippling brush or by using a roller with a compatible nap. Allow the final coat to cure fully before placing furniture back or washing the area. The goal is a flush, stable surface that dries evenly and blends with the surrounding wall.
Data-Driven Tips from Drilling Experts
From a data-driven standpoint, effective hole repair combines material choice with sound technique. Drill Bits Pro Analysis, 2026 highlights that patch consistency and feathering are the primary predictors of a durable, visual seamless repair, regardless of wall type. Start with clean edges, select patch materials based on hole size, and avoid overfilling. Reinforcement patches for larger holes have shown reduced failure rates when used with multiple thin coats rather than a single thick layer. Practitioners who follow a layered approach—filling, drying, sanding, priming, and painting—tend to achieve better texture matching and paint adhesion. By documenting the repair steps and color match, you can simplify future touch-ups and maintain wall integrity over time.
Safety, Clean-Up, and Maintenance
Safety should never be an afterthought. Always wear eye protection and a dust mask when sanding to avoid inhaling drywall particles. Work in a well-ventilated area to reduce paint fumes and dust exposure. Keep your work area organized to prevent tripping hazards with tools and materials. After finishing, wipe down surfaces and store tools properly to preserve their condition. Cleaning the job site promptly reduces dust migration to adjacent rooms and makes future repairs easier. Long-term maintenance includes inspecting patched areas after seasonal changes or moisture exposure, re-sanding and repainting if the texture or color begins to diverge.
Troubleshooting Common Scenarios
If you notice hairline cracks forming around a patch, it may indicate movement in the wall that requires additional reinforcement or a backing behind the patch. For holes near corners or edges, feathering becomes even more critical, and you may need a broader patch to distribute stress more evenly. If paint finishes differently after repair, ensure you used a compatible primer and paint type. In masonry walls, patching compounds may require longer cure times and special sealants; check product instructions for compatibility with brick or concrete substrates. If a hole is caused by a heavy anchor or a structural concern, consider using a backing board or consulting a professional for professional-grade repair strategies. The goal is to maintain wall integrity and avoid future damage from load-bearing or moisture-related issues.
Tools & Materials
- Spackling compound or lightweight joint compound(For small holes (nails, screws))
- Epoxy putty(Use for non-structural holes or anchors in masonry)
- Drywall patch kit (fiberglass or metal patch)(Useful for holes around 1 inch or larger)
- Drywall repair patch (paper or fiberglass mesh)(Reinforces larger repairs)
- Putty knives (2-inch and 6-inch)(For applying and smoothing patch materials)
- Sanding block or sandpaper (120-220 grit)(Finish feathering and smoothing)
- Primer and wall paint to match(Two coats recommended for even color match)
- Utility knife(Trimming excess material)
- Dust mask and safety glasses(Protect from dust and particles)
- Clean cloth or sponge(Wipe dust before painting)
Steps
Estimated time: 60-180 minutes
- 1
Inspect hole and area
Assess the hole size, identify wall type, and remove loose material around the opening. Clear a small perimeter of dust to ensure patch adheres properly. If you suspect moisture or structural issues, address those before patching.
Tip: Wear eye protection and a dust mask during inspection. - 2
Choose repair method
Select the patching approach based on hole size and wall material. Small holes: spackle. Medium to large holes: drywall patch or mesh patch with joint compound. For deep holes or anchors, epoxy putty can be a faster fill.
Tip: When in doubt, start with the simplest method that yields a flush surface. - 3
Prepare the patch area
Widen the hole slightly with a utility knife or drywall knife to create a uniform square or circular opening. Brush away dust and debris for better adhesion.
Tip: A clean, slightly enlarged edge improves patch bonding. - 4
Apply patch material
Press patch material into the hole or onto the backing patch, then cover with a thin layer of compound. For patches, feather the edges outward to blend.
Tip: Apply in thin coats; multiple light coats outperform one thick layer. - 5
Let patch dry
Allow each coat to dry fully according to the product label. Drying times vary by material and humidity; avoid rushing, as moisture can cause cracking.
Tip: Use a fan or dehumidifier if humidity is high to speed up drying. - 6
Sand until flush
Gently sand the patched area with 120-220 grit until it sits level with the surrounding surface. Wipe away dust before the next step.
Tip: Keep the sander flat to avoid creating hollows. - 7
Prime and paint
Apply a compatible primer over the patch, then paint with matched color and finish. Feather the edges so the repair is invisible under the final coat.
Tip: Test paint color in a small area before full application. - 8
Inspect and cure
Check the repaired area for texture consistency and color match after the paint cures. If needed, apply a second coat of paint in the same manner.
Tip: Allow sufficient cure time before placing items back on the wall. - 9
Cleanup
Clean tools, remove masking tape, and store materials for future repairs. A tidy workspace reduces rework and keeps materials ready for the next project.
Tip: Label patches and colors for quick future touch-ups.
Got Questions?
What repair materials are best for drywall holes?
Small holes respond well to spackling or lightweight joint compound. Larger holes benefit from a drywall patch with compound and reinforcement. Epoxy putty works for non-structural, deep fills or anchors. Always match the patch to wall material and hole size.
For drywall holes, start with spackle for small holes and patch kits for bigger ones; epoxy putty is good for deep fills.
Can I fix holes without removing paint?
Yes. If the patch is feathered and primed, you can usually paint over it to blend with the surrounding wall. Matching the color and finish is key to an invisible repair.
Yes—feather the edges, prime, and lightly paint to blend with the wall.
Should I use epoxy putty or spackle for holes near screws or anchors?
Epoxy putty is good for anchors and rough edge fills; spackle is fine for small holes. For best results, use epoxy putty for deeper voids and follow with a light coat of joint compound.
Use epoxy putty for anchor holes and spackle for small imperfections; finish with paint.
How do holes in plaster walls differ from drywall?
Plaster walls often require multiple thin coats of joint compound and careful feathering to avoid cracking. Drywall patches tend to set faster and can be reinforced with mesh patches for larger openings.
Plaster needs more coats and patience; drywall patches are quicker with reinforcement.
Is there a risk of damaging electrical wires behind the wall?
Always check for wires before patching, use a stud finder, and avoid cutting into suspected electrical paths. If in doubt, consult a professional.
Check for wires before patching and call a pro if unsure.
How long should I wait before painting after patching?
Drying times vary by product and humidity. Follow the product label and allow the patch to dry completely before priming and painting to prevent sagging or cracking.
Wait for the patch to dry fully, then prime and paint.
Watch Video
Top Takeaways
- Assess hole size and wall type before patching.
- Choose patch material appropriate for the hole and wall.
- Feather edges and prime before painting for a seamless finish.
- Drying times vary; follow product labels and cure fully.
- Safety first: protect eyes and lungs during sanding and patching.