How to Get Drill Arm in Subnautica
Learn how to obtain the Drill Arm upgrade for your Subnautica Prawn Suit with a clear, step-by-step path. Discover blueprint locations, gathering requirements, and installation tips to maximize mining efficiency and exploration safety.

To answer how to get drill arm subnautica: you must locate the Drill Arm blueprint fragments and assemble them at a Vehicle Upgrade Console to install the upgrade on your Prawn Suit. Start by exploring wreck sites and data caches for the fragments, then gather the components listed in the blueprint. This article guides you through every step.
What the Drill Arm does in Subnautica
The Drill Arm is an upgrade module for the Prawn Suit that significantly enhances mining capability. With the Drill Arm attached, the Prawn Suit can bore through tougher materials and gather resources more quickly than with the default tools. This makes it invaluable for players who explore dangerous biomes or need large quantities of ore to complete bases and large projects. When used strategically, the Drill Arm lets you tunnel through ore seams and crust that would otherwise slow you down, helping you reach deeper zones with less downtime. Keep in mind that upgrades like the Drill Arm consume power and add weight, so plan your oxygen and battery strategy accordingly. For many players, the key decision is whether the increased mining speed justifies using a Prawn Suit upgrade slot for the duration of an expedition. In practice, the Drill Arm pairs well with other mobility and tool upgrades, enabling more efficient exploration while reducing the frequency of trips back to base to unload ore.
If you’re pursuing how to get drill arm subnautica, you’ll want to focus on finding the upgrade blueprint fragments first, then prepare for the assembly and installation steps. The upgrade will redefine how you approach resource-rich zones, letting you extract materials faster and with fewer trips. Remember to scout multiple wrecks and outposts; fragments are often spread across several locations. In addition to the core upgrade, consider planning your expedition to include support tools that extend your operating window, such as extra power cells and efficient inventory management. With patience and systematic exploration, you can achieve a reliable mining workflow that keeps you ahead of your project goals.
Blueprint fragments: where to find them and how the upgrade works
The Drill Arm blueprint in Subnautica is not a single fragment; it is built from multiple piece parts scattered across wrecks, research outposts, and sunken corridors. To learn how to get drill arm subnautica, you will need to collect all fragments and assemble them into a complete blueprint in your data bank. Once the blueprint is assembled, you can craft the Drill Arm at a Vehicle Upgrade Console. The console acts as the upgrade hub for Prawn Suit components, and it is typically located in the Moon Pool or other vehicle docking areas depending on your game version and progression. After installation, the upgrade becomes a permanent part of the Prawn Suit unless you remove it with a separate process. In short, to execute how to get drill arm subnautica, you must locate fragments, assemble the blueprint, and perform the installation at the upgrade station. Remember that fragment locations may differ with each update, so check your game’s latest patch notes if you are playing on a platform with frequent updates.
Materials and prerequisites for assembly
Before you can install the Drill Arm, you must have the blueprint assembled and the requisite parts on hand. In Subnautica, upgrade blueprints indicate the precise materials required; these materials can vary by game version and platform, so you should consult the blueprint in your PDA for exact lists. In general, you should ensure you have:
- The Drill Arm blueprint assembled
- A Prawn Suit ready for upgrade
- Access to a Vehicle Upgrade Console
- The power resources to complete the installation and test the arm in the field
If you cannot locate one of the materials, you may need to revisit a biome where upgrades typically spawn or revisit wrecks. Patience is part of how to get drill arm subnautica, so plan a dedicated exploration session rather than trying to improvise on the fly. The key is to verify materials within the blueprint; if a required component is missing, it will prevent the upgrade from being installed. Finally, ensure your save file is backed up before a major upgrade in case you want to revert changes later.
The process rewards careful exploration and preparation. While you wait, you can review patch notes for your platform to anticipate any changes in how fragments spawn during world updates. This is a good time to map out a route that covers several wreck sites rather than chasing a single location. A solid plan reduces backtracking and improves your odds of finishing the upgrade in a single session.
For players who prefer a more structured approach, create a simple checklists that align with the blueprint’s sections: fragment collection, blueprint assembly, material gathering, console installation, and post-install testing. Rinse and repeat for any additional upgrades you intend to pursue in the same save file. This method keeps you organized and reduces the chance of missing critical steps in the upgrade chain.
Installing and testing the Drill Arm
With blueprint assembled and materials in hand, approach the Vehicle Upgrade Console and select the Drill Arm upgrade. The system will display the required components; confirm the install. After installation, re-enter your Prawn Suit and take it for a test run in a controlled area. Monitor the impact on mining speed, drill’s effectiveness, and power consumption. If the upgrade seems underwhelming or causes lag, verify that you have the latest patch and that the armor’s power supply is sufficient. Testing should include drilling a few ore deposits and evaluating whether the improved torque helps break harder seams. Always maintain an escape route and oxygen supply; upgrades can drain power, so carry spare power cells for extended operations. In practice, many players structure their excursions to include a 'drill-first' approach at the start of a tunnel to maximize resource yield.
After installation and initial testing, you should assess both the immediate effects and long-term value. If you find the drill requires too much energy for your typical route, consider calibrating other ship systems or adjusting your travel plan to lean on efficient, extended operations. Practicing in safe zones first helps you refine your technique without risking life support failures.
If you want to maximize the upgrade’s effectiveness, pair it with other mining or mobility upgrades that expand your reach without overtaxing your power reserves. The Drill Arm shines when used in well-planned routes where you can steadily chip away at resource pockets while maintaining a safe retreat path. Remember to periodically back up your save before testing new combinations, so you can revert if a combination produces unstable performance.
Safety and efficiency tips
Upgrading in Subnautica is rewarding, but it can also be risky in hazardous biomes. Before you attempt to install the Drill Arm, save your game and maintain a safe backup. Use a stable docking point to avoid sudden movement during upgrade operations, and ensure you have spare power cells in your inventory to mitigate power drain. Consider upgrading one module at a time; installing multiple heavy upgrades can cause handling issues or reduce maneuverability when navigating tight caverns. When planning a drilling run, map an escape route that avoids immediate threats—this reduces the chance of getting trapped if the upgrade affects your movement speed. Finally, always verify compatibility with your current vehicle loadout and check for in-game patches that may affect upgrade functions or spawn rates. These precautions help you maximize the Drill Arm’s benefits while minimizing risk during exploration.
How to Apply the Drill Arm in Practice
Learning how to get drill arm subnautica is about translating blueprint knowledge into in-game action. Start with patient exploration, then move to careful assembly and testing. The Drill Arm elevates your mining capacity, meaning longer expeditions with higher resource yields. To make the most of it, pair the upgrade with smart fuel and oxygen management, plan your exit routes, and stay adaptable to changing biome hazards. By combining strategic planning with on-site testing, you’ll unlock efficient mining routines that accelerate your base-building timeline and resource procurement.
Tools & Materials
- Prawn Suit(The upgrade attaches to this vehicle)
- Drill Arm blueprint fragments(Collected from wrecks and data caches; combined into full blueprint)
- Vehicle Upgrade Console(Upgrade hub for Prawn Suit modules)
- Materials listed in the blueprint(Exact items vary by game version; check the blueprint in-game)
- Power source(Power cells or equivalent to sustain testing)
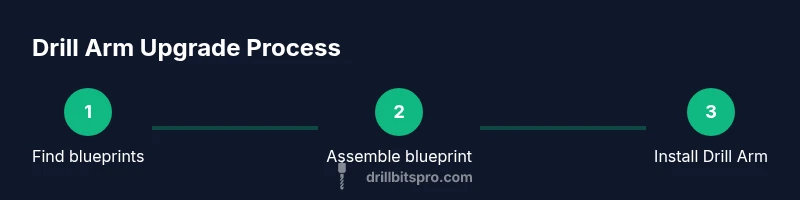
Steps
Estimated time: 60-90 minutes
- 1
Find Drill Arm blueprint fragments
Explore wrecks, data pods, and research outposts to locate blueprint fragments. Each fragment contributes to the complete Drill Arm blueprint, so collect multiple sources to ensure you can assemble it later.
Tip: Scan every container; fragments are often hidden in side chambers and overlooked rooms. - 2
Assemble the Drill Arm blueprint
Once you’ve gathered fragments, assemble them in your data bank to create the full Drill Arm blueprint. Verify the blueprint is marked as ready for crafting before proceeding.
Tip: Double-check that you have all fragments; missing a single piece blocks construction. - 3
Collect the required materials
Refer to the blueprint to determine the exact materials needed. Gather these components in advance to avoid multiple trips between locations.
Tip: Create a checklist and check off items as you obtain them to stay organized. - 4
Navigate to the Vehicle Upgrade Console
Head to the upgrade station accessible from the Moon Pool or a designated docking area. Access the console and select the Drill Arm upgrade option.
Tip: Save before starting the upgrade in case you want to revert changes. - 5
Install the Drill Arm
Confirm the materials are present and install the Drill Arm onto your Prawn Suit. The process will attach the upgrade permanently until you replace or remove it with a separate procedure.
Tip: Monitor the installation prompt; canceling mid-way can corrupt progress. - 6
Test and calibrate
Test the upgraded Prawn Suit in a controlled area. Assess drilling speed, power usage, and maneuverability to ensure the upgrade meets your needs. Make small route adjustments based on the results.
Tip: Carry spare power cells during initial tests to avoid being stranded if power drains quickly.
Got Questions?
What is the Drill Arm used for in Subnautica?
The Drill Arm is a Prawn Suit upgrade that enhances mining speed and capability, allowing you to access tougher ore seams more efficiently.
The Drill Arm upgrade boosts your Prawn Suit's mining power, letting you dig through tougher ore seams more quickly.
Where can I find the Drill Arm blueprint fragments?
Fragments are scattered across wrecks, sunken data pods, and research outposts. Collect multiple fragments and assemble them into the full Drill Arm blueprint.
Fragments are in wrecks and data pods; gather several pieces and assemble the blueprint.
Do I need to upgrade at the Vehicle Upgrade Console or elsewhere?
The common upgrade point is the Vehicle Upgrade Console, typically found in the Moon Pool or designated docking areas. This is where you install the Drill Arm once you have the blueprint and materials.
Upgrade at the Vehicle Upgrade Console when you have the blueprint and materials.
Is the Drill Arm upgrade permanent after installation?
Yes, once installed on the Prawn Suit, the Drill Arm remains part of the suit until you remove it with a separate process. Plan your loadout accordingly.
The Drill Arm stays on the Prawn Suit unless you deliberately remove it.
Can I remove or replace the Drill Arm later?
Provided you use the in-game upgrade system, you can usually remove or swap upgrades via the Vehicle Upgrade Console or a similar interface, though you may lose the installed upgrade if you replace it with another.
Upgrades can usually be swapped at the console, but you might lose the previous upgrade.
What should I do if fragments aren’t spawning after updates?
Check the latest patch notes and confirm your game version. Fragment locations can shift with updates, so you may need to search additional wrecks or outposts.
If fragments stop spawning after an update, review patch notes and search nearby wrecks for new locations.
Watch Video
Top Takeaways
- Locate fragments to unlock the blueprint.
- Assemble the blueprint before gathering materials.
- Install at the Vehicle Upgrade Console with care.
- Test in a safe area and monitor power use.