How to Get Out of Drill: Practical Exit Tactics for You
Learn how to get out of drill safely across work, classroom, and DIY settings. This practical guide covers decision criteria, approved channels, and documentation to protect people and equipment.

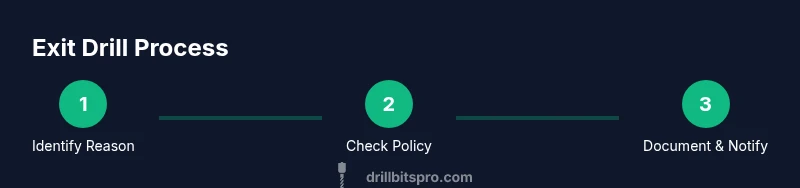
By following a clear exit framework, you can safely leave a drill when conditions justify it. You will identify the reason, consult policy, inform the drill lead, and document the outcome. This quick guide outlines the essential steps, safeguards, and communication tips to minimize risk and disruption. Expect to use official channels, stay professional, and prioritize safety. The steps below apply across workplace, training, and DIY contexts.
What 'getting out of drill' means in different contexts
In everyday language, how to get out of drill can refer to exiting a practice drill, a training exercise, or even a home improvement project that uses a drill. Understanding which context you’re in helps determine the correct action and the right person to notify. When DIY enthusiasts search for how to get out of drill, they want practical, safety-first guidance that minimizes risk while maintaining professional conduct. This article uses Drill Bits Pro's practical lens to explore exit decisions across workplace drills, classroom simulations, and home projects.
First, identify the exact scenario: is this a formal drill organized by a company, a drill in a classroom setting, or a momentary pause in a DIY task? The distinction matters because different policies and leadership structures govern each environment. In a formal industrial drill, you’ll typically have documented procedures, a chain of command, and approved channels for pausing or exiting. In a DIY setting, safety and personal responsibility take center stage and can be managed with equipment adjustments, PPE, and a quick safety pause. Across all contexts, the objective is to exit cleanly without compromising safety or equipment. The phrase how to get out of drill becomes a practical question of process, not a knee-jerk reaction. The more you understand the context, the easier it is to act swiftly, safely, and in alignment with policy.
Safety, ethics, and policy awareness
Exit decisions must prioritize safety and ethics. If a situation introduces a real hazard—an errant bit, a loose clamp, smoke, unusual noises—exit immediately and notify the supervisor. Even when a drill is routine, you should understand the formal process to leave. Ethics demand honesty: misrepresenting hazards to avoid work can lead to disciplinary action. Read the organization’s drill policy and the tool safety guidelines before you participate. In many organizations, there are clear channels to request to pause or exit, with documented forms and supervisor approvals. For DIY projects, treat the drill as any potentially dangerous tool: keep the area clear, wear appropriate PPE, and avoid escalating small issues into unsafe situations. The more you know about the rules, the quicker you can respond with a well-founded exit plan that protects people and equipment. Drill Bits Pro emphasizes that alignment between safety culture and practical action reduces risk and keeps projects on track.
Decision framework for exiting a drill
Use a simple decision framework to determine whether exit is appropriate. Start with a quick hazard check: is there an immediate danger to people, the workpiece, or the mounting hardware? If yes, exit immediately, power down the tool, and secure potential energy sources as needed. If the situation is not immediately dangerous, consult the policy: does the drill policy allow a pause, a timeout, or an early exit? Consider the needs of teammates and the impact on the task; communicate succinctly to avoid confusion. Always document the reason, time, and actions taken. This framework is designed to be practical in diverse settings—from industrial shop floors to community maker spaces and private garages—so you can apply it without guessing. It also helps you stay consistent, which reduces friction when debriefing the incident later. By following a repeatable process, you ensure that 'how to get out of drill' becomes a predictable, safe procedure rather than a stressful exception.
Documentation and communication templates
Having ready-to-use templates saves time and reduces miscommunication. Use an official exit request form or an email template to record the decision. Include your name, the drill type, the exact reason, time of exit, and any safety actions taken. If you can, attach photos or notes showing the hazard. Share the update with the drill lead or supervisor through the approved channel (radio, intercom, or email). A clear record helps with after-action reviews and ensures accountability for future sessions. Drill Bits Pro has seen teams perform better when exit events are documented promptly and consistently, because it makes it easier to identify recurring hazards and adjust procedures. If your organization doesn’t have an existing form, adapt a short, factual note that captures the key elements: who, what, where, when, why, and how you responded.
Step-by-step plan (planning phase)
Before initiating exit steps, you should define the goal of your exit (safety first, policy compliance, or equipment protection). Gather supporting facts: what exactly happened, when, where, and who is involved. Decide who must be informed and the preferred channel for a request. By preparing in advance, you reduce delays when time matters most.
Communicating with supervisors and teammates
Describe your reason concisely and factually. Use official language and avoid emotion-driven language. Provide the needed context: hazard name, affected area, and potential consequences. Ask for acknowledgment of your exit and a confirmation of next steps. Keep the message brief but complete, and be ready to answer follow-up questions. Strong communication prevents confusion and keeps the drill moving forward safely.
After-action and follow-up
After exiting, complete any required paperwork and attend the post-drill debrief if invited. Record lessons learned and any suggested improvements to prevent recurrence of the hazard. If applicable, coordinate with maintenance to reset tools or secure equipment. A thorough after-action process strengthens future drills and demonstrates responsibility.
Tools & Materials
- Request to Exit Form (or official policy document)(Have your organization’s exit request form or policy handy.)
- Supervisor or Drill Lead Contact Information(Phone or radio; ensure you can reach them during the drill.)
- Notepad and pen(For quick notes and rationale.)
- Email/Message Template(A pre-written script to document the exit.)
- Documentation of Safety Justification(Any safety or health justification.)
- Calendar/Schedule(To coordinate with other tasks.)
Steps
Estimated time: 15-30 minutes
- 1
Identify Exit Reason
Assess whether a hazard, policy constraint, or task constraint justifies leaving. Note the exact trigger that prompts exit and distinguish between temporary pauses and permanent removal from the drill.
Tip: Be specific about safety hazards; record date/time and location for clear communication. - 2
Check Applicable Policy
Review the drill policy to determine whether pauses, pauses with supervisor approval, or immediate exits are allowed. If policy is unclear, escalate to the supervisor or safety officer using the approved channel.
Tip: If there is ambiguity, err on the side of safety and ask for a quick confirmation. - 3
Prepare Your Exit Request
Draft a concise rationale including what happened, why it requires exit, and what the immediate safety impact is. Include time, location, equipment involved, and what you did to mitigate risk.
Tip: Use a pre-made template to speed up the process and reduce omissions. - 4
Secure a Communication Channel
Notify the drill lead or supervisor through the official channel (radio, intercom, or email) and request formal approval to exit. Ensure you receive acknowledgment before leaving.
Tip: Avoid ad-hoc channels that may bypass safety leadership. - 5
Submit Your Request and Await Confirmation
Send the exit request and wait for a written or verbal confirmation. Keep a copy of the confirmation and store it with the incident notes.
Tip: If you’re in a live environment, continue to monitor for any evolving hazards until you are clear of the danger. - 6
Document the Exit and Conduct After-Action Notes
Record the event details, actions taken, and any suggested improvements. Share notes with the team and, if applicable, with maintenance or safety staff.
Tip: Capture lessons learned to prevent recurrence and support future drills.
Got Questions?
What should I do first if I notice an immediate hazard during a drill?
If you detect an immediate hazard, exit the drill right away and notify the supervisor through the official channel. Do not wait to complete the task; prioritize safety and prevent injury or damage.
If you notice an immediate hazard, exit right away and tell the supervisor through the approved channel.
Can I leave a drill without supervisor approval?
Leaving without approval is not advised. Follow the documented exit procedures and seek supervisor confirmation to ensure safety and accountability.
Always follow the official exit procedures and seek supervisor confirmation before leaving.
What documents do I need to exit a drill?
Have an official exit form or approved template, notes on the hazard, and a timestamp. Attach any photos or evidence if required by policy.
Use the official form and include notes on the hazard with a timestamp.
How should I handle a mandatory drill if I have a health concern?
Discuss health concerns with a supervisor or safety officer. Most policies provide accommodations or safe alternatives; follow the approved process.
Talk to your supervisor about health concerns and follow the official process for accommodations.
How can I politely ask to exit a drill while being respectful?
State the hazard or policy reason briefly, reference the official channel, and thank the lead for understanding. Keep it calm and professional.
State the reason briefly, reference the channel, and thank them for understanding.
What if my exit affects team productivity or deadlines?
Explain the potential impact honestly and offer to assist with a quick handover or rescheduling. Coordinate with the lead to minimize disruption.
Be honest about the impact and offer to help with handover or rescheduling.
Watch Video
Top Takeaways
- Assess safety first before requesting to exit.
- Document every step for accountability.
- Use official channels and approved wording.
- Keep communication concise and factual.
- Follow up to confirm the exit and next steps.