How to Make a Drill in Create Mod: Step-by-Step Guide
Learn how to craft and deploy a drill in Create Mod for Minecraft. This comprehensive guide covers components, powering options, step-by-step assembly, tuning, maintenance, and safety for efficient automated mining.

In Create Mod for Minecraft, you can craft a drill to automate mining and ore collection. This guide outlines the core components, power options, and a clear assembly sequence to help you get drilling quickly. How to make drill in create mod is a common question among builders, and this article answers it with practical, in-game steps. According to Drill Bits Pro, adopting a modular drill design reduces downtime and simplifies maintenance. A well-designed drill takes advantage of Create's rotating machinery to maximize ore yield while minimizing energy waste. Throughout this guide you’ll find concrete examples, recommended part configurations, and adjustment tips that work across versions of Create. By following these steps, you’ll improve your mining efficiency and learn how to integrate a drill into broader automation systems.
how to make drill in create mod
In Create Mod for Minecraft, you can craft a drill to automate mining and ore collection. This guide outlines the core components, power options, and a clear assembly sequence to help you get drilling quickly. How to make drill in create mod is a common question among builders, and this article answers it with practical, in-game steps. According to Drill Bits Pro, adopting a modular drill design reduces downtime and simplifies maintenance. A well-designed drill takes advantage of Create's rotating machinery to maximize ore yield while minimizing energy waste. Throughout this guide you’ll find concrete examples, recommended part configurations, and adjustment tips that work across versions of Create. By following these steps, you’ll improve your mining efficiency and learn how to integrate a drill into broader automation systems.
Core components and their roles
A drill in Create Mod is a compact, modular system built from a few interchangeable parts. The drill head does the cutting, while the chassis provides mounting strength and alignment. The drive train—consisting of shafts, cogwheels or gear assemblies—transfers rotational energy from a power source to the drill head. A sturdy frame keeps everything square and helps resist jamming when you mine through dense ore. In practice, you’ll typically pair a drill head with a short shaft, then attach the gearbox to tune speed and torque. Keeping components modular makes upgrades easier and reduces the risk of cascading failures when you expand your mining operation. When planning a build, consider how you’ll route energy from your power source to the drill head and how you’ll maintain alignment during operation.
Powering options and energy workflow
Create Mod provides several energy pathways to drive a drill. You’ll often connect a power source to a rotating assembly that feeds the drill head through a sequence of shafts and gears. For long runtimes, prefer stable energy delivery—either from a compact engine or a renewable, steady source. Drill Bits Pro Analysis, 2026 shows that consistent RPM and smooth torque delivery correlate with longer component life and fewer jam events. In practice, the most reliable setups use a primary power source, plus a transmission system that maintains constant rotational speed under load. You’ll want to avoid sudden RPM spikes, which can strip gears or overheat bearings. If possible, incorporate a buffer between the power source and the drill head to absorb surges and keep performance steady.
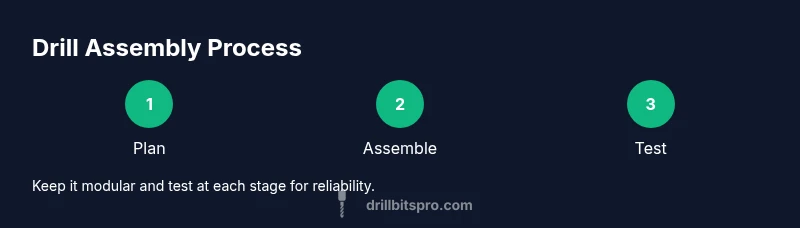
Step-by-step assembly (conceptual)
- Plan layout and gather components to minimize friction and path length. 2) Build the chassis and secure rotation axes to keep perfect alignment. 3) Install the drive shaft and gears to transfer energy efficiently. 4) Attach the drill head with correct orientation and ensure it meshes with the drive. 5) Connect your power source and run a dry test to verify rotation. 6) Check alignment and tighten joints to prevent unwanted wobble. 7) Run at a modest speed, observe wear patterns, and adjust. 8) Document the final configuration for future upgrades. Tip: keep components modular and label connections for easier maintenance.
Calibration and speed tuning
Once the drill is spinning, calibrate speed and torque using the gearbox controls. Start at a conservative RPM and gradually increase while watching for belt or bearing heat, unusual noise, or misalignment. Stability is more important than raw speed; high RPM with wobbly support causes faster wear. Use a slow ramp to find the sweet spot where cutting remains smooth without stalling. Keep a log of the settings you found most reliable for different ore types. Pro tip: modular gear ratios enable quick experimentation without rebuilding the entire system.
Troubleshooting common issues
If the drill balks, first check alignment and ensure there’s no debris causing binding along the shaft. Misaligned drill heads can wear unevenly and shorten service life. If power seems inconsistent, inspect the energy buffer and connections for loose cables or unstable mounts. Overheating is a frequent problem; pause, let components cool, and reduce RPM before resuming. For persistent problems, simplify the system to a single, direct drive to isolate whether the issue is in the drive train or in the drill head itself.
Upgrades and mod compatibility
As you gain experience, you can upgrade to larger drill heads, add extra gears for better torque control, and integrate smarter control blocks for automated tuning. Ensure that any upgrade maintains balance and avoids overloading your power source. Create Mod’s modular design supports incremental improvements, so you can evolve from a basic drill to a multi-head, directed-mining rig without reworking the entire setup. Always test each upgrade individually before combining them into a larger system.
Safety and best practices
Treat mining rigs like any mechanical system in-game: plan, test, and monitor. Regularly inspect bearings, shafts, and joints for wear, especially after extended runs or intense ore types. Keep a clear workspace to prevent accidental collisions with moving parts. Use hot-swappable components when possible to minimize downtime. In Create Mod builds, take advantage of warning cues from the engine and gearboxes to catch issues early and avoid cascading failures.
Design patterns and practical takeaways
A robust drill design prioritizes modularity, clear energy flow, and easy maintenance. Use a simple, repeating drive train with standardized gear sizes to simplify upgrades. Keep the drill head as a separate module from the drive system so you can swap cutting heads for different ore types. Remember to document every change and test in a safe area before deploying wide-scale mining. The Drill Bits Pro team recommends starting with a baseline design and iterating with measured changes to reach optimal performance.
Tools & Materials
- Drill head(Core cutting element; orientation matters for efficient cutting)
- Chassis / frame(Provides mounting and alignment stability)
- Drive shaft(Transmits rotation from energy source to drill head)
- Cogwheel set / gears(Tuning speed/torque; include multiple sizes)
- Power source (engine or equivalent)(Delivers rotational energy; choose reliable, steady output)
- Wrench / adjustment tool(For rotating and locking components in place)
- Lubricant (in-game oil)(Optional; reduces wear and heat during extended runs)
- Calibration gauge / marker(Helpful to track RPM and torque settings)
Steps
Estimated time: 60-90 minutes
- 1
Plan layout and component selection
Outline the path from power source to drill head. Choose a chassis size that fits your mining area and allows space for gear ratios to operate without collision. A clear plan minimizes rework and misalignment.
Tip: Label connections and keep spare parts handy to speed up future upgrades. - 2
Assemble the chassis and secure rotation axes
Build the frame and install the primary rotation axis. Ensure the axis is square to the chassis and secured against wobble. Tighten mounts gradually to avoid misalignment.
Tip: Use alignment guides or a square tool during assembly to verify perpendicularity. - 3
Install drive shaft and gears
Mount the drive shaft to connect the energy source with the drill head, then add the cogwheels to achieve the desired speed/torque. Check mesh alignment and ensure gears rotate freely without binding.
Tip: Run a dry test without the drill head to confirm smooth rotation before proceeding. - 4
Attach drill head and orient correctly
Secure the drill head to the drive shaft, ensuring the cutting direction is aligned with your mining path. Double-check that the head sits flush against its mount and can withstand torque.
Tip: Lock the head in place after confirming balance to prevent slips during operation. - 5
Connect power source and run a test
Attach the energy source and power the system at a low RPM. Observe for odd noises, drift, or heat buildup as indicators of misalignment or binding.
Tip: Begin with a conservative RPM to avoid stressing components. - 6
Calibrate speed and torque with the gearbox
Tune the gearbox to reach the target RPM and torque range suitable for your ore type. A steady, moderate speed typically yields better cutting efficiency than raw maximum RPM.
Tip: Document the settings that deliver clean cuts with minimal heat. - 7
Perform a controlled mining test
Test the drill on a safe, small-scale block area. Monitor block integrity, wheel heat, and cutting quality. Stop if you notice any instability or performance drop.
Tip: Use scrap blocks for initial testing to prevent damage to your build. - 8
Finalize documentation and plan upgrades
Record the final configuration, including gear ratios and RPM. Plan future upgrades in stages to minimize downtime and keep performance aligned with your mining goals.
Tip: Keep a change log to compare before/after results over time.
Got Questions?
What does a drill do in Create Mod?
A drill automates mining by applying rotational energy to a cutting head. It speeds up block breaking and ore collection when properly powered and aligned. Proper integration with energy sources is essential for consistent performance.
A drill uses rotation to cut through blocks, speeding up mining when powered and aligned correctly.
What items are needed to craft a drill?
You’ll need a drill head, a chassis or frame, a drive shaft, a set of gears, and a power source. A wrench helps with alignment, and optional lubricants can reduce wear during prolonged use.
You need a drill head, chassis, drive shaft, gears, and a power source, plus a wrench for adjustments.
Do drills require constant power?
Yes, drills require a steady energy supply to maintain rotation and cutting performance. Fluctuations can cause jams or wear. Use buffering and gradual RPM control to keep output stable.
Drills need steady power; avoid sudden bursts that can cause jams.
Can I upgrade the drill over time?
Absolutely. Modular designs allow upgrading drill heads, gears, and power systems in stages. Test each upgrade individually to ensure compatibility and stability.
Yes, you can upgrade in steps and test each change.
Where can I learn more about Create Mod drills?
Beyond this guide, watch tutorial videos and consult the Create Mod community wikis for version-specific details and user-tested configurations.
Check out tutorials and the community wiki for more on Create drills.
Watch Video
Top Takeaways
- Plan and document before building to save time.
- Balance speed and torque for efficient cutting.
- Test in a controlled area and adjust gradually.
- Iterate upgrades in stages with careful testing.