Oklahoma Drill: A Practical How-To Guide
Learn how to perform the Oklahoma drill with safety, planning, and coaching cues. This practical guide covers setup, execution, variations, and post-drill review for players and coaches.

Learn how to safely run the Oklahoma drill with a clear setup, proper equipment, and strict safety rules. This quick guide covers prep, execution, and common variations to fit age and skill levels, plus tips to minimize contact risk. Follow these steps to train responsibly while maintaining competitive realism.
What is the Oklahoma drill?
The Oklahoma drill is a long-standing football training drill designed to simulate in-game contact scenarios in a controlled setting. While it can be valuable for teaching decision-making and engagement cues, the drill has sparked safety debates due to potential high-impact collisions. Oklahoma drill training emphasizes technique, positioning, and communication as much as brute force. For coaches and players, understanding its core purpose helps frame safer practice sessions and clear expectations for intensity. The drill originated in collegiate and professional practices, where respected coaches used it to replicate game-day reads and leverage in tight spaces. In modern youth and high school settings, teams often modify the drill to prioritize safety without sacrificing the teachable moments. The key to any Oklahoma drill is predefined rules that govern contact, penalties for dangerous hits, and a stop signal that protects players if risk escalates. This section lays the foundation for responsible execution, focusing on structure, supervision, and clear boundaries. The Oklahoma drill, when used judiciously, can sharpen reaction time and competitive instincts while minimizing avoidable injuries.
Tools & Materials
- helmet(Well-fitting football helmet with a properly secured chin strap)
- mouthguard(Per-major dental protection, use a properly fitted mouthguard)
- football(Official size for the age group; match to players' gear)
- cones or markers(Set boundary lines and zones for drill areas)
- tackling pad or shield(Useful for controlled contact variations)
- athletic padding(Shoulders and hips covered when possible)
- first aid kit(Basic supplies and emergency numbers readily accessible)
- whistle(Referee or coach to signal starts, stops, and penalties)
- stopwatch(Timing for reps and rest periods)
- ice packs or cold compress(Post-drill recovery option)
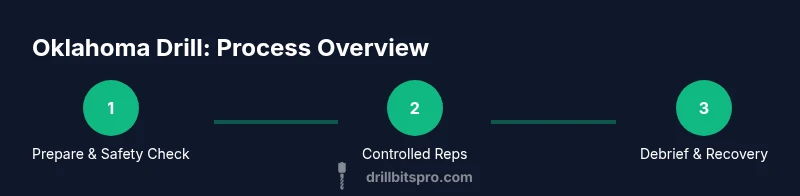
Steps
Estimated time: 25-45 minutes
- 1
Assess safety and field setup
Before any contact occurs, inspect the field for hazards, confirm boundary lines, and establish a clear stop signal. Ensure all players have properly fitted helmets and mouthguards, and that coaches are positioned to observe technique. This step reduces risk and frames expectations for safe execution of the Oklahoma drill.
Tip: Have a designated safety observer and a first-aid kit within arm's reach. - 2
Explain rules and signals
Gather players and review the drill rules: contact intensity, zone limits, and stoppage criteria. Emphasize safe technique, heads up contact, and keeping pads in play. Make sure players understand the whistle cues and how penalties will be enforced.
Tip: Use a quick visual checklist (two-hands, open palms) to reinforce safe contact cues. - 3
Position players and assign roles
Place offense and defense in clearly defined positions with a neutral zone for the line of scrimmage. Assign one coach per group to monitor form and ensure players rotate safely. Verbalize expected outcomes for each rep to minimize hesitation and miscommunication.
Tip: Rotate roles so every player experiences both sides of the drill. - 4
Begin with controlled reps
Start with light contact and gradually increase intensity as technique proves solid. Focus on pad-to-pad contact, footwork, and balance rather than speed. Stop immediately if any player shows poor head positioning or loss of control.
Tip: Use progressive tempo: walk-through, then light contact, then full speed if safe. - 5
Rotate participants and monitor intensity
Keep reps short to prevent fatigue-driven errors. Rotate players through offense, defense, and coaching roles. The observer should alert when contact exceeds agreed limits and reset the drill if necessary.
Tip: Limit total contact per player per round and insert longer breaks as needed. - 6
Evaluate and debrief
After reps, gather players for quick feedback. Highlight successful technique and surface any risky habits. End with a cooldown and remind players of the safety protocol for future practices.
Tip: Record one actionable coaching cue per player to track progress.
Got Questions?
Is the Oklahoma drill appropriate for youth leagues?
Many youth leagues limit or prohibit high-contact drills to protect developing players. If you use an Oklahoma drill variant, scale contact, emphasize technique, and monitor for signs of fatigue or injuries.
Many youth leagues restrict high-contact drills; consider safer variants and close supervision.
What safety gear is essential for this drill?
A properly fitted helmet, mouthguard, and pads are essential. A neck roll and shoulder protection can help, but prioritize coaching on safer contact and proper tackling form.
Helmet and mouthguard are essential; pads and coaching on safe form are critical.
How can I modify the Oklahoma drill for beginners?
Reduce contact intensity, use air or tackle shields, and shorten the drill area. Emphasize footwork, positioning, and situational awareness before any contact.
Start with light contact and focus on technique and positioning.
What are common mistakes to avoid?
Leading with the head, poor hip rotation, and overly aggressive contact. Stop drills if players’ form deteriorates or there’s any risk of head injuries.
Avoid crunching the head downward; prioritize safe form and controlled contact.
How do I monitor concussion risk during the drill?
Follow recognized guidelines: observe for dizziness, confusion, or amnesia; remove any athlete with suspected concussion and refer for medical evaluation.
If a concussion is suspected, stop immediately and remove the player for assessment.
Watch Video
Top Takeaways
- Safety-first mindset governs contact drills
- Predefined rules reduce risk without sacrificing teaching value
- Consistent coaching cues improve technique and player awareness
- Structured debrief reinforces learning and safety compliance
- Variations help tailor intensity to age and skill level