How to Rent a Mag Drill: A Practical Guide
Learn how to rent a mag drill safely and cost-effectively with a step-by-step approach, model selection tips, and rental best practices for DIY and pro metalworking.

Renting a mag drill is often the most cost-effective way to handle heavy, precise holes in metal, especially for intermittent projects. With the right rental terms and safety check, you can complete tasks faster than with a hand drill. According to Drill Bits Pro, planning your rental and choosing the right model are essential for a successful job.
Why Renting a Mag Drill Makes Sense
For DIYers and professionals, a mag drill offers precision and speed when drilling into steel. If your project requires holes that are accurately spaced and perpendicular, a magnetic base keeps the tool steady while you feed the bit. Renting a mag drill is often more economical than purchasing for a one-off project, and it gives you access to higher-end machines without the long-term debt. According to Drill Bits Pro, rental options are especially advantageous when you need varied hole sizes or occasional use, since you can select a model that matches the task rather than buying a single unit. Make sure the workpiece is clean, flat, and ferrous so the magnet holds securely, and check the drill’s rating for the material thickness you’ll encounter.
In practice, the decision hinges on how often you drill, the size of the holes, and the thickness of the material. For small shops or one-off jobs, rental can eliminate maintenance costs and depreciation. If you anticipate multiple projects over several months, compare total rental costs to the purchase price plus maintenance. Quality magnetic drills also vary in magnet strength, depth capacity, and spindle speed, so specify the exact needs (hole diameter, material type, and depth) before booking.
This section sets the stage for a practical rental approach: plan the task, verify the surface for magnet engagement, and choose a model that matches the hole size and thickness you’ll encounter. A well-chosen rental reduces setup time and helps you achieve clean, perpendicular holes with minimal operator effort.
What to Look For When Renting
Key considerations include magnet strength, spindle speed, horsepower, and anchor points for stability. For most DIY metalwork projects, a 1200-1800 W rating and a 12-18 inch bed are adequate. If you’ll be drilling through thick plate, aim for models with stronger magnets and deeper depth. Also assess whether the rental includes essential accessories: chuck key, spare bits, coolant/lubricant, and a case. Compare rental terms: daily vs. weekly rates, insurance, liability for tool damage, and late return penalties. If possible, test the tool at the rental shop before you leave, ensuring the magnet activates cleanly and holds a secure grip on your work surface. As you plan, consider the job’s total hours and the time you’ll need for setup and cleanup.
Beyond specs, confirm the model’s compatibility with the bit sizes you intend to use. Some units support a wider range of diameters, while others excel at higher rpm for small-diameter holes. If you’re new to mag drills, a mid-range unit with a reliable motor and stable magnetic base is a safer starting point. Finally, verify that the rental includes a spare bit kit and guidelines for coolant use, since improper cooling can shorten bit life and affect hole quality.
Understanding Rental Terms and Insurance
Read the rental agreement carefully. Verify the tool’s condition before use and document any existing damage. Check what happens if the magnet fails during use, and who covers repairs. Many shops offer basic liability coverage; you may need additional insurance for high-risk materials or extended rental periods. Ask about replacement policy if the drill is unavailable when you need it; some shops provide a comparable substitute. If you’re working on a roof or scaffolding, ensure the site has a stable anchor point for the magnet and that the power source is safe.
Knowing the service terms helps you avoid surprises. Keep a copy of the pre-use inspection checklist and report any wear on magnets, cables, or the collet. If the rental includes training, take advantage of it to learn correct bit seating and depth stop settings. Finally, clarify return windows and clean-up duties so you don’t incur additional charges.
Setting Up the Mag Drill on your Workpiece
Prepare the surface: clean rust, oil, and paint from the area to maximize magnet grip. Clamp or place the workpiece on a flat, non-slip surface. Switch on the magnet and verify full contact with the base before starting. Mark the hole center with a punch and pilot-drill if needed to guide the bit. Install the correct bit into the collet, tighten securely with the chuck key, and set the proper depth stop. Recheck alignment and ensure there are no obstructions.
A stable surface is essential. If the magnet seems weak, you can add a shim or extra clamp to limit movement. For larger or thicker parts, consider using a second magnet or an additional fixture to reduce wobble. Before drilling, practice on a scrap piece to confirm feed rate and drilling depth. Finally, be mindful of the risk of misalignment and double-check before you begin the final cut.
Drilling Techniques and Best Practices
Begin with a light pilot hole to verify alignment, then feed slowly, keeping steady pressure. Use cutting oil or coolant to reduce heat and extend bit life. Maintain a moderate speed appropriate to the material; too fast can dull the bit, too slow causes chatter. Frequently wipe debris and stop to verify hole straightness with a square or calipers. If the magnet loosens during drilling, stop immediately and re-seat the base.
As you gain experience, you’ll learn to adjust feed rate and speed for different materials. For steel, a slower feed with adequate cooling yields smoother holes. For thicker stock, take multiple passes with stepping depths rather than trying a single deep hole. Monitor bit wear and replace promptly to avoid rough edges or oversized holes.
Safety, Maintenance, and Return
Always wear eye protection, hearing protection, and gloves; never bypass the magnet safety interlock. Disconnect power before changing bits or adjusting depth. After use, clean the magnet surface and store the drill in its case. Return the tool on time and report any damage. If coolant was used, drain and dispose of it per local rules.
Maintenance is simple but important: wipe down surfaces, check the power cord for nicks, and store bits in protective cases. Document any issues observed during use so the rental shop can assess wear and decide on replacement. When returning, ensure all accessories are accounted for and the tool is clean to avoid cleaning fees.
Common Pitfalls and How to Avoid Them
Overlooking surface cleanliness reduces magnet grip. Drilling too fast or without coolant overheats bits. Forgetting to measure depth creates oversize holes. Not securing the workpiece can cause movement; always verify the base is solid. Finally, assuming rental terms include insurance—confirm coverage to avoid unexpected charges. These simple checks keep your holes accurate and your workflow efficient.
Learning from common mistakes can save time and money. If you’re unsure about a specific hole pattern, plan pilot holes and use a stop to consistently reproduce hole depths. Always annotate the drill settings for future reference and keep a small notebook with the model, RPM, depth, and material used.
Budgeting and Scheduling Rental
Plan the rental duration based on the project timeline. Compare daily vs. weekly rates and factor in a buffer for setup and cleanup. Include the cost of spare bits, coolant, and safety gear in your estimate. For longer jobs, weekly rates may be cheaper, but watch for hidden charges like extension fees. If you’re unsure about tool availability, book early and confirm reservation terms in writing to avoid last-minute changes.
A practical budget also considers potential damages or wear. Set aside funds for a spare bit kit and any unexpected repairs. Finally, reserve time at the end of each day for cleaning and inspection so you’re ready to return the tool without delay.
Quick-Check List for the Rental Day
- Confirm the magnet holds securely on your work surface.
- Verify the bit is sharp and properly seated.
- Check coolant supply and waste disposal plan.
- Wear PPE and keep bystanders clear of the drilling zone.
- Document any pre-existing tool damage before use.
Tools & Materials
- Magnetic drill (rental)(Ensure horsepower and magnet rating match hole size and plate thickness)
- Collet and chuck key(Tighten securely; keep key in a pouch to avoid loss)
- Appropriate drill bit(Carbide-tipped bits for metal; bring replacements)
- Cutting oil or coolant(Use per manufacturer guidance to reduce heat)
- Safety glasses or face shield(ANSI Z87.1 compliant)
- Measuring tools (tape, square, calipers)(For center marking and hole alignment)
- Workholding (clamps or magnets)(Keep the workpiece stationary and level)
- Extension cord and power source(GFCI if operating in damp environments)
- Brush or rag for debris(Keep the work area clean during drilling)
Steps
Estimated time: 1.5-3 hours
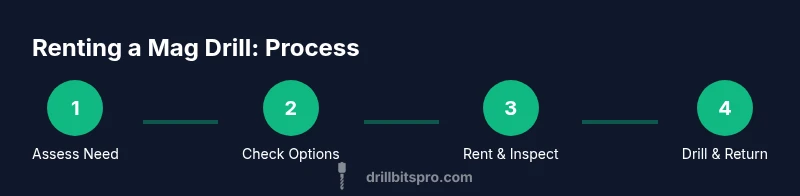
- 1
Assess project requirements
Identify hole sizes, depth, and the material to be drilled. Confirm that a mag drill rental is the most efficient option for this job.
Tip: Create a quick sketch with hole centers and depths to guide setup. - 2
Check rental terms
Review daily vs weekly rates, insurance, included accessories, and return policy before booking.
Tip: Ask for a pre-use inspection checklist and sign it. - 3
Inspect the tool condition
Examine the magnet surface for clean contact, verify cords are intact, and confirm the collet and bits are present.
Tip: Do a test magnet on a scrap piece to confirm hold strength. - 4
Prepare the workpiece and magnet
Clean the contact area, place on a flat surface, and engage the magnet fully before alignment.
Tip: Use a second clamp if the piece is large or irregular. - 5
Install the bit and set depth
Insert the bit into the collet, tighten with the key, and set the desired drilling depth with the stop.
Tip: Run a quick pilot hole to verify center alignment. - 6
Drill with controlled feed
Start at a slow RPM, feed steadily, and apply coolant. Pause to verify hole straightness periodically.
Tip: Keep hands clear of the feed mechanism and monitor magnet stability. - 7
Finish and inspect
Complete the hole, back out smoothly, and wipe debris. Inspect hole for diameter and perpendicularity.
Tip: If the hole isn’t right, assess whether re-drilling is needed after repositioning. - 8
Return the rental
Clean the tool, pack accessories, and report any damage. Return on time to avoid penalties.
Tip: Document the return with photos or notes for your records.
Got Questions?
What is a mag drill and how does it work?
A mag drill uses a strong electromagnet to hold the drill to a ferrous workpiece while you drill. This eliminates the need for clamps in many setups and allows for precise, perpendicular holes. The magnet must be fully engaged and the work surface clean for best results.
A mag drill uses a magnetic base to hold the drill to steel, letting you drill precise holes without clamps. Make sure the surface is clean and the magnet is fully engaged.
When should I rent vs buy a mag drill?
Renting is ideal for infrequent or seasonal projects, or when you need access to higher-end models without the upfront cost. If your workload is steady and long-term, purchasing may be more economical in the long run.
Renting is best for occasional use or when you need a higher-end model without a big purchase. Buying makes sense for frequent use.
What safety precautions should I follow?
Wear eye protection, hearing protection, and gloves. Ensure the magnet is fully engaged and the area is free of obstructions. Always power-down before changing bits or adjusting depth.
Wear PPE, check the magnet, and power down before changing bits to stay safe.
What determines rental cost?
Costs depend on the rental duration, model features (magnet strength, depth), included accessories, and any insurance or deposit requirements. Compare daily versus weekly rates to find the best value.
Duration, model features, and included accessories drive rental costs; compare daily and weekly rates.
How should I transport and store the mag drill?
Transport with the case or padded bag to prevent damage. Store in a dry, clean space and keep bits organized. Always unplug and inspect cords before storage.
Carry it in its case, store in a dry place, and inspect the cord before putting it away.
What if the magnet loses holding power during drilling?
Stop drilling, re-seat the magnet, and verify the surface is clean and flat. If the hold remains weak, reposition or switch to a different base fixture before continuing.
If the magnet slips, stop and re-seat; check the surface and consider an alternative fixture if needed.
Watch Video
Top Takeaways
- Assess rental fit for your project
- Choose the right mag drill model
- Secure the workpiece and wear PPE
- Follow safe drilling speeds and coolant guidelines
- Return equipment promptly with all accessories