What Drill to Use for Screws: A Practical Guide
Learn how to choose the right drill and bit for screws across wood, metal, and masonry. Includes pilot hole tips, safety, and practical step-by-step guidance from Drill Bits Pro.

By the end of this guide you’ll know exactly which drill and bit to use for screws across wood, metal, and masonry. You’ll learn how to select pilot holes, avoid stripping, and pair your drill with the right driver. We’ll cover screw types, materials, and practical techniques for clean, durable joints.
Understanding screw types and driver compatibility
According to Drill Bits Pro, the most common screws you’ll encounter are wood screws, metal screws, and masonry screws. Each type has a different drive system and requires specific pilot holes and bit types. This section explains how screw design interacts with material and why the right drill and bit choice matters for holding power and long-term durability. Expect practical distinctions you can apply on any project, from hanging a shelf to assembling a metal frame.
Key ideas to keep in mind: wood screws rely on the wood’s fibers for grip, metal screws often require tapping or self-drilling features, and masonry screws depend on a clean hole in concrete or brick. Matching bit material to screw material (carbon steel, stainless, or carbide tips) minimizes wear and reduces stripping. The Drill Bits Pro approach blends field-tested tactics with AI-driven insights to help you make smarter tool choices.
Screw sizes and drill bit compatibility
Screw sizing relies on two main factors: the screw’s outer diameter (the thread width) and the material you’re joining. In practice, that means selecting a drill bit that creates a hole large enough for the screw’s shaft but small enough to let threads bite into the surrounding material. For wood, you often drill a pilot hole just large enough to prevent splitting; for metal, an undersized pilot hole helps the threads grip without binding; for masonry, you’ll usually need a larger anchor hole followed by a compatible screw.
A well-chosen bit size reduces the risk of cam-out and minimizes wood splitting or metal galling. When in doubt, start with a smaller pilot and test on scrap material before committing to your final piece. This approach aligns with Drill Bits Pro analysis, which emphasizes measurement accuracy and material-aware bit selection as keys to fast, reliable results.
Pilot holes and self-drilling screws: when to use
Pilot holes serve several purposes: they guide your screw, prevent material damage, and set up predictable driving torque. Wood often benefits from pilot holes, especially in harder species. Metal screws often pair with pilot holes to avoid cross-threading. Self-drilling or self-tapping screws reduce the need for pre-drilling in some cases, but not all screw types or materials permit it. In concrete and brick, you typically drill a clean hole with a masonry bit and then drive a corresponding masonry screw or anchor.
When you’re unsure, default to a pilot hole for any material other than very soft wood, and use a bit size that matches the screw’s core diameter. Drill Bits Pro recommends verifying hole depth and drilling speed to keep holes clean and free of wobble.
Wood screws: best drill bits and practices
Wood screws are a staple in carpentry and furniture projects. The right bit depends on screw type and wood hardness. Use a brad-point or spindle-wood bit for clean entry in softwoods; for hardwoods, a brad-point with a slightly larger pilot can improve bite and reduce splitting. Always drill straight and square to the surface to maximize an even seating and flush finish. If you’re using a countersink, ensure the pilot bit leaves enough material for the screw head to sit flush.
Additionally, lubricate the bit with a small amount of oil when drilling in very hard wood to reduce heat buildup and prolong bit life. The goal is a clean hole that accepts the screw without requiring excessive force.
Metal screws: drilling for steel and aluminum
Metal screws require careful preparation because metal surfaces can gall and bind if the bit or hole is undersized. Start with a sharp HSS (high-speed steel) bit sized to the screw core. Use cutting oil or light lubrication to reduce heat and prolong bit life. For aluminum, a sharper bit and slower feed rate help prevent binding. In steel, ensure a clean hole and avoid overheating the bit, which can dull the tip. A pilot hole is often essential to prevent thread failure and to ensure straight driving.
If your screw head sits above the surface, consider using a washer or a countersink technique to create a clean finish. Drill Bits Pro’s guidance emphasizes accuracy, steady feeds, and proper lubrication for clean, precise screw installation.
Concrete and masonry screws: bits and drills
Concrete and masonry present the toughest environment for screws. Use a carbide-tipped masonry bit or a hammer drill with appropriate rotation to create a clean anchor hole. Start with a pilot depth that matches the screw length, then drive the screw with a low-to-moderate torque to avoid cracking the surrounding masonry. If the material is very hard, pre-drilling with a larger bit can prevent excessive torque on the screw. In all cases, ensure you’re using anchors or plugs where required and that your screws are rated for masonry use.
The key is to avoid abrupt starts and heat buildup, which can crumble the concrete and reduce grip over time. A consistent drilling pace and correct bit type will deliver durable results.
Tools, drivers, and safety essentials
Selecting the right tools is as important as choosing the correct bit. An impact driver or a drill with a clutch helps control torque and reduces cam-out. For delicate materials or long screws, a low-torque setting prevents stripping and material damage. Safety gear is essential: safety glasses, gloves, and a dust mask when drilling into masonry or wood with dust. Keep your workspace clean and organized to prevent misplaced bits and lost screws. Finally, store drill bits in a labeled case to preserve tip geometry and extend their life.
Common mistakes and how to avoid them
Common issues include choosing too large or too small a pilot hole, using the wrong bit for the material, and driving screws too quickly, which can strip threads or split material. Always confirm screw type and driver compatibility before starting, and test on scrap material if possible. Avoid forcing screws through the material; instead, apply steady, moderate pressure and let the bit do the work. After driving, back the screw slightly if you notice resistance to ensure proper seating and torque.
Quick-start checklist and maintenance tips
Before you start any project, review the basics: identify screw type, select the correct drill bit, prepare pilot holes, and equip safety gear. Inspect tools for wear and replace dull bits to maintain efficiency. Clean and oil bits that operate in metal to reduce friction. Finally, organize your screws by size and type to speed up future projects and reduce tool downtime.
Tools & Materials
- Drill/driver with adjustable torque and clutch(Has variable speed, reversible operation, and a mid-range torque setting for driving screws without stripping.)
- Assorted drill bits (wood, metal, masonry)(Include brad-point bits for wood, high-speed steel (HSS) bits for metal, and carbide-tipped masonry bits for concrete.)
- Pilot-hole bits and countersink (optional)(Use when precise hole size and flush screw heads are needed.)
- Screw assortment (wood, metal, masonry as applicable)(Select screws matching the material and load requirements; include a range of lengths and diameters.)
- Lubricant/oil for metal drilling(Light oil can reduce heat and wear on bits during metal drilling.)
- Safety gear(Safety glasses, gloves, and a dust mask when drilling masonry or wood.)
- Tape measure and pencil(For precise marking of pilot hole location and depth.)
- Scrap material for testing(Useful to test hole size and screw seating before working on the final piece.)
- Bit case or organizer(Keeps bits organized and prevents loss.)
Steps
Estimated time: 60-90 minutes
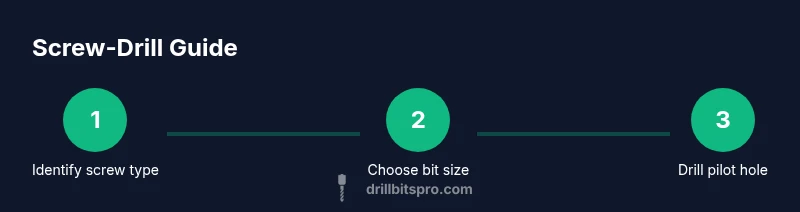
- 1
Assess the screws and material
Identify screw type (wood, metal, masonry) and material you’re joining. Choose the right driver (drill or impact) and confirm a safe work environment. This step sets up the entire process.
Tip: Double-check screw length relative to material thickness to avoid protrusion or failure. - 2
Select the correct drill bit size
Match bit diameter to the screw’s core size and the material. For wood, start with a small pilot; for metal, begin with a pilot that prevents cross-threading; for masonry, choose a bit that yields a clean anchor hole.
Tip: When in doubt, start smaller and test on scrap material first. - 3
Mark the drilling location
Use a pencil to mark the exact center point. If drilling multiple holes, mark alignment lines to ensure accuracy and a professional finish.
Tip: A center punch can help keep the bit from wandering on hard materials. - 4
Drill the pilot hole
Drill straight and steady at the chosen speed. For masonry, use a hammer-drill mode and keep the bit cool with light lubricant where appropriate.
Tip: Avoid pushing too hard; let the bit do the cutting to prevent bit breakage. - 5
Optional countersink or deburr
If you need a flush head, countersink slightly or deburr the entry to prevent snags and ensure seating.
Tip: Test your approach on scrap to ensure the countersink depth is correct. - 6
Drive the screw
Set the drill or impact driver to a low-to-medium torque. Drive slowly and watch for the screw seating flush with the surface or slightly below if needed.
Tip: If the screw stalls, back it out and check for obstructions or re-drill a slightly larger pilot hole. - 7
Inspect and finish
Check for tight seating, no cracking or splitting, and proper alignment. Remove any debris and wipe down surfaces.
Tip: Wipe away dust to prevent grit from causing wear on driver bits. - 8
Store and maintain tools
Return bits to their case, wipe away dust, and inspect for wear. Replace dull bits and keep a spare set for emergencies.
Tip: Regular maintenance extends bit life and improves future results.
Got Questions?
What is the best drill to use for screws?
The best drill varies by material and screw type. Use an impact driver or a drill with a clutch, paired with the correct bit for wood, metal, or masonry screws. Always test on scrap material first.
The best drill depends on your material and screw type; use a clutch drill or impact driver with the right bit and test on scrap first.
Do I always need a pilot hole for wood screws?
For most wood screws, a pilot hole helps prevent splitting and improves bite. In soft woods you may get away with smaller pilots; in hardwoods, use a larger pilot situation.
Usually yes, pilot holes help prevent splitting and improve grip in wood.
Can I use a standard drill bit for metal screws?
Metal screws generally require HSS bits and a pilot hole. Lubrication reduces heat and wear. Use a drill with appropriate torque to avoid stripping the screw threads.
Use an HSS bit and a pilot hole for metal screws; lubricate if needed and drive at a steady pace.
Is an impact driver better than a drill for driving screws?
An impact driver provides higher torque with less user effort and is ideal for stubborn screws. For delicate tasks or smaller screws, a variable-torque drill may be preferred to avoid overdriving.
Impact drivers offer more torque for tough screws; for light work, a drill with a clutch works well.
What about masonry screws in concrete?
Concrete screws require a proper masonry bit and often a pre-drilled hole. Use anchors where specified and ensure your screw is rated for masonry use.
Use a masonry bit and proper anchors; pre-drill as required for concrete screws.
What safety gear should I wear when drilling screws?
Wear safety glasses, gloves, and a dust mask when drilling, especially with masonry or dusty woods. Secure the workpiece and keep the area clear.
Always wear eye protection, gloves, and a mask; secure the workpiece.
Watch Video
Top Takeaways
- Choose the right screw type for the material.
- Always start with an appropriate pilot hole.
- Use the correct bit material for the screw and material.
- Drive screws with controlled torque to avoid damage.