Drill Tooth: Sharpening and Maintenance Guide
A comprehensive, step-by-step guide to identifying, sharpening, and maintaining drill teeth on common drill bits for DIYers and professionals. Learn safe practices, tool choices, and best habits to extend bit life and improve hole quality.

You will learn how to identify, inspect, and maintain drill teeth on common drill bits, then sharpen or replace them to restore cutting performance. You will need safety gear, a sharpening file or stone, a bench vise, and a suitable drill-bit sharpener. This practical process helps DIYers and professionals drill cleaner holes with less wear and tear.
What is drill tooth and why it matters
A drill tooth is the sharpened edge on a drill bit, sometimes referred to as the cutting lips that meet the material to create a hole. The term also loosely encompasses the immediate geometry around the tip, including the relief angles and flute configuration. Understanding drill tooth is essential because it governs how quickly a bit removes material, how heat is generated, and how clean the hole remains. The Drill Bits Pro team emphasizes that the quality of the teeth directly affects chip formation, worming (if feed and speed are incorrect), and overall accuracy. In practical terms, well-formed teeth slice through material with less resistance, produce fewer burrs, and require less corrective work after drilling. Different materials—high-speed steel, cobalt, or carbide—have distinct edge retention and wear patterns, so choosing the right tooth style for the job matters. For DIY projects and professional work alike, a thoughtful approach to drill tooth geometry pays off in time saved and better results. According to Drill Bits Pro, precision in tooth geometry lays the foundation for effective cutting performance.
Tooth geometry and its impact on hole quality
Tooth geometry includes the size, angle, and edge shape of the drill lips. The angle of the cutting edge relative to the bit axis affects how aggressively the tooth engages material and how easily chips are evacuated through the flute. Sharp, evenly ground teeth cut with less resistance, which reduces heat buildup and lowers the risk of workpiece tear-out. A misaligned or uneven tooth set creates asymmetrical holes, accelerates dulling, and can trap chips inside the flute. On soft woods, for example, a slightly steeper approach can prevent tear-out; on metals, a precise rake angle helps maintain straightness and reduces work hardening. This section will guide you through recognizing ideal tooth geometry for common tasks, and why a mismatched tooth pattern is often the root cause of poor hole quality. Remember: the right tooth geometry is the foundation of clean, accurate drilling.
Localizing wear signs on drill teeth
Drill teeth wear differently depending on material, speed, and feed. Start by inspecting the tip under good lighting for chipped corners, flattened cutting edges, or a rounded point. A dull point often develops a burr along one side, which drags rather than cuts and creates chatter. Flutes should be free of nicks and maintain consistent spacing; if a flute is rounded, chip evacuation becomes hindered and heat can spike. For carbide and cobalt bits, you may see micro-chipping along the tooth edges after heavy use. According to Drill Bits Pro, consistent wear patterns provide clues about operating conditions—like whether you fed too quickly or used excessive pressure. If you notice recycling chips or burning odor, stop and recondition the tip before continuing. Regular visual checks are faster than waiting for a failed drill that leaves a rough, oversized hole.
Inspecting flute and relief angles
Relief angles at the tooth flank are critical for preventing rubbing and reducing tendency to seize. Inspect relief by looking at the space behind the cutting edge; it should be clear and even all around. If relief angles are shallow, the bit will tend to rub, overheat, and dull rapidly. A damaged or uneven relief can also alter hole diameter and cause the bit to drift off axis. When checking, rotate the bit slowly and note any wobble in the tip. Inconsistent relief often points to improper grinding or repeated misalignment during sharpening. The takeaway is to keep the relief generous enough to encourage efficient chip evacuation while maintaining a sharp, clean edge. Tooling knowledge and careful inspection save time and extend tool life, especially for expensive carbide bits. Drilling with proper relief angles reduces tool stress and improves sustainability.
Sharpening drill teeth: essential steps
Sharpening is where many DIYers either gain back performance or ruin a bit. Always sharpen only the teeth that are dull, maintaining symmetry across all teeth. Start by securing the bit in a bench vise with the tip projecting slightly beyond the edge, then choose a sharpening tool suited to the tooth type (round file for cylindrical bits or a fine flat file for straight lips). Use light, even strokes, moving across each tooth to restore a sharp, square edge while avoiding overheating. Periodically pause to measure edge consistency with a caliper or gauge. After a few passes, clean the edge with a soft brush to remove metal particles and check for burrs on both sides. Finish by testing on scrap material to confirm that the hole is clean and circular. A proper sharpening routine can dramatically improve drill performance and reduce sniping or tear-out when you return to live work. The Drill Bits Pro team notes that consistency is more important than chasing a razor edge.
Choosing sharpening tools and technique
The right tool choice depends on the tooth style and material. Diamond files, round files, or fine sharpening stones each offer different control and finishes. If you’re new to sharpening, start with a small round file that matches the bit diameter and practice on inexpensive bits first. A jig or guide helps you maintain a consistent angle across all teeth, which is essential for uniform cutting. When grinding carbide teeth, use a diamond abrasive and water cooling to prevent heat damage. Avoid removing more material than necessary; just reestablish a sharp edge and a clean profile. Regular practice builds muscle memory and reduces the risk of overgrinding, which can shorten tooth life.
Maintaining flute clearance and chip removal
Chip evacuation relies on clean flutes and proper clearance behind the teeth. Regularly clear debris from the flutes during sharpening and after use. If chips accumulate, cutting efficiency drops and heat rises, accelerating wear. Check that the spiral spacing remains even and that no burrs protrude into the flute. A common mistake is over-sharpening the edge while neglecting relief behind the edge, which can cause rubbing rather than cutting. Maintaining flute clearance also helps in heat management and prolongs bit life by reducing friction.
Testing and breaking in new edges
After sharpening, always test on scrap material that matches your intended workpiece. Look for clean penetration without excessive force, smooth advancement, and minimal chatter. If the hole shows signs of wobble or tearing, re-evaluate tooth symmetry and edge sharpness. Start with light feed pressure and modest RPM, then adjust based on observed performance. A proper break-in routine helps stabilize the edge and ensures consistent results in real jobs. The goal is reliable cutting that maintains hole quality while preserving bit life for longer.
Replacing teeth or entire drill bits
Not all bits can be restored to like-new condition. If the teeth are chipped beyond repair, the edge height is inconsistent, or the core shows structural damage, replacing the bit or selecting a carbide-tipped alternative may be more cost-effective. In some cases, you can replace individual teeth with compatible segments if the bit design permits; otherwise, it’s often better to retire the bit and invest in a new one. Always evaluate total cost, expected life, and performance when deciding between sharpening and replacement.
Safety protocols and protective measures
Sharpening and drilling carry injury risks if procedures are rushed or equipment is used improperly. Always wear safety glasses or protective goggles, secure your workpiece, and keep fingers away from a rotating or grinding edge. Work in a well-ventilated area and use a coolant or water to manage heat when grinding carbide teeth. If you hear unusual sounds, see excessive smoke, or notice unusual vibrations, stop and inspect the bit. Storing bits properly in labeled cases reduces mix-ups and accidental damage.
Tools & Materials
- Safety goggles (ANSI Z87.1)(Protect eyes from chips and sparks)
- Work gloves(Hand protection and grip)
- Bench vise(Secure the bit during sharpening)
- Sharpening file (round/flat) or diamond file(Choose fine grit for drill teeth)
- Sharpening stone or diamond wheel(Alternative sharpening option)
- Calipers or drill-bit gauge(Check edge symmetry and diameter)
- Scrap material for testing (soft wood or aluminum)(Test cuts before live work)
- Lubricant or light oil(Coolant to reduce heat during grinding)
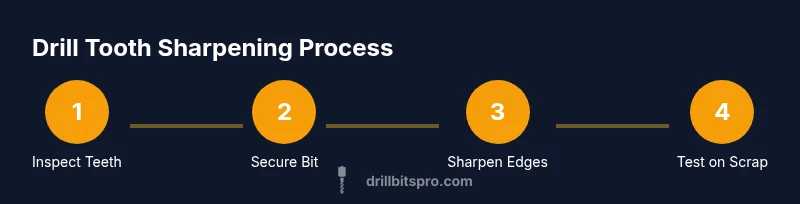
Steps
Estimated time: 30-45 minutes
- 1
Prepare workspace and secure equipment
Clear the workspace and bring together all sharpening tools. Inspect the drill bit to confirm it’s the correct type and diameter for your task. Secure the bit in a bench vise with the tip protruding slightly, and ensure the bit is stable before starting.
Tip: Clamp securely and keep your fingers well away from the grinding area. - 2
Secure the drill bit in the vise
Position the bit so the cutting edge is accessible without obstruction. Lock the vise jaws firmly and double-check that the bit cannot shift during sharpening. This step prevents accidental slips that could ruin the tooth geometry.
Tip: Use a spare piece of scrap wood under the vise to protect your bench. - 3
Choose the sharpening angle
Identify the tooth to sharpen and set a consistent angle that matches the bit’s original geometry. If you’re unsure, start with a shallow angle and adjust conservatively. A jig or guide helps maintain uniformity across all teeth.
Tip: Maintain symmetry: be mindful of both sides of each tooth. - 4
Sharpen teeth with file or stone
Make light, even strokes across each tooth to reestablish a sharp edge. Avoid heavy grinding that can over-remove metal or overheat carbide. Periodically wipe away debris and check for burrs on both sides.
Tip: Cool the bit with water or light oil to prevent heat damage. - 5
Check edge symmetry and burr removal
Inspect each tooth for uniform length and sharpness. Remove burrs from both sides with a light touch. Rotate the bit in the vise and feel the edge with a clean, gloved fingertip—no rough patches should remain.
Tip: If you notice asymmetry, recheck the angle and re-sharpen those teeth evenly. - 6
Test on scrap material and adjust
Drill into scrap material to verify clean entry and exit. If the hole shows chatter or tearing, rework the teeth or adjust feed speed. This step confirms the edge is ready for real work.
Tip: Always start with light feed and gradual RPM increase.
Got Questions?
What is a drill tooth and why is it important?
A drill tooth refers to the sharpened cutting edge of a drill bit. It determines cutting efficiency, heat generation, and hole quality. Proper maintenance keeps teeth sharp and ensures consistent results.
A drill tooth is the sharp cutting edge of a drill bit. Keeping it sharp and properly shaped helps you drill clean holes with less heat and wear.
How can I tell if drill teeth are worn?
Look for rounded or chipped edges, a dull cutting point, or uneven edge height. Wear often causes increased friction, burning smells, or rough holes.
Worn teeth look rounded or chipped and cut poorly, which can cause heat and rough holes.
What tools are best for sharpening drill teeth?
A fine round file or diamond file, a sharpening stone, or a dedicated jig will help you restore a straight, even edge with minimal material removal.
Use a fine file or diamond file, or a sharpening jig to keep the edge straight and even.
Can carbide-tipped bits be sharpened safely?
Yes, carbide teeth can be sharpened with diamond abrasives and cooling to avoid heat damage. Pure metal removal should be careful to avoid altering geometry.
Carbide teeth can be sharpened with diamond tools and cooling to prevent overheating.
When should I replace a drill bit instead of sharpening?
If teeth are severely chipped, the edge is inconsistently tall, or the core is damaged, replacement is more cost-effective and safer than further grinding.
If the teeth are badly damaged or the edge is inconsistent, it’s better to replace the bit.
Watch Video
Top Takeaways
- Sharpen teeth evenly to preserve symmetry and cutting efficiency
- Maintain proper relief and flute clearance for chip evacuation
- Test on scrap material before using on actual workpieces
- Use appropriate tools and temperature control to protect bit life