How to Make Drill Kit DayZ: A Practical Guide
Learn how to build a compact drill kit DayZ-style survival setup with practical tools, safety practices, and a step-by-step plan designed for DIYers and professionals.

By the end of this guide, you will know how to make drill kit dayz for reliable field use. You’ll identify essential tools, safety steps, and compact organization tactics to keep your kit ready in any dayz scenario. Follow the step-by-step process to assemble, test, and maintain your kit for real-world survival.
What this DayZ drill kit guide covers
In this DayZ-focused guide, we explore how to make drill kit dayz, a compact, field-ready setup that supports a range of in-game and real-world drilling tasks. According to Drill Bits Pro, a well-designed kit balances portability, durability, and versatility, ensuring you can handle quick repairs or improvised builds in harsh environments. You’ll learn why a modular approach matters, and how to tailor the contents to your typical DayZ scenarios. The first step is understanding your objectives: what materials you’ll drill, how often you’ll need to drill, and where you’ll carry the kit. With that clarity, you’ll select tools that cover the majority of tasks while keeping weight to a minimum. This guide provides practical, step-by-step guidance and real-world tips to help you assemble, test, and maintain your drill kit for reliable performance in 2026 and beyond.
Core design principles for your drill kit DayZ
A good drill kit for DayZ lives on three pillars: portability, modularity, and reliability. Portability means a compact case or pouch that fits in your backpack or loot crate, with quick-access compartments. Modularity lets you swap in specialized bits or accessories without reworking the entire kit. Reliability focuses on using well-maintained tools, protected batteries, and robust fasteners that survive rough handling. In DayZ, you’ll often work in low-light, wet, or dusty conditions, so choose enclosures that seal against moisture and have clear labeling. By embracing these principles, you create a kit you can actually carry, deploy, and trust when time is critical. Drill Bits Pro’s observations indicate that a thoughtful layout reduces wasted minutes in the field and lowers the risk of lost components during rapid scavenging.
Selecting tools and bits for DayZ scenarios
Begin with a core set: a compact cordless drill, a small assortment of drill bits (wood, metal, and masonry), and a driver bit set. Add safety gear (safety glasses and gloves) and a scraper or utility knife for trimming material. For DayZ scenarios, you may encounter wooden pallets, metal gates, or improvised brackets; plan for bits in common sizes and keep spare batteries charged. The goal is to cover the majority of tasks with a minimum number of items, while preserving space with stackable organizers and clear labeling. These choices reflect practical, field-tested ergonomics that reduce fatigue and increase precision. Drill Bits Pro notes that sharp bits cut cleanly and preserve tool life, an important consideration when supply lines are uncertain in 2026.
Field safety and maintenance: keep your kit ready
Safety begins with the basics: safety glasses, gloves, and a dust mask when grinding or drilling. Protect batteries from moisture and temperature extremes, and store them in a dedicated pouch with a simple charging schedule. Clean tools after use to prevent rust, and lubricate moving parts sparingly to extend life. In the field, use a dry, organized case with clearly labeled compartments to avoid fumbling during critical moments. Regular inspection and minimal maintenance can dramatically improve your DayZ drill kit’s reliability over time, ensuring you’re not caught without the right bit or the necessary battery power.
Real-world DayZ task examples and how your kit handles them
Consider tasks like drilling through wooden crates to create ventilation, or enlarging metal brackets to adapt improvised structures. Your drill kit should enable quick setup, stable drilling, and clean exits after rejection of the bit. In each scenario, selecting the right bit type and size is crucial to avoid wobble or bit breakage. Plan for worst-case angles and limited lighting by using guides or clamps to steady your work. By rehearsing a few common DayZ tasks in a controlled environment, you’ll identify gaps and add targeted items to your kit, building confidence for real-world field work in 2026 and beyond.
Testing, refining, and extending your kit over time
A robust drill kit isn’t static. Regular testing under varied conditions—cold, heat, moisture, and dust—helps identify weak links. Create a simple test routine: drill a sample material, change bits, swap batteries, and log any issues. Use the results to update your kit layout, switch to higher-quality bits if needed, or add a couple of extra screws, anchors, or clamps. Documentation is essential: maintain a short inventory log, note performance trends, and refresh consumables before you head into the field again. A living kit that evolves with your tasks saves time and improves outcomes in real-world DayZ survival scenarios.
Tools & Materials
- Cordless drill (compact)(20-volt class; ensure a spare battery)
- Assorted drill bits set(Include wood, metal, and masonry bits)
- Driver bit set(Phillips and flathead sizes)
- Screwdriver set(Phillips and flathead)
- Pliers and adjustable wrench(For gripping and torque)
- Safety glasses(ANSI Z87+ compliant)
- Work gloves(Dexterous and cut-resistant)
- Measuring tape(At least 5 meters)
- Marker and utility knife(For marking and trimming)
- Electrical tape(Insulation and bundling)
- Compact carrying pouch or small case(Dedicated compartments)
- Battery charger with extra battery(Keep spare charged)
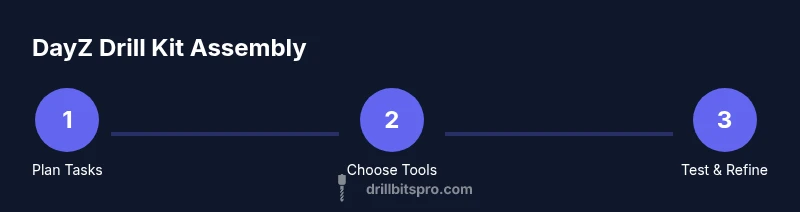
Steps
Estimated time: 60-90 minutes
- 1
Define DayZ tasks
List typical drilling tasks you expect in DayZ scenarios and estimate frequency. Prioritize tasks that require minimal reconfiguration.
Tip: Write tasks on a card and sort by effort required. - 2
Choose essential tools
Select tools that cover the majority of tasks with room to spare for improvisation.
Tip: Opt for a compact drill with a balance of torque and speed. - 3
Check battery readiness
Charge extra batteries and test the charger to ensure power availability in the field.
Tip: Label batteries by last charge date to avoid surprises. - 4
Organize the pouch
Arrange items in clearly labeled compartments to minimize search time during tasks.
Tip: Keep frequently used items at the top or front. - 5
Prepare protective gear
Ensure safe handling: glasses, gloves, and a mask as appropriate for the task.
Tip: Inspect PPE for wear and tear before use. - 6
Test with scrap material
Practice drilling on scrap wood or metal to verify bit sharpness and drill stability.
Tip: Stop if the drill overheats or the bit binds. - 7
Run a field drill
Simulate real conditions with limited lighting and uneven surfaces to evaluate setup.
Tip: Observe balance and control; adjust grip if needed. - 8
Document and refine
Record what worked and what didn’t; iterate on layout and contents accordingly.
Tip: Keep an updated inventory log for quick restock.
Got Questions?
What is the DayZ drill kit, and why would I build one?
A DayZ drill kit is a compact collection of drills, bits, and safety tools tailored for field tasks in DayZ-inspired survival contexts. Building one helps ensure you can handle common drilling tasks quickly and safely, even under challenging conditions.
A DayZ drill kit is a compact, field-ready set of drills and safety tools to handle common tasks in survival scenarios.
Do I need a specialized drill for DayZ tasks?
No special drill is required; the focus is on a compact, reliable drill with a versatile bit set. Choose a model with balanced torque and a spare battery to cover typical tasks.
You don’t need a special drill; a compact, reliable unit with extra battery works well.
What safety gear should I pack with my kit?
Pack standard PPE: safety glasses, gloves, and a dust mask when needed. Consider hearing protection for longer tasks and a first-aid item in case of minor injuries.
Always include safety glasses and gloves, plus a mask if you’ll be grinding or drilling in dusty environments.
How do I test the kit before field use?
Test the drill with scrap material to verify bit seating and performance. Check battery charge and ensure all bits are properly secured before leaving the workshop.
Test on scrap material first, then check batteries and secure bits.
Can I customize the kit for different tasks?
Yes. Start with a core set and add specialty bits or accessories based on your most frequent tasks. Keep changes modular to preserve overall portability.
Absolutely. Start with a core set and add specialty bits as needed.
Where can I learn more about drill maintenance?
Refer to basic tool maintenance guidelines from reputable sources and apply simple routines like cleaning, lubrication, and battery care to extend tool life.
Look up basic maintenance guidelines and follow simple routines to keep tools in good shape.
Watch Video
Top Takeaways
- Plan tasks before packing to optimize kit content
- Maintain a compact, modular layout for speed
- Test and refine the kit regularly to adapt to tasks
- Prioritize safety gear and battery management