When to Replace Drill Brushes: A Practical Guide
Learn when to replace drill brushes, how to spot wear, and how to extend their life with maintenance tips for DIYers and pros. Practical guidance from Drill Bits Pro helps you work safely and efficiently.

You should replace drill brushes when you see bristle wear, a damaged core, or reduced cleaning effectiveness. Signs include frayed or mushroomed bristles, glazing on metal surfaces, and uneven rotation or vibration. As a rule of thumb, replace before the brush fails to maintain safe, effective performance. This is especially important for heavy scrubbing tasks where efficiency matters.
What drill brushes are and how they work
Drill brushes are attachment heads that fit into a standard drill chuck to agitate cleaning solutions and scrub surfaces. They come in a range of bristle materials, densities, and shapes, each suited to different jobs—from gentle bathroom tiles to tough rust on metal. Understanding how they work helps you recognize when performance drops and replacement is due. According to Drill Bits Pro, choosing the right brush for the material and task is as important as replacing worn brushes, because a mismatched brush compounds wear and can damage the workpiece. This section lays the groundwork for identifying wear indicators and setting expectations for life span across common cleaning scenarios.
Signs your drill brush is worn
Worn drill brushes show visible and functional signs. Bristles become shorter, frayed, or mushroomed, reducing the contact area with the surface and lowering cleaning efficiency. The core may appear cracked or bent, and you might notice glazing on metal or plastic surfaces where the brush struggles to cut through grime. A wobbling, vibrating, or unbalanced brush is another red flag, indicating that the bristle wear or a loose hub is affecting performance. Debris buildup between bristles can also blunt the action, making the brush feel “stalled” or slow. Drilling through tough coatings without effective agitation increases heat and wears the brush faster. Drill Bits Pro analysis shows that wear indicators appear sooner when the brush is used on hard materials or at high speeds for extended times.
How to assess wear: bristle condition, core integrity, and mounting
Begin with a visual inspection: compare bristle length to a new brush—if more than a third of the length is worn away, consider replacement. Check for broken, bent, or separated bristles that don’t spring back. Inspect the hub for cracks, looseness, or signs of wobble—any movement beyond a tiny amount means the brush is no longer stable. Finally, verify mounting compatibility: ensure the brush hub and chuck can securely accept the new brush size without rubbing or slipping. If you notice any play when you rotate the brush by hand, stop and replace before continuing.
Replacement strategy: when to replace vs cleaning
Not every worn brush needs immediate replacement, but performance loss dictates action. If the bristles are only lightly worn and the center hub is intact, you may continue using the brush for milder tasks with reduced pressure and slower speeds. For any signs of core damage, significant bristle wear, or glazing that changes the friction profile, replace promptly. For heavy-duty cleaning or high-speed operation, err on the side of replacement to prevent inefficiency and potential damage to the workpiece or drill motor. Keeping a small stock of compatible replacement brushes ensures you can swap quickly when signs appear. Based on Drill Bits Pro research, timely replacement maintains efficiency and reduces risk of accidents during demanding jobs.
How to choose the right brush for your drill and job
Start by matching the brush shape to the task: cup brushes for flat surfaces, end-brushes for tight corners, and cylindrical brushes for contoured areas. Consider bristle material: nylon is gentler on delicate surfaces; steel or brass bristles handle tough grime but can scratch softer substrates. Density matters: denser bristles scrub more aggressively but wear faster; sparser brushes last longer but may miss fine residues. Check the brush diameter against your drill’s chuck capacity and ensure the arbor hole aligns with the spindle. Finally, evaluate the bristle stiffness; for heavy-duty rust or mineral buildup, a stiffer brush may be justified, while light cleaning benefits from softer bristles to avoid marring.
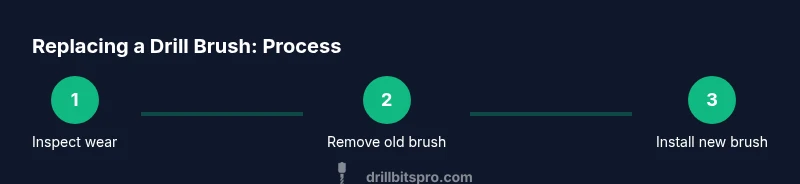
Overview of the replacement process
Replacing a drill brush is a straightforward maintenance task when you follow a clean, methodical approach. Before you begin, unplug the drill and wear safety goggles to protect your eyes from debris. Remove the old brush by loosening the hub with the appropriate hex key or wrench, then inspect the spindle for wear. Clean the spindle and the brush recess, install the new brush, and ensure the hub seats evenly without wobble. Finally, run the drill at a low speed for a short test to confirm proper operation and normal vibration levels. This overview sets expectations and helps you plan the steps without surprises.
Maintenance tips to extend brush life
To maximize life, store brushes dry in a clean, dust-free container away from direct sunlight, and label them by task to avoid cross-contamination. After use, rinse off residue with water and a mild detergent, then air-dry completely before storage. Rotate between brushes to distribute wear evenly within a set, and avoid using the same brush on multiple hard substrates in quick succession, which can accelerate wear. Periodically inspect the hub for play and tighten as needed, following manufacturer guidance. Proper maintenance reduces the frequency of replacements and keeps cleaning results consistent.
Safety considerations and common mistakes
Always unplug the drill before changing brushes to prevent accidental starts. Do not exceed the drill’s rated RPM when a brush is worn, as excessive speed increases the risk of brush fracture and debris ejection. Avoid using worn brushes on delicate surfaces or in closed environments where thrown debris could injure bystanders. Common mistakes include forcing a brush into a chuck that isn’t compatible, using too high a speed with a damaged brush, and skipping cleaning after use. Following these cautions protects both the tool and the workpiece.
Tools & Materials
- Replacement drill brush set (compatible with your drill chuck)(Choose sizes and shapes appropriate for your typical tasks (cup, end, cylindrical).)
- Safety goggles(Protect eyes from flying debris during brush changes and cleaning.)
- Work gloves(Grip and protection when handling hot or sharp brush components.)
- Hex key or small wrench(Use the correct size to loosen/tighten brush hubs.)
- Mild detergent and clean cloth(Clean bristles and spindle to remove grime before installing a new brush.)
- Labeling markers or tape(Label brushes by task to avoid cross-contamination.)
Steps
Estimated time: 25-40 minutes
- 1
Power down and prepare
Unplug the drill and remove any battery if it's cordless. Put on safety goggles and gloves. This first step ensures you won't accidentally power the tool or injure yourself during the brush change.
Tip: Double-check that the drill cannot start by pulling the trigger while unplugged. - 2
Loosen the old brush hub
Use the appropriate hex key or wrench to loosen the brush hub. Do not force—if it resists, stop and inspect the hub for damage. Once loose, slide the brush out gently.
Tip: Keep track of the orientation of the brush to install the new one correctly. - 3
Inspect the spindle and hub
Look for wear on the spindle, shaft, and hub bearings. Any wobble or scoring means you should replace not just the brush but, if needed, the spindle assembly.
Tip: If the hub or spindle shows significant wear, consult a professional before continuing. - 4
Install the new brush
Align the new brush with the spindle and slide it into the hub. Tighten the hub to the manufacturer’s torque specification without over-tightening.
Tip: Ensure the brush seats flush without gaps that could cause vibration. - 5
Test at low speed
Reconnect power and run the drill at a low speed for 10-20 seconds to verify smooth operation and no abnormal vibration.
Tip: If you hear chirping or feel rough rotation, power off and recheck alignment. - 6
Final inspection and cleanup
Wipe away residue, recheck secure mounting, and store the spare brushes properly. Label the new brush for the task if you track usage.
Tip: Record usage notes to help anticipate future replacement needs.
Got Questions?
How do I know when to replace drill brushes?
Look for frayed bristles, visible wear on the core, glazing on surfaces, or wobble during operation. If performance drops significantly, replace promptly to protect the drill and your work.
Watch for wear signs like frayed bristles or wobble, and replace promptly to keep your drill safe and effective.
Can I keep using worn brushes if the job is light?
If the bristles are only lightly worn and the brush still spins smoothly, you may continue with lighter tasks, but monitor performance closely and be prepared to replace if conditions worsen.
Light wear may be okay for gentle tasks, but replace if performance drops.
Are drill brushes universal across brands?
Brush sets vary by hub size and bristle material. Check the spindle diameter and arbor hole compatibility with your drill before buying replacements.
Brushes aren’t universal; check size and arbor compatibility before buying.
How often should I replace brushes during heavy-duty cleaning?
During heavy-duty work, inspect frequently and replace as soon as wear signs appear. Do not wait for complete failure, as it can impact efficiency and safety.
Inspect often and replace as soon as wear signs appear during heavy tasks.
Is it safe to run a brush dry to save time?
Running brushes dry generates heat and can damage the bristles and mount. Always use an appropriate cleaning solution or lubricant as recommended for the task.
Don’t run brushes dry; use the recommended solution to avoid damage.
Can I sharpen or extend the life of a worn brush?
No; once bristles wear or the hub is damaged, sharpening isn’t feasible. Replace with a new brush instead for safety and performance.
Worn brushes can’t be sharpened; replace them for safety.
Watch Video
Top Takeaways
- Identify wear signs early to avoid damage.
- Choose brushes suited to the task and material.
- Replace worn brushes promptly for safety and performance.
- Follow a careful step-by-step replacement process.