Why is My Drill Smoking? Quick Troubleshooting Guide
Facing smoke from a drill? This practical, AI-assisted guide from Drill Bits Pro helps you identify overheating causes, perform safe checks, and decide when to repair or replace.

Why is my drill smoking? The most likely reason is overheating due to heavy load, a stalled motor, or worn brushes and bearings. Stop using the drill, unplug it, and let it cool. Check for visible damage, dust buildup, or blocked vents; if smoke returns, don’t use it and consult a professional or replace the tool.
Why is my drill smoking? Immediate causes and what’s happening
Why is my drill smoking? According to Drill Bits Pro, the most common cause is overheating from prolonged use, heavy loads, or seized components. In DIY projects, extended drilling without breaks, using high-torque settings, or drilling into hard materials can push a drill motor beyond its safe operating temperature. When air vents are blocked by dust, metal shavings, or a clogged chuck, convection cooling is impaired, letting heat build up quickly. Worn brushes or bearings inside the motor can also increase friction and current draw, producing smoke or a burning smell. Additional culprits include a binding chuck, a short in the switch or windings, or using incompatible bits that bind before the drill’s motor can recover. If you see smoke, stop immediately, unplug, and let the tool rest. This guide covers hands-on checks and safe fixes to get you back to work without risking injury or further damage.
Quick Checks: safety first and easy wins
Before you dive into deeper diagnostics, perform a few quick, safe checks:
- Unplug the drill and allow it to cool completely.
- Inspect the ventilation openings for dust or debris and clear them with a soft brush or compressed air if available.
- Look for obvious signs of damage, melted plastic, or burnt smell near the motor housing.
- Check the chuck and bit for binding or excessive wobble, which can increase load on the motor.
- Ensure you’re using the correct bit for the material and that you’re not forcing the drill beyond its rating.
- If the smell is chemical or the smoke is heavy, treat it as a possible electrical hazard and seek professional help immediately.
Diagnostic Flow: symptom-to-solution quickly
This section helps map symptoms to likely causes and fixes. Start with the simplest checks and move to targeted tests:
- Symptom: smoke or burning smell during operation.
- Likely cause: overheating from heavy load or blocked vents (high likelihood).
- Quick fix: cool and clean, test with no-load drilling on a scrap piece.
- If smoke recurs, examine brushes, bearings, and wiring for wear or damage (seek service if needed).
- If the motor heats rapidly after a short period, the drive train or windings may be the issue (consider replacement or professional service).
Step-by-Step Fixes for the most common cause: overheating
- Safety lockout: unplug the drill from its power source and set it on a non-flammable surface to cool for at least 15 minutes. 2) Inspect vents and remove dust: use a soft brush or compressed air to clear the intake and exhaust paths. 3) Check the bit and chuck: ensure the bit is sharp, properly seated, and not binding; replace if necessary to reduce load. 4) Inspect brushes and bearings: if accessible, remove the end cap and check for uneven wear or sparking; replace worn brushes or faulty bearings. 5) Light-load test: reassemble and run under light load on scrap material to observe heat generation. 6) Decide on service: if smoke reappears quickly, the motor windings or switch may be failing; seek professional repair or replacement.
Prevention: how to avoid future overheating and smoke
To minimize the risk of overheating and smoke in the future, follow these practical habits:
- Use shorter drilling intervals with rests to let the motor cool.
- Use the correct speed and apply steady, even pressure instead of forcing the drill.
- Regularly clean dust and debris from vents and the chuck area.
- Maintain brushes and bearings by following the manufacturer’s service intervals.
- Store tools in a dry, cool place to prevent moisture-related electrical issues.
- Invest in a dedicated cooling break or fan for extended tasks and consider a drill rated for higher duty cycles.
Drill Bits Pro’s guidance emphasizes proactive maintenance and proper technique to extend tool life and reduce safety risks.
Safety notes and when to seek help
Smoke is a warning sign. If you notice burning plastic, melted insulation, or see visible arcing or a strong electrical burn odor, stop immediately, unplug, and do not continue to use the tool. Do not attempt DIY electrical repairs beyond basic inspection—motor windings and switches carry real shock hazards. If the exterior is intact but heat rises quickly during light use, the tool may require professional assessment or motor replacement. Personal protective equipment (PPE) such as safety glasses, gloves, and a dust mask should be worn whenever inspecting a potentially hazardous tool.
Additional scenarios: dust, wiring, and component wear
Dust buildup, damaged wiring, or worn internals can all contribute to smoke generation. In dusty environments, ensure that ventilation paths remain clear and consider periodic cleaning. Worn brushes cause arcing and overheating; if you notice sparking inside the housing, replace the brushes promptly. Wiring insulation damage can short and overheat; if you see melted insulation or discoloration, stop using the tool and consult a professional. Debris in the chuck or gearbox can also impede operation, increasing load and heat. Regular maintenance and mindful operation are key to preventing recurring issues.
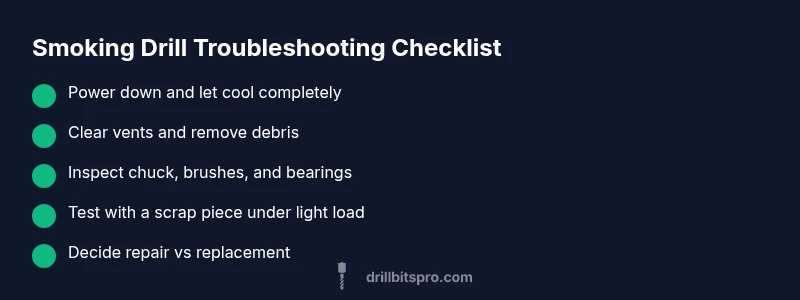
Steps
Estimated time: 30-45 minutes
- 1
Power down and cool down
Unplug the drill and place it on a non-flammable surface. Allow at least 15 minutes for cooling before handling. This reduces immediate injury risk and prevents further damage.
Tip: If the tool is hot to touch, use heat-resistant gloves to handle for a quick outside inspection. - 2
Inspect vents and exterior
Look for dust buildup near intake or exhaust vents. Use a soft brush or compressed air to remove debris. A clear path improves cooling and lowers heat generation.
Tip: Do not use high-pressure air if you’re unsure about vent integrity; a gentle puff works best. - 3
Check chuck and bit fit
Remove the bit and inspect the chuck for looseness or binding. Ensure the bit is sharp, properly seated, and appropriate for the material. A binding bit increases motor load and heat.
Tip: Test with a scrap piece first to prevent sudden binding during proper operation. - 4
Assess brushes and bearings accessibly
If your model provides access, inspect brushes for wear. Worn brushes or rough bearings can cause overheating and sparking. Replace as needed or seek professional service.
Tip: Only replace brushes with the same type and specification; incorrect parts can cause further damage. - 5
Perform a light-load test
Reassemble the drill and run under light load on scrap material to observe heat and any renewed smoke. If heat persists, it’s a sign to stop and seek service.
Tip: Keep your hands away from the chuck area during testing. - 6
Decide on repair vs replacement
If smoke returns quickly or internal components show signs of wear, motor windings may be compromised. In many cases, replacement is safer and more economical than extensive repair.
Tip: Consult a professional for a precise quote before committing to a major repair.
Diagnosis: During operation, the drill emits smoke or a burning smell
Possible Causes
- highOverheating from prolonged use or heavy load
- highWorn brushes or bearings causing friction and higher current draw
- mediumElectrical short in motor windings or switch
- lowJammed chuck or debris causing binding
Fixes
- easyLet the tool cool completely and unplug before inspection
- easyClean vents and remove dust; inspect brushes and bearings if accessible
- hardInspect switch and wiring for damage; replace the motor or have it serviced
- easyRemove debris from the chuck and test under light load
Got Questions?
What are the most common causes of a smoking drill?
The most common causes are overheating from heavy use, blocked vents, and worn brushes or bearings. Electrical faults and debris can also contribute. Addressing these areas often resolves the issue.
Common causes are overheating, blocked vents, and worn brushes. Check these areas first.
Is it safe to continue using a smoking drill?
No. Stop and unplug immediately. Continuing to use a smoking drill risks electrical shock, fire, and further motor damage.
No. Stop and unplug immediately and avoid using it until inspected.
How can I prevent overheating in the future?
Use appropriate duty cycles, match the bit to the material, and periodically clean vents. Allow breaks to cool and perform regular maintenance on brushes and bearings.
Use the right bit, avoid overloading, and clean vents regularly.
When should I replace vs repair the drill?
If the motor windings are damaged or repair costs approach the price of a new drill, replacement is safer and more economical. A professional assessment helps confirm the best path.
If windings are damaged or repair costs are high, replacement is recommended.
Can dust cause smoking?
Yes. Dust and debris can clog cooling vents and insulation, causing overheating and smoke. Regular cleaning minimizes this risk.
Dust can cause overheating and smoke by clogging vents.
What safety gear should I use when troubleshooting?
Wear safety glasses, gloves, and a dust mask. Work in a well-ventilated area and keep a fire extinguisher nearby for old tools.
Put on safety glasses, gloves, and a mask; work safely.
Watch Video
Top Takeaways
- Stop the drill immediately when you see smoke
- Cool, inspect, and clean vents before testing
- Check brushes, bearings, and windings with care
- Decide between repair or replacement based on damage