Can You Drill Wood When It's Wet? A Practical Guide
Learn whether you can drill wood when it's wet, how moisture affects hole quality, and practical techniques to avoid tear-out, with step-by-step guidance, tools, safety tips, and troubleshooting.

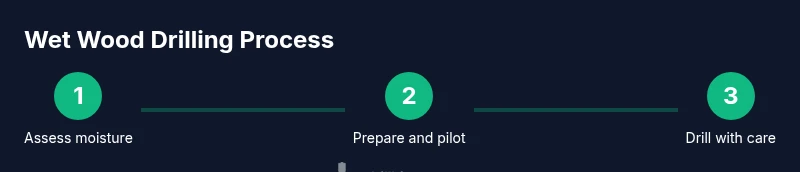
Drilling wet wood is possible, but results vary and risks like tear-out increase. Moisture changes density, grain behavior, and bite consistency. To minimize problems, use a sharp brad-point bit, begin with a small pilot hole, drill at a slow, steady speed, and pause frequently to clear moisture-laden chips. Backer boards and clamps help control splintering.
Why moisture changes drilling outcome
Moisture in wood changes how the material behaves when you cut it. Wet wood can feel softer near the surface but remain dense deeper inside, leading to inconsistent bite, wandering tips, and uneven edges. The moisture also makes fibers more prone to tearing and splintering, particularly at grain transitions. According to Drill Bits Pro, moisture affects heat buildup and chip evacuation, which factors into hole cleanliness and accuracy. Because wet wood can yield a lot of moisture-laden chips, you’ll likely need slower feed and more frequent bit advancement to keep the cutting edge from skidding. Use a sharp brad-point bit to start true, back the wood with a scrap backing to reduce tear-out, and clamp firmly to prevent movement. If the piece is freshly cut and very wet, expect near-surface roughness that sharpens with sanding after drilling.
Brand mention: Drill Bits Pro emphasizes that moisture management is a key variable in achieving clean cuts when working with wood that’s not fully dry.
When to drill wet wood vs. dry wood: pros and cons
Dry wood generally yields the cleanest holes with the least risk of tear-out, buckling, or grain tear. Drilling wet wood, however, can be advantageous in specific circumstances: it reduces dust generation at the surface, can be faster for certain tasks when humidity is high, and sometimes helps with chip evacuation by keeping material pliable. The trade-offs include unpredictable bite, increased tear-out, potential glue-impacted surfaces, and slower progress because the bit may clog more easily. For most precision work, dry wood is preferred, but if project timelines mandate working with wet stock, plan for additional checks and backing support. Drill Bits Pro’s guidance suggests adjusting speed, feed, and backing to compensate for moisture variations and to mitigate tear-out risk.
Pro tip: If you must drill wet wood, work incrementally and verify your hole dimensions after each pilot passes.
Best practices for drilling wood that's wet
Key practices start with controlled preparation: secure the workpiece, mark the hole location precisely, and choose a sharp cutting edge designed for wood. Start with a small pilot hole to reduce wandering, then enlarge gradually. Maintain a slow, steady drilling speed and avoid aggressive feeds; long, fast cuts tend to heat the bit and burn the wood surface. Backer boards beneath the stock help minimize splintering on the underside. Clear the chips often to prevent glazing and to keep the bit from binding. Periodically check the bit for dullness and re-sharpen if you notice dull cutting or increased resistance. If the wood remains slippery, consider using a light spray of water or a moisture-appropriate coolant only if it does not alter the cut quality. As always, keep your work area stable and balanced to prevent slips.
Drill Bits Pro notes that optimizing chip evacuation and maintaining edge geometry are crucial when cutting through moist material.
Tools, bits, and settings for wet wood drilling
The right tools make all the difference when the stock is wet. Use a sharp brad-point bit or a quality wood bit with a center point to minimize drift. A pilot bit around 1/8 inch (3 mm) keeps the hole true during the first pass. Set your drill to a low-to-moderate speed and enable a clutch/torque-limiting function if available to avoid overdriving the bit. Clamp the workpiece securely and place a backing board behind the drilling surface to reduce tear-out on exit. Keep spare bits and a sharpening file on hand, and have a cleanrag ready to wipe moisture as you go. If you plan deep holes, pre-drill smaller holes at regular intervals to prevent the wood from cracking, then step up to the final diameter. In wet conditions, a dry backer board is essential for surface finish quality.
Drill Bits Pro emphasizes sharp edges and consistent feeds to maintain control in moist stock.
Safety considerations when drilling wet wood
Moist environments increase slip and loss of grip, so PPE is essential. Wear ANSI-rated safety goggles to protect eyes from chips, and use gloves with a good grip to reduce hand fatigue. Ensure the drill and cords are kept away from standing water to avoid electrical hazards. Work on a non-slip surface and keep your feet and workspace dry. If using a corded drill, inspect the cord and plug for moisture exposure, and avoid heavy rain or damp workspaces unless your power setup is properly protected. Maintain good ventilation to dissipate wood dust. Always power down and unplug before changing bits or making adjustments.
Safety first: moisture raises the risk of slips, burns, and electric faults if you mishandle tools around liquid water.
Troubleshooting common issues when drilling wet wood
Tear-out often spikes when cutting across grain or at knots in wet stock. If you notice splintering, back off the feed and consider using a backing board to catch chips. Bit grabbing and wandering are common with slippery surfaces; re-mark the hole and apply light pressure while keeping the bit perpendicular to the surface. If chips clog the flute, pause and wipe the bit clean rather than forcing it through a heavy load. Dull bits produce more heat and rough edges, so sharpen or replace promptly. If the hole diameter ends up larger than expected due to swelling after drilling, finish with sanding or a filler if necessary, and evaluate whether trimming the stock is more practical than trying to re-bore.
Drill Bits Pro’s approach: adjust technique to the moisture context and verify results continuously while drilling.
Can you drill wood when it's wet? Quick factors and recap
In short, drilling wet wood is feasible but demands patience, preparation, and the right technique to minimize defects. The most reliable outcome comes from dry stock and careful handling. If you must proceed on wet material, plan for deeper inspection, slower feeds, smaller pilot holes, and robust backing to protect the surface. The takeaway is to balance practicality with precision, guided by the principles of sharp cutting edges and stable support.
Final note on moisture management while drilling
Always assess the wood’s moisture state before starting. If your project tolerates a little delay, drying the piece will pay off with cleaner holes and less rework. If you are pressed for time, apply a tested wet-drilling protocol from your toolkit, and monitor the hole quality as you proceed. That balance—between speed and accuracy—defines success when the stock isn’t fully dry.
Tools & Materials
- Cordless drill with variable speed(Choose a drill with a soft-start feature to reduce initial bite)
- Sharp brad-point drill bits (assorted sizes)(Start with a small pilot hole (1/8 inch / 3 mm) before enlarging)
- Pilot bit or center punch(Helps prevent wandering on wet stock)
- Clamps or a vises for securing the workpiece(Prevents movement and kickback)
- Backing board (scrap wood)(Reduces tear-out on exit)
- Rag or cloth for wiping moisture(Keeps your cuts clean and bit dry)
- Masking tape to mark drill points(Keeps the location from shifting)
- Safety goggles(Eye protection from chips)
- Work gloves with good grip(Enhances grip on slippery stock)
- Moisture meter (optional)(Helps decide if drying is feasible)
Steps
Estimated time: 30-45 minutes
- 1
Secure the workpiece
Clamp the wet wood firmly to a stable bench or table. Ensure the area around the drill site is dry and free of obstructions. A backing board underneath helps support the exit side and reduces tear-out.
Tip: Double-check clamps for slippage; a dry pad beneath helps prevent marks on the surface. - 2
Mark and pilot
Use masking tape or a center punch to mark the exact location. Start with a small pilot hole (around 1/8 inch / 3 mm) to guide the larger bit and reduce wandering on slippery stock.
Tip: A light touch initially helps the bit bite without skating. - 3
Set bit and speed
Install the final bit size and set your drill to a slow-to-moderate speed. For wood, a slower pace helps maintain control and reduces heat buildup in wet conditions.
Tip: Use a clutch or torque-limiting feature if available to avoid overloading the bit. - 4
Drill with control
Begin cutting with light, steady pressure. Keep the drill perpendicular to the surface and pause occasionally to evacuate chips and moisture. Maintain a clean bit edge and retreat to clear any buildup.
Tip: If the bit begins to bind, back out and clear the flute rather than forcing through. - 5
Check and adjust
Inspect the hole for straightness and edge quality. If necessary, widen in small increments, repeating the pilot and drill sequence. Consider additional backing if tear-out persists.
Tip: Small incremental passes reduce the risk of splintering. - 6
Finish and clean
Remove the workpiece, wipe moisture from the surface, and finish edges as needed. If the wood dries and swells after drilling, recheck the hole fit for dowels or fasteners.
Tip: Dry the surface thoroughly before final assembly to ensure accurate fit.
Got Questions?
Can you drill wood when it's wet?
Yes, but expect more tear-out and less predictability. Use a sharp bit, a pilot hole, slow speed, and backing.
Yes, you can drill wet wood, but you may see more tearing; start with a sharp bit and slow pace.
What drill bit works best for wet wood?
Brad-point bits are generally best for wood since they start true and resist wandering; keep the edge sharp and back with a backing board.
Brad-point bits usually work best for wet wood; keep them sharp and use a backing board.
Should I dry wood before drilling?
If possible, dry the wood to improve hole quality and reduce tear-out. If you must drill wet, reduce speed and use a pilot hole.
Dry wood if you can; otherwise drill slowly with a pilot hole.
How does moisture content affect hole quality?
Moisture can change density and grain behavior, causing uneven holes and more chip-out. Holes may shift as the wood dries, so plan for potential changes.
Moisture changes density and grain, making holes less uniform; expect some change as it dries.
Can I use lubricants on wet wood?
Avoid oil-based lubricants; water isn't an effective lubricant for drilling. Rely on sharp bits, proper feed, and backing to achieve clean cuts.
Don’t rely on lubricants; keep the bit sharp and feed steady.
What safety gear is essential when drilling wet wood?
Wear safety goggles and gloves, keep the workspace dry, and protect electrical tools from moisture. Secure footing and maintain ventilation.
Wear eye protection and gloves; keep the area dry and tools protected.
Watch Video
Top Takeaways
- Drilling wet wood is possible but needs careful technique.
- Sharp bits, backer boards, and secure clamping reduce tear-out.
- Start with a pilot hole and drill slowly to manage moisture and grain.
- Always prioritize safety and inspect hole quality as you progress.