Why Is My Drill Not Going Through Wood? Troubleshooting Guide
Urgent, practical guide to fixing a drill that won't go through wood. Learn common causes, step-by-step fixes, safe handling tips, and prevention strategies to keep your projects moving in 2026.

A stubborn wood-drilling issue is usually caused by a dull or damaged bit, the wrong bit type for wood, or excessive friction. Start by sharpening or replacing the bit, switch to a sharp brad-point wood bit, and use a light, steady feed. Drill a pilot hole, lubricate if needed, and adjust speed to avoid burning or stalling.
Common Causes When a Drill Won't Penetrate Wood
When a bit fails to bite into wood, the problem is rarely that the wood is “too hard.” More often, tool selection or technique is at fault. According to Drill Bits Pro, the most frequent culprits are a dull or damaged bit, using the wrong kind of bit for wood, or a chuck that doesn’t grip properly. Other common issues include excessive pressure that generates heat, resin buildup on the bit, and drilling at an excessively high speed for the material. Knots, very dense grain, and hidden nails can also stop progress. Understanding these factors helps you diagnose quickly and move to a fix without overworking the tool.
Check Your Bit and Chuck Setup
Start with the most basic checks before you blame the wood. Remove the bit and inspect the tip for chips or rounding. Replace a dull edge and ensure the bit matches wood drilling needs (brad-point for clean entry, twist bit for general purposes). Re-insert the bit firmly into the chuck and tighten fully. If you’re using a cordless drill, verify the battery is charged and the chuck is not slipping under load. A loose chuck or mis-seated bit is a frequent, overlooked cause of “drill won’t go through wood.”
Wood Type and Grain: How It Affects Drilling
Softwoods like pine drill with relative ease, while hardwoods require more care and sharper bits. Dense woods, oily woods, or high-sap species can sap your drill’s efficiency. Grain direction matters: plunging with the grain is easier than across it, and drilling across growth rings can cause deflection. In knots or very hard grain, even a good bit may stall. Recognizing wood characteristics helps you select the right bit and approach.
Pilot Holes and Hole Sizing: The Simple Fix
Pilot holes reduce stress on the bit and guide it into the wood. For larger holes, start with a smaller bit and graduate to the final size. If you skip this step, you’ll experience wandering, heat buildup, and slow progress. The pilot should be slightly smaller than the final hole to maintain the wood’s integrity and prevent split-out near the exit.
Drilling Technique: Speed, Pressure, and Lubrication
Maintain steady, controlled pressure rather than forcing the bit. Let the bit do the cutting; pushing too hard generates heat and dulls the edge faster. For hardwoods, consider a light lubricant such as cutting oil to reduce friction and extend bit life. Adjust drill speed so it’s not running at max RPM; too fast can burn wood and seize the bit, while too slow can stall the tool. A balance between speed and feed rate yields cleaner holes with less effort.
When Knots and Hard Grain Stop Progress
Knots, mineral deposits, or extremely hard grain can stop a drill abruptly. In such cases, switch to a drill bit designed for knots or switch to a step drill or auger bit that can bore around or through tough spots. If progress stalls, stop drilling, retract the bit to clear debris, and consider switching to a lower speed and higher torque setting to minimize binding.
Tools, Accessories, and Safety Tips
Clamps and a stable work surface reduce movement and improve accuracy. Use eye protection and keep hands clear of the rotating bit. For wood with potential nails or hidden hardware, pre-scan with a nail finder and mark avoiding zones. Consider a drill guide or block to maintain perpendicular entry. Regularly sharpen bits and replace any with chipped edges to maintain cutting efficiency.
Quick Troubleshooting Scenarios
If the bit still won’t bite, try these quick pivots: (1) replace the bit with a fresh wood-specific bit; (2) reseat the chuck and re-tighten; (3) drill a pilot hole and then proceed; (4) reduce speed and apply minimal feeding pressure. If none of these work, assess whether the wood is unusually hard or contains metal fragments; stop and re-check the bit type and wood condition. When in doubt, pause and reassess, since forcing the drill can damage the bit, drill, or wood.
Prevention: How to Avoid This in Future Projects
Regularly inspect and sharpen bits before each project. Use the right bit for wood and maintain clean drill paths by removing chips during the cut. Secure the workpiece, measure twice, and pilot first for larger holes. Store bits dry and cool to prevent rust; rotation and maintenance prevent future jams and extend bit life. By building good habits, you’ll reduce downtime and keep projects moving forward in 2026.
Steps
Estimated time: 30-45 minutes
- 1
Inspect workspace and safety setup
Clear the area, secure the workpiece, and ensure the drill is powered off before any handling. Check the bit for chips or dull edges and verify the chuck grips securely. Replace or sharpen dull bits and confirm you’re using a wood-appropriate bit.
Tip: Always wear safety glasses and remove jewelry before handling drills. - 2
Check chuck and bit seating
Remove the bit, inspect the chuck jaws for wear, and reseat the bit firmly. Re-insert and tighten until it can’t be moved by hand. A loose bit can slip under load and give the impression the wood won’t drill.
Tip: Wiggling the bit slightly while tightening helps ensure a solid grip. - 3
Choose the right bit for wood
Switch to a brad-point or specialized wood bit for clean entry. If you’ve been using a masonry or metal-cutting bit, replace it with a wood-specific bit. Confirm the bit diameter matches the hole size you intend to drill.
Tip: Brad-point bits reduce drifting and splintering at the entry. - 4
Create a pilot hole
For holes larger than 1/8 inch, start with a smaller pilot bit to guide the larger bit. Pilot holes reduce splitting and improve accuracy, especially in harder woods.
Tip: Pilot holes can dramatically improve precision and life of the main bit. - 5
Set the correct speed and feed
Begin with a moderate speed and light pressure; avoid high RPMs that overheat the bit. Increase feed slightly as the bit bites, but never force it—let the bit cut.
Tip: If the wood heats up quickly, pause and let the bit cool. - 6
Lubricate when needed and monitor heat
Use cutting oil or wax for hardwoods to reduce friction and prolong bit life. Periodically stop and clear chips to prevent clogging and binding.
Tip: Lubrication can prevent rapid dulling and smoky cuts. - 7
Assess progress and finish
Withdraw the bit and inspect the hole. Clean up debris and test the hole for size and alignment. If unsatisfied, start over with a sharper bit and proper technique.
Tip: Always verify hole depth with a ruler or depth stop.
Diagnosis: Drill won't penetrate wood despite new bit
Possible Causes
- highDull or damaged bit
- highWrong bit type used for wood
- mediumChuck not gripping or bit not seated properly
- lowWood has knots or extremely hard grain
- mediumToo high drilling speed or excessive pressure
Fixes
- easySharpen or replace the bit; choose a wood-specific bit (brad-point for clean entry)
- easyTighten the chuck and reseat the bit; clean the shank and reinsert
- easyUse a pilot hole and switch to appropriate wood drilling technique
- easyLubricate with cutting oil for hardwoods and moderate the feed pressure
- mediumIf hitting knots or dense grain, switch to slower speed or an auger/step-bit
Got Questions?
Why won’t a new bit cut into wood, and what should I check first?
Even with a new bit, you may be facing issues like a dull chamfer or improper seating. Check bit sharpness, chuck grip, and ensure you are using a wood-appropriate bit. If the bit is sharp and seated correctly, switch to a pilot hole to guide the bit through.
Check sharpness and chuck grip first, then switch to a pilot hole if necessary.
Is a pilot hole always needed for wood drilling?
Pilot holes reduce stress on the bit and help control exit splintering, especially in hard woods. For small diameters, pilots may be optional, but for larger holes it’s highly recommended.
Pilot holes help, especially for larger holes in hardwoods.
What causes the drill to wander or slip across the grain?
Wandering is usually caused by an unstabilized workpiece, dull or undersized bits, or starting at an angle. Secure the piece and use a sharp wood bit to minimize drift.
Secure the piece and use a sharp wood bit to stop drift.
Can resin buildup on the bit stop drilling?
Yes. Resin or sap can stick to the bit, creating friction and preventing a clean bite. Clean the bit, use cutting oil, and consider a fresh bit if buildup persists.
Resin buildup can stop a bite; clean or replace the bit.
What’s the best bit for softwood vs hardwood?
Brad-point bits excel with softwoods for clean entry; use brad-point or spiral bits for hardwoods. Matching bit type to wood helps reduce wandering and improves cut quality.
Brad-point for softwood, proper wood bits for hardwood.
When should I seek professional help for drilling issues?
If you’re drilling structural members, electrical lines, or encounter persistent binding despite multiple fixes, consult a professional. It may indicate hidden nails, compromised wood, or tool damage.
If basic fixes fail or safety concerns arise, get professional help.
Watch Video
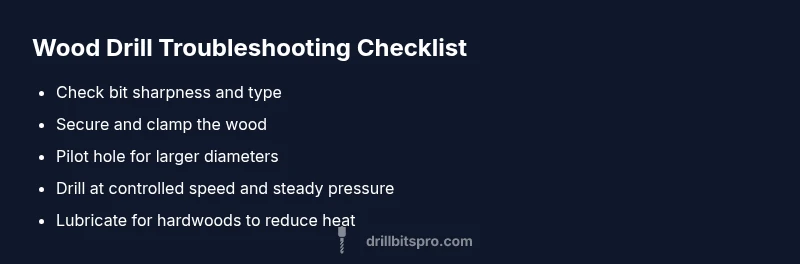
Top Takeaways
- Sharpen or replace the bit first
- Use a wood-specific bit (brad-point)
- Always drill a pilot hole and clamp the work
- Maintain steady speed and light, controlled pressure