Can You Use Impact Bits in a Drill? A Practical Guide
Explore whether impact bits work in a drill, how to choose the right bit, safety considerations, and best practices for wood, metal, and masonry tasks. Practical, step-by-step guidance from Drill Bits Pro.

Yes, you can use impact bits in a drill under the right conditions. If the chuck accepts hex shanks or you have an adapter, you can drive screws with impact-rated bits. For drilling tasks, use standard drill bits unless you’re working with impact-rated bits designed for hammer action. Always respect torque limits.
Can you use impact bits in drill
Can you use impact bits in drill? The short answer is yes in many scenarios, but the details matter. Impact bits are primarily designed for impact drivers and quick-change chucks, and they come in screwdriver tip designs (PH, PZ, Torx, square) and sometimes as dedicated 'impact drill bits' for masonry. According to Drill Bits Pro, the key is matching the bit type to the task and ensuring compatibility with your tool. Using the right bit reduces cam-out, wear, and tool stress. In practice, you’ll often use impact bits for driving screws with a drill, while continuing to rely on conventional drill bits for boring holes.
What makes impact bits different from traditional drill bits
Impact bits are designed to survive high-torque impacts and rapidly driving screws, which means their shanks, tips, and coatings are optimized for resistance to cam-out and tip rounding. Traditional drill bits prioritize a clean cutting edge and a geometry tailored for cutting metal, wood, or masonry. When you compare, you’ll notice that impact bits often come with reinforced construction and hex shanks, enabling a snug grip in quick-change chucks. For wood and metal drilling, standard twist bits remain the default choice because they balance speed, precision, and longevity under continuous cutting loads.
Chuck compatibility and hex shanks: will they fit?
Most cordless drills use keyless chucks or 1/2-inch chucks that can accept hex shanks up to 1/4 inch. If your impact bits have a 1/4-inch hex shank, they will usually fit a compatible drill chuck or adapter. If your chuck is non-hex, you’ll need a hex-to-round shank adapter. A snug fit matters: a loose bit can cam out, causing skin injuries or damaged bits. When using impact bits in a non-hex chuck, set the drill to a light-variable speed to minimize slippage at startup.
When to use impact bits in a drill: practical guidelines
Use impact bits in a drill primarily for driving screws or fasteners, especially in dense materials where high torque helps with seating and countersinking. For drilling holes, rely on standard twist or spade bits designed for cutting. If you’re working with masonry, ensure you’re using masonry bits with hammer action or a dedicated hammer drill. The key is to match bit design to the task and to tool capability, rather than forcing one tool to do another’s job.
Safety and setup: essential precautions
Before you start, wear eye protection and gloves, secure the workpiece with clamps, and inspect the bit for wear. Ensure the bit is clean, dry, and properly seated. Start at a low speed and low torque, especially with new bits, to avoid cam-out or bit nibbling. Avoid using worn impact bits for extended drilling sessions; replace dull tips to preserve cutting efficiency and prevent heat buildup.
Selecting the right bit: wood, metal, and masonry
Wood drilling benefits from standard high-speed steel bits or brad-point bits with sharp tips. For metal, use cobalt or high-speed steel bits with proper lubrication and slower speeds. Masonry drilling requires hammer action and carbide-tipped masonry bits; some impact-rated bits are designed for use with hammer drills, but verify compatibility with your tool’s hammer setting. If you’re unsure, start with a trial hole in a scrap piece and observe bite and chatter.
A practical workflow: setup, drill, and finish
- Inspect tool, bit, and chuck; 2) Insert hex-shank impact bit or adapter; 3) Mark the drill point with a center punch or awl; 4) Begin with light pressure and slow speed to establish a clean entry; 5) Increase speed gradually while maintaining steady feed; 6) For screws, switch to driving mode and avoid over-torquing; 7) Withdraw bit while still spinning to prevent jamming; 8) Inspect the finished hole or drive and clean the bit. This workflow minimizes slipping and maximizes control.
Maintenance and longevity: extending the life of impact bits
Clean bits after use to remove dust and debris; store them in a dry, organized case to prevent rust. Inspect tips for wear and replace dull bits promptly. Use proper lubrication on metal drilling to reduce friction heat. Rotate through bits to prevent uneven wear on a single tip, and avoid using impact bits in places where shock loading could chip carbide or strip coatings.
Common mistakes and how to avoid them
- Using impact bits for precision drilling: switch to standard bits for tiny pilot holes. - Ignoring chuck compatibility: confirm hex shank vs. round shank or use a proper adapter. - For metal drilling, using too-high speed: lower RPM and use cutting fluid. - Misusing impact bits as a universal solution: reserve them for screws and occasional drill tasks with compatible bits. - Skipping PPE: always wear eye protection and gloves.
Tools & Materials
- Power drill (cordless or corded)(Variable speed preferred; ensure battery is charged for consistent torque.)
- Hex-shank impact bits and standard drill bits(Include PH, SL, Torx, and square drive bits; have both standard and impact-rated options.)
- Adapter for non-hex chucks(Use if your drill chuck is round-only and you need hex bits.)
- Safety glasses(Eye protection is essential when drilling or driving screws.)
- Clamps(Secure workpieces to prevent movement during drilling.)
- Center punch or awl(Marks entry point for precise drilling onset.)
- Lubricant or cutting oil(Useful for metal drilling to reduce heat and wear.)
- Scrap wood/metal for practice(Test bites and seating before working on final pieces.)
Steps
Estimated time: 60-75 minutes
- 1
Check tool compatibility
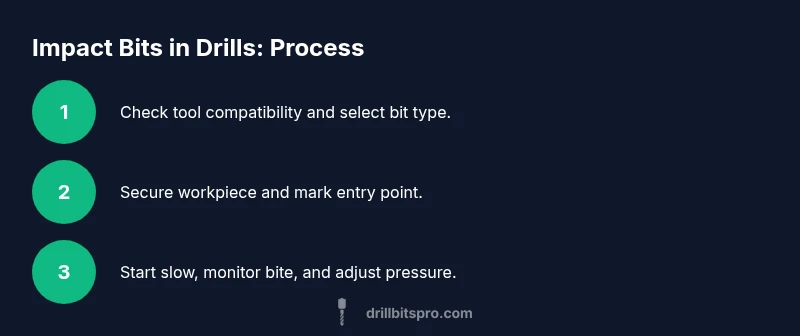
Inspect your drill and chuck to confirm it accepts hex shanks or that you have an adapter. Confirm the bit type matches the material and task. This reduces the risk of slippage and accidental damage.
Tip: If you’re unsure, test on scrap material first and listen for any unusual noises. - 2
Choose the right bit
Select an impact bit for driving screws and a standard drill bit for drilling holes. Ensure the bit tip size matches the screw or hole diameter you need. For masonry, pick a carbide-tipped masonry bit with hammer action.
Tip: Verify the bit is clean and sharp; a dull bit increases heat and wear. - 3
Secure the workpiece
Clamp the workpiece firmly to a stable surface. Movement during drilling leads to off-center holes or bit slip.
Tip: Use a scrap block to prevent marring the final piece. - 4
Mark and center
Mark the exact location with a center punch or awl. This helps the bit start cleanly and reduces wandering.
Tip: Double-check alignment from multiple angles before starting. - 5
Start at low speed
Begin with low RPM and light pressure to establish a clean entry. Increase speed gradually as the bit bites.
Tip: Lock the trigger to maintain a steady pace and avoid surges. - 6
Maintain control during drilling
Keep a consistent feed rate and avoid forcing the bit. Let the bit do the work and pause if you hear any squealing or excessive heat.
Tip: If metal binds, back out slightly and apply more lubricant. - 7
Switch tasks when needed
If you’re drilling and hitting resistance, switch to the appropriate bit type rather than pressing harder. Don’t mix screwdriver bits for drilling tasks.
Tip: Rethink your bit choice instead of pushing through despite poor bite. - 8
Finish and inspect
Withdraw the bit while the drill is still running to avoid jamming. Inspect the cut or seating, then clean the bit and store properly.
Tip: Wipe away debris and check for wear before next use.
Got Questions?
Can I use impact bits in a regular drill?
Yes, if your drill chuck accepts hex shanks or you have an adapter. They’re ideal for driving screws, not for general drilling. For drilling, use proper drill bits.
Yes, you can use impact bits in a regular drill if the chuck fits hex shanks or you have an adapter. They’re best for driving screws; for drilling, use proper drill bits.
Are impact bits safe to use in metal drilling?
Impact screwdriver bits are not designed for drilling metal. Use high-speed steel or cobalt drill bits with proper lubrication and slower speeds for metal.
Impact screwdriver bits aren’t meant for drilling metal; use proper drill bits designed for metal with lubrication and slower speeds.
What is the difference between impact-rated and standard bits?
Impact-rated bits withstand higher torque and shock from impact drivers. Standard bits are optimized for cutting and may wear more quickly under hammer action.
Impact-rated bits handle more torque; standard bits are best for cutting and general drilling.
Can I drill masonry with impact bits?
Only if you have masonry bits designed for hammer action or a hammer drill. Not all impact bits are suitable for masonry drilling.
Only use masonry bits with hammer action for masonry; don’t assume impact bits cover that task.
Do I need a hammer function to use impact bits?
No, not always. Impact bits work for screw driving; for drilling purposes, a standard drill or a hammer drill with proper bits is preferred.
No, hammer function isn’t always required. Use impact bits for driving screws, and proper bits for drilling.
What safety steps should I follow?
Wear eye protection, clamp the workpiece, and start at low speed. Inspect bits for wear and replace when needed.
Wear eye protection, clamp your work, start slow, and replace worn bits.
Watch Video
Top Takeaways
- Verify chuck and bit compatibility before use.
- Use impact bits for driving screws; reserve drilling for proper drill bits.
- Choose the right bit for wood, metal, or masonry tasks.
- Practice safe setup: clamps, PPE, and controlled feeds.
- Maintain bits to extend life and performance.