How Drill Bits Are Made: A Practical Guide
Explore the end-to-end manufacturing of drill bits, from material choice to grinding, coating, and quality checks. Learn how different materials affect performance across wood, metal, and composites.

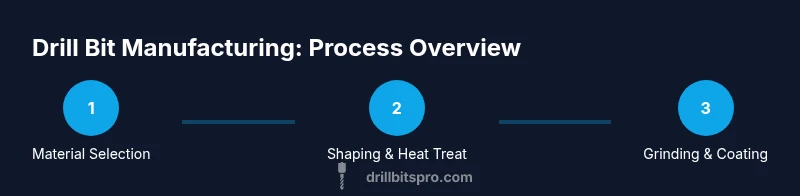
According to Drill Bits Pro, drill bits are made through a repeatable sequence from material selection to finishing. This quick overview introduces common materials (HSS, cobalt, carbide), how the tip and flutes are formed, and how grinding, coating, and QC determine performance and durability. You’ll also learn why geometry and finishing choices matter for wood, metal, and composite drilling.
Overview: The journey from raw material to cutting edge
The manufacture of drill bits is a disciplined sequence that balances material science, heat treatment, precision grinding, and protective coatings. Every bit begins as a blank rod of steel or carbide, selected for its hardness, toughness, and wear resistance. The subsequent steps create the geometry that determines how efficiently the bit cuts, how heat is managed, and how long it lasts in real-world work. For DIY enthusiasts and professionals, understanding this journey helps in choosing the right bit for the job and in diagnosing wear or failure when something goes wrong. The key idea is that performance comes from the right combination of material, geometry, and finish. The field constantly evolves with coatings and advanced carbide compositions, but the core principles remain the same.
Materials drive performance
Bits are commonly made from high-speed steel (HSS), cobalt-alloyed steel, and carbide. HSS offers good toughness and versatility for wood and light metalwork; cobalt versions increase heat resistance for tougher metals; carbide taps deeper into hard materials and delivers long life in demanding applications. Coatings such asTiN or TiAlN reduce friction and heat buildup, extending life in high-speed operations. Selecting the right material depends on the workpiece, hole size, and drilling speed. Drilling aluminum, for example, benefits from sharp geometry and gentle cutting actions, while stainless steel often requires carbide or coated tools and slower feeds to minimize work-hardening.
Tooling and setup determine repeatability
Manufacturing uses a mix of traditional and modern tooling, including precision lathes, forging presses, and CNC grinders. Fixtures hold blanks steady during shaping, heat treatment, and grinding. Process controls monitor temperature, feed rate, and wheel dressing to maintain consistency across lots. Modern shops may employ automated inspection lines to verify diameter, runout, and flute geometry. The result is a consistent product that meets tight tolerances while minimizing waste.
The shaping phase: turning stock into a bit
The journey begins with bar stock cut to length, then rough-formed to approximate bit shape. For indexable bits, segments are machined in multiple steps; for solid bits, the tip and shank are forged or machined from a single blank. The goal here is to establish the base geometry—point angle, lips, and flute contours—that will be refined in later steps. Each design choice influences cutting efficiency, dust evacuation, and chip removal during drilling. Precision in this stage reduces the need for later corrections and improves first-hole accuracy.
Heat treatment: getting hardness without brittleness
Hardening and tempering are critical to the bit’s performance. Heat-treating increases hardness, enabling clean cuts and resistance to wear. Tempering adjusts toughness, reducing the risk of cracking under impact. The exact temperatures and soaking times depend on the base material and the intended application. This phase often requires controlled quenching and subsequent tempering in a furnace. Consistent heat treatment yields uniform hardness across the bit’s length, which translates to predictable performance during drilling.
Point geometry and flute design: the functional core
The point angle, lip shape, and flute geometry define how a bit bites into material and clears debris. A sharper point and optimized lip relief reduce walking and improve centering, especially in metal and harder composites. Flutes must balance chip capacity with rigidity; too many flutes can weaken the bit, while too few can cause chip clogging. In this section, designers consider the material's hardness, expected feed rate, and the machine rigidity to select the ideal geometry. Fine-tuning these angles and rounds yields better hole quality and less heat buildup.
Coatings and finishes: life-extending technologies
Coatings such as TiN, TiAlN, and diamond-like carbon (DLC) are applied to reduce friction, heat, and wear. Coatings extend tool life in high-speed operations and improve corrosion resistance in certain environments. Selection depends on application: TiN is common for general-purpose steel drilling, while TiAlN excels in high-temperature metal drilling. Coating thickness is carefully controlled to preserve geometry while adding the protective layer. Proper coating also helps maintain edge sharpness during repeated uses.
Precision grinding and final finishing
Final geometry is achieved through a sequence of grinding passes. Primary grinding shapes the cutting edge, while secondary passes refine relief and flute geometry. Surface finishes are checked for uniformity, and edges are deburred to prevent micro-cracks. Quality-minded shops use calibrated gauges and optical comparators to confirm diameters, runout, and concentricity. A properly finished bit resists chipping and maintains cutting efficiency across many holes.
Quality control and testing: ensuring reliability
Quality control encompasses dimensional checks, hardness testing, and wear evaluation under simulated drilling conditions. Random sampling helps detect production drift, enabling adjustments to grind parameters or heat treatment. Material traceability is essential, linking each bit to its batch, heat-treatment lot, and coating run. The outcome is a reliable product line where end users can trust hole size, finish, and tool life. QC results feed back into process improvements for ongoing reliability.
Special and high-performance bits: pushing the envelope
Some applications demand specialty bits, such as carbide-tipped bits for abrasive metals, CBN-coated tools for very hard materials, or diamond-coated micro-bits for glass and ceramic. These bits use advanced materials and coatings, and their manufacturing requires tighter process controls. While more expensive, they deliver exceptional performance where standard HSS or cobalt bits would falter. For professionals, investing in high-performance bits can reduce tool changes and improve overall productivity.
Safety, care, and maintenance
Grinding and heat-treatment operations produce significant heat and particulate matter; PPE like safety glasses, gloves, and respirators are essential. Regular maintenance, such as re-sharpening drills at the right intervals, keeping cutting edges clean, and storing bits in protective racks, extends tool life. Avoid overheating the bit during grinding, which can cause micro-cracks that compromise strength. Proper handling and storage minimize corrosion and edge damage.
Common mistakes and how to avoid them
New users often select the wrong material for the job, overheat the bit during drilling, or push too fast, causing premature wear or breakage. Always match material to workpiece, use appropriate feeds and speeds, and choose the right coating for the environment. Regular inspection of edge wear and hole quality helps catch issues early. Training and following manufacturer guidelines reduce risk of damage and improve outcomes.
The future of drill bit manufacturing
Advances in materials science, coatings, and smart manufacturing are shaping the next generation of drill bits. Sustainable production methods, shorter supply cycles, and predictive maintenance are increasing reliability and lowering total cost of ownership. As machines become more capable, designers can push new geometries and coatings that offer better performance at higher speeds and with less heat generation.
Tools & Materials
- Forging/shaping equipment (lathe, forging press)(Turns blank rods into rough bit shapes; ensure temperature control and safety guards)
- Heat treatment furnace(Controlled hardening and tempering to balance hardness and toughness)
- Grinding machinery (grinders, CNC grinders, dressing tools)(Used to achieve final geometry, lip angle, and flute precision)
- Coating system (PVD/CVD)(Applies TiN, TiAlN, or similar coatings to reduce wear)
- Measuring and inspection tools (micrometers, calipers, optical comparators)(Verify diameter, runout, and edge geometry to spec)
- Coolant/lubrication system(Keeps temperatures down during grinding and improves edge life)
- Stock materials (HSS, cobalt, carbide bars)(Base materials selected for intended application)
- Fixturing and workholding (jigs, vises)(Ensure stable processing and repeatable results)
- Safety gear (goggles, gloves, face shield, PPE)(Protect against heat, sparks, and debris)
- Quality control equipment (hardness tester, surface finish gauge)(Confirm hardness and surface integrity after processing)
Steps
Estimated time: 2-3 hours
- 1
Gather material options and plan
Select base material (HSS, cobalt, carbide) based on the intended use and hole dimensions. Review required tolerances and coating choices before starting to minimize rework.
Tip: Plan for different job types to reuse tooling and avoid cross-contamination of coatings. - 2
Prepare stock and trim to rough length
Cut and deburr long bars to create manageable blanks for shaping. Ensure cut ends are clean to prevent delamination during forging.
Tip: Use a reliable cutoff wheel and deburr immediately to prevent edge cracking. - 3
Forge or shape the blank into approximate geometry
Form the rough tip, flute roll, and shank through forging or precision machining. Maintain symmetry and concentricity to ease subsequent grinding.
Tip: Keep temperatures controlled to avoid micro-cracks in the core. - 4
Hardening and tempering
Heat treat the blank to achieve target hardness, then temper to balance toughness. Use precise temperature profiles to avoid brittleness.
Tip: Quench and temper with controlled cooling to maintain edge integrity. - 5
Rough grind to final geometry
Grind the primary cutting edge, lip relief, and initial flute shapes. Check concentricity and ensure the point is centered.
Tip: Dress grinding wheels regularly to maintain sharp, true edges. - 6
Fine grind and flute optimization
Refine lip clearance and flute geometry for effective chip removal. Achieve consistent edge thickness across the cutting edge.
Tip: Use precise measuring tools to confirm diameter and runout before coating. - 7
Coatings and protective finishes
Apply a thin, uniform coating to reduce friction and wear. Verify coating uniformity and adhesion.
Tip: Confirm coating thickness with non-destructive testing methods when possible. - 8
Precision grinding and surface finishing
Final passes ensure the geometry meets tolerances. Deburr edges and inspect for uniformity.
Tip: Document wheel wear and adjust feed rates to maintain consistency. - 9
Quality inspection and sorting
Measure diameter, runout, and edge geometry. Sort by tolerance class and coating consistency.
Tip: Use a random sampling plan to monitor batch quality over time. - 10
Packaging and storage
Package with protective covers and store in a controlled environment to prevent corrosion and chipping.
Tip: Label batches for traceability and future quality checks.
Got Questions?
What materials are drill bits typically made from?
Most drill bits are made from high-speed steel (HSS), cobalt-alloyed steels, or carbide. Each material offers a different balance of hardness, toughness, and heat resistance. Coatings can enhance performance further, particularly in high-speed metal drilling.
Most drill bits use HSS, cobalt, or carbide, with coatings to improve wear resistance.
What is the difference between HSS and carbide drill bits?
HSS bits are tougher and cheaper, suitable for wood and soft metals. Carbide bits are harder and wear-resistant, ideal for hard metals but more brittle and expensive.
HSS is tougher and cheaper, carbide is harder and more brittle.
Why are drill bits coated and which coating should I choose?
Coatings reduce friction and heat, extending life in demanding drilling. TiN and TiAlN are common; select based on material, speed, and heat conditions.
Coatings reduce heat and wear; pick based on material and speed.
Can drill bits be sharpened at home?
Yes, with proper tools (grinder or sharpening jig) and care. Misalignment or overheating can ruin geometry, so proceed carefully or rely on a professional service for high-precision bits.
You can sharpen at home with care, but improper technique can ruin the bit.
How do I choose the right drill bit size for a project?
Match the drill bit diameter to the hole size required by the fastener or component. Consider the material, desired finish, and pilot-hole requirements when selecting size and type.
Pick the bit diameter to match the hole size you need and the material you’re drilling.
How is drill bit quality tested in manufacturing?
Manufacturers perform dimensional checks, hardness tests, and performance trials on sample bits. Traceability and coating adhesion tests ensure consistency across production lots.
Bits are checked for size, hardness, and coating quality to ensure consistency.
Watch Video
Top Takeaways
- Know your material choices and when to use each
- Geometry and coatings matter for performance
- Quality control is essential for repeatable results
- Follow safety protocols during all manufacturing steps
- Regular maintenance extends tool life