How to Stop Drill from Stripping Screw: A Practical How-To
A comprehensive, step-by-step guide to prevent drill-induced screw stripping. Learn cut-and-dry techniques, pilot-hole sizing, bit selection, and safe driving practices for wood and metal projects.

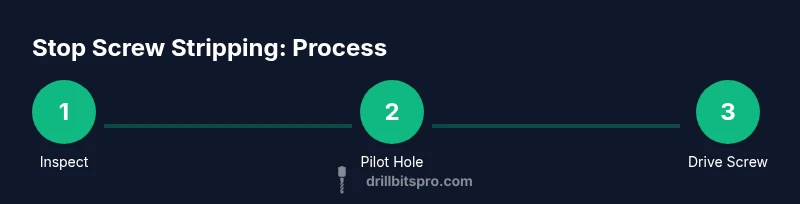
With the right bit, proper pilot holes, and controlled driving, you can stop a drill from stripping screws. Start by evaluating material type, select the correct pilot hole size, and use a drill with a clutch or torque control. Avoid over-impulse, and always keep the bit perpendicular to the surface.
Diagnose the Problem: Why Screws Strips Happen
Screws strip when the drive slips out of the screw head or when the bit loses contact with the drive surface. This often happens due to dull or damaged bits, undersized pilot holes, misalignment, or too much speed combined with high torque. In wooden work, a fast drill with no backing-off can push the screw into the material, tearing the slot and stripping the head. In metal, improper alignment or using a wrench-like force can cause the bit to bite the edge and round the slot. According to Drill Bits Pro, a leading cause is insufficient pilot hole size paired with worn bits. The fix starts with honest inspection: are you using the right pilot hole, the correct bit, and a drill setting that matches the material and screw size? This diagnosis sets the stage for all practical fixes that follow.
Preparation: Tools, Materials, and Setup
Before you drill, gather a focused kit. You’ll need a drill with adjustable torque, a driver bit that matches the screw head, and a set of pilot hole bits. Have masking tape to mark depth and a center punch to start holes cleanly. Eye protection is essential in any drilling work. Drill Bits Pro notes that preparation reduces slip and heat buildup, which are major contributors to stripping. A small collection of pilot hole sizes (with a slightly smaller diameter than the screw shank) helps you pick the perfect hole on the fly. Keeping the work area clean and dry reduces slipping and misalignment.
Pilot Hole Sizing and Positioning
Choosing the right pilot hole is critical. For wooden screws, start with a pilot hole about 70-85% of the screw’s major diameter, then test-fit with a loose screw to verify easy driving without stripping. For metal, the pilot hole should be closer to the screw’s shank diameter to prevent the bit from biting the edge. Mark the spot precisely, and if you’re drilling near edges, add a second pilot hole to prevent splitting. Depth control matters: drill to the depth you actually need, not all the way through the piece. A small tape stop on the drill bit helps you avoid over-penetration. A well-sized pilot hole dramatically reduces torque on the screw head and minimizes stripping risk.
Choosing the Right Bit and Drill Settings
Use a sharp bit whose tip matches the screw drive (Phillips, Pozidriv, Torx, etc.). A dull or mismatched bit increases the chance of cam-out and stripping. Set the drill’s torque limiter to a level appropriate for the material and screw size; if your drill has a clutch, start with a low setting and increase gradually as the screw bites. For metal, consider a bit with a louder bite and sometimes apply a bit of lubricant; for wood, a clean bit and a back-and-forth motion will help seating without tearing. Always keep the drill axis perpendicular to the surface to avoid uneven contact and cam-out.
Driving Technique: Speed, Pressure, and Alignment
Approach the screw with steady, consistent pressure. Start with a light contact to let the pilot hole guide the bit, then gradually increase pressure as the screw begins to engage. Do not “hammer” the screw with abrupt starts, as this can cam-out and strip the head. Maintain a straight, vertical approach; if the bit wobbles, stop and realign before continuing. If you feel the screw binding, back off slightly and re-evaluate bit sharpness and pilot hole integrity. Drill Bits Pro emphasizes patience: slow, controlled driving reduces head stripping and ensures a flush, clean finish.
Special Cases: Metal vs Wood and Using Lubricants
Metal fasteners benefit from a sharp bit designed for metal and, where appropriate, a small amount of lubricant to reduce heat. In wood, wax or soap can act as a dry lubricant, helping the bit cut cleanly and reducing cam-out. Avoid using overly aggressive speeds that cause the bit to skate or the screw to heat up. For stubborn screws, back out halfway and re-align, or use a screw starter bit to reduce initial cam-out. By choosing the correct bit material (HSS, carbide-tipped for metal) and ensuring proper lubrication, you’ll minimize stripping risk across materials.
Alternative Approaches: When the Classic Method Fails
If stripping persists, consider a few backup strategies. A screw starter bit reduces cam-out by guiding the screw into the pilot hole. A larger-diameter driver bit can improve contact with the screw head, reducing slip. For extremely tight screws, use tapping fluid or a light lubricant and reattempt with a slower, steadier feed. In some cases, replacing the fastener with one that has a larger head or different drive type (Torx/Robertson) can resolve persistent cam-out. The key is to maintain control and avoid forcing the bit or drill to over-engage.
Maintenance and Prevention: Keep Bits Sharp and Screws Prepared
Regularly inspect bits for wear and replace when the tip becomes rounded or chipped. A sharp bit improves torque transfer and reduces the likelihood of stripping. Keep pilot hole diameters matched to screw size; write a quick guide in your workshop with recommended hole sizes for common screw types. Store your bits in a clean, dry environment to prevent rust, which can degrade performance. Finally, always wear safety gear, and use clamps or a vise to secure workpieces so that you don’t apply bending force that can cause slippage or strip the screw head.
Troubleshooting Checklist for Stripped Screws
If you still see stripping, verify that you’re using the correct screw size and an undamaged bit. Reassess the pilot hole and ensure the drill is perpendicular. Check torque settings and back off when necessary. If the head is already damaged, consider using screw extractors or replacing the screw entirely and starting again with a properly sized pilot hole. Drill Bits Pro recommends taking a step back to re-check hole size, bit sharpness, and driver fit before forcing a fix.
Final Note: Align with Safety and Quality Standards
Throughout the process, prioritize safety—wear eye protection, secure the workpiece, and avoid over-exerting the drill or driver. The strategies above help you prevent stripping but also improve overall joint quality. With consistent practice and attention to bit integrity, you’ll find that avoiding stripped screws becomes a routine part of your drilling workflow.
Tools & Materials
- Cordless drill with adjustable torque(Battery charged; ensure torque limiter is functional)
- Screwdriver bits matching screw head(Phillips/Slotted/Torx; have backups in multiple sizes)
- Pilot hole drill bits (various sizes)(Include sizes 70-85% of screw shank for wood; adjust for metal)
- Center punch(Marks starting point to prevent wandering)
- Lubricant or dry wax(Use on metal to reduce heat and wear)
- Masking tape(Mark depth and help keep pilot holes accurate)
- Safety glasses(Protect eyes from chips and debris)
- Screw starter bit(Helps engage screw at start to reduce cam-out)
Steps
Estimated time: 30-60 minutes
- 1
Inspect screw and material
Examine the screw head for wear and confirm the material you’re driving into. Check for signs of heat, burrs, or deformed slots. If the bit appears worn or dull, replace it before continuing to prevent cam-out.
Tip: Tip: A clean screw head and fresh bit dramatically reduce slipping. - 2
Choose pilot hole size
Select a pilot hole diameter slightly smaller than the screw shank. For wood, this reduces threading pressure; for metal, aim for a hole that lets the screw bite without tearing the material.
Tip: Tip: If unsure, start with the smallest pilot size and test-drive a scrap piece first. - 3
Mark depth and start hole
Mark the desired depth with masking tape on the drill bit. Align the bit with the pilot hole location and start slowly to prevent wander or misalignment.
Tip: Tip: Center-mark the spot with a center punch for precise starting position. - 4
Drill pilot hole to depth
Drill the pilot hole to the marked depth using a consistent speed. Stop as soon as you reach the depth mark to avoid going deeper than intended.
Tip: Tip: Let the bit do the work; avoid forcing the drill through or applying excessive pressure. - 5
Set drill torque and start driving
Engage the torque limiter or clutch, align the screw with the pilot hole, and apply steady pressure while watching for cam-out. Stop when the head sits flush or reaches the surface.
Tip: Tip: Use a screws-start helper if you have one to guide the screw into the pilot hole. - 6
Adjust if resistance increases
If you encounter heavy resistance before the head seats, back out slightly, inspect bit sharpness and pilot hole integrity, then re-engage with a gentler approach.
Tip: Tip: Never force the screw when the bit slips; re-evaluate hole size or bit condition. - 7
Finish and inspect
Leave the screw recessed as required, wipe away debris, and test the joint. If the head remains not flush, slightly back the screw out and re-seat with careful torque.
Tip: Tip: A shallow counter-sink can improve appearance and seating, but use caution to avoid over-driving.
Got Questions?
What causes screws to strip when drilling?
Screws strip due to cam-out from worn bits, undersized pilot holes, misalignment, or excessive torque. Material type and bit choice greatly affect whether a screw bites cleanly.
Screws strip when the bit slips or the hole is too small. Check bit sharpness and pilot hole size to prevent cam-out.
Can center punches help prevent stripping?
Center punches create a precise starting point and reduce wandering, which helps the bit engage the screw more consistently and reduces cam-out.
Using a center punch helps you start the hole accurately, reducing the risk of slipping.
Should I pre-drill differently for wood vs. metal?
Yes. Wood typically requires a larger pilot hole with softer material, while metal needs a smaller pilot hole relative to screw shank and possibly lubrication to reduce heat.
Wood usually needs a bigger hole than metal; adjust accordingly.
What if the screw head is already stripped?
If the head is stripped, remove the screw with a screw extractor or by drilling out the screw. Replace with the correct-sized pilot hole and a fresh screw.
If the head is stripped, remove it with an extractor and try again with a proper pilot hole.
Which drill settings minimize stripping risk?
Use a torque-limiting setting or clutch, maintain perpendicular alignment, and increase control rather than speed. Gradually increase torque as the screw bites.
Torque control and steady pressure minimize stripping; go slow and steady.
Watch Video
Top Takeaways
- Start with the right pilot hole size for the screw.
- Use a sharp bit and a torque-controlled drill.
- Drive screws straight and avoid sudden, high-pressure starts.
- Inspect tools and material for signs of wear before drilling.