Can You Use a Drill Instead of an Impact Driver? A Practical Guide
Learn when a drill can substitute for an impact driver, how to set up your tool, and best practices for safe screw driving in DIY and professional projects. Drill Bits Pro explains torque, bit selection, and step-by-step tips to avoid cam-out and damage.

A drill can substitute for an impact driver for light screw-driving tasks, but for longer screws or dense materials, an impact driver is safer and faster due to higher torque and reduced cam-out. Set the drill to its drill/low-torque mode and use the correct bits, avoiding the hammer function. For tough jobs, switch to an impact driver or use impact-rated bits.
Why this comparison matters
According to Drill Bits Pro, understanding the difference between a drill and an impact driver helps you pick the right tool for the job and extend the life of fasteners. While both tools share a drilling function, their design focuses and torque delivery are distinct. For DIY enthusiasts and professionals, choosing the right tool saves time, reduces frustration, and minimizes material damage. Drill Bits Pro analyses consistently show that using the correct tool improves outcomes and keeps projects moving smoothly, especially when you’re speeding up workflow on a busy job site. This guide will help you gauge when a substitute is reasonable and when it isn’t.
Can you use a drill instead of an impact driver?
Yes, in many light-to-moderate screw-driving tasks a regular drill can stand in for an impact driver, but with significant caveats. A drill generally delivers rotational force with a constistent torque, while an impact driver adds percussive blows that drive screws more aggressively into hard materials. If you’re working with soft wood, small fasteners, or short screws, a drill set to low-torque mode can finish the job without stalling, stripping, or cam-out. When you’re driving larger screws or into hardwood, or working in metal, the risk of cam-out increases and the drilling action becomes less efficient. In those cases, it’s wise to switch to an impact driver. Drill Bits Pro’s evaluation highlights that the right tool choice depends on material, screw size, and desired speed.
Light-duty tasks where a drill can suffice
For projects involving soft woods, cabinetry, or decorative screws, your drill can handle the job with careful technique. Use a sharp pilot hole, matched bit types (wood bits for pilot holes, then wood-threaded screws), and a clutch setting to prevent overdriving. A drill with a clutch helps you limit torque, reducing the chance of splitting boards or snapping screws. Proper bit selection is key: use a sharp, appropriate-size bit and avoid using metal-cutting bits for wood. In these scenarios, the drill’s ability to reverse and drill at variable speeds is often enough to complete the task efficiently.
Torque, cam-out, and bit compatibility explained
Understanding torque and cam-out is essential when substituting a drill for an impact driver. Cam-out occurs when the bit slips out of the screw head, stripping the slot and ruining the fastener. An impact driver delivers rapid, percussive torque that minimizes cam-out on stubborn screws, particularly in hardwood or dense materials. If you must substitute, clamp the work securely, start slowly, and avoid forcing the screw. Bit compatibility matters too: use impact-rated driver bits or hex-shank bits designed for drivers; standard drill bits without a hex shank can slip and cause injury or damage.
How to set up your drill for screw driving
Prepare your drill by switching to the drill/drive setting (not hammer). Use a clutch that limits torque, and choose a compatible bit with a hex shank when possible. Pre-drill a pilot hole to reduce resistance and prevent splitting. Start screws at a slow pace, then increase speed gradually as the screw catches, watching for cam-out. Keep the drill perpendicular to the work and steady; avoid bending wrists or applying sideways force that can strip the screw head. If you feel resistance, back out, inspect the bit and pilot hole, then resume with a gentler approach.
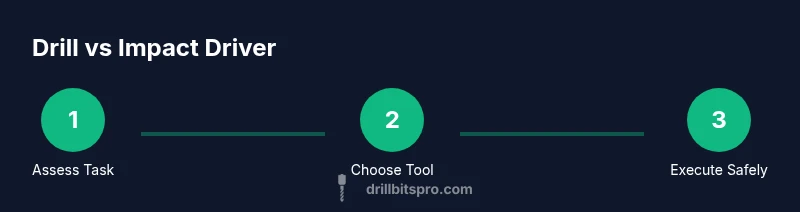
Step-by-step: substituting a drill for an impact driver
This section outlines a clear, practical approach to using a drill as a substitute. Start by assessing the task, selecting the right bits, and adjusting the drill’s torque. Then pre-drill, set the clutch, and drive screws with care. If the bit stalls or the screw doesn’t bite, stop and switch to a proper driver or adjust technique. Remember to work slowly and steadily, and always wear eye protection.
Pitfalls and mistakes to avoid
Avoid relying on high speed without enough torque when using a drill for driving screws. Never use the drill’s hammer function for screw driving, as that mode is designed for masonry and can damage both screw and material. Skipping the pilot hole or using an undersized bit increases cam-out risk. Also, don’t over-tighten screws—use a clutch or stop once the screw is flush to avoid material damage. Finally, keep your bits sharp and clean to maintain grip and reduce wear.
Alternatives and when to upgrade
If you’re doing frequent heavy-duty screw driving, investing in a dedicated impact driver or a combi tool with a variable torque profile makes sense. For hobby projects or occasional tasks, a good-quality drill with a clutch can handle most wood screws and light metal fasteners. Consider renting or purchasing an impact driver for denser materials or longer projects, as the savings in time and reduced wear on bits can be worth the cost. Drill Bits Pro recommends evaluating your typical workload to decide whether a full upgrade is warranted.
Authority sources
For deeper technical context and safety guidance, see:
- https://www.osha.gov
- https://extension.illinois.edu
- https://extension.umn.edu
Tools & Materials
- Cordless drill or corded drill(Ensure battery is charged; prefer variable speed if available.)
- Driver bit set (Phillips, slotted, square)(Include hex-shank options if your drill accepts them.)
- Pilot bit set (wood)(For soft woods, use a pilot hole before driving screws.)
- Impact-rated driver bits (optional)(Useful if you decide to switch to an impact driver later.)
- Clamp or vise(Hold work securely to prevent slips.)
- Safety gear (eye protection)(Always wear eye protection when drilling or driving.)
- Measuring tape and pencil(Mark screw locations precisely.)
- Lubricant or wax for threads(Helps reduce friction on metal screws)
Steps
Estimated time: 30-45 minutes
- 1
Assess the task
Evaluate screw size, material, and required hold. If the screw is short in soft wood, you may substitute with a drill. For long screws or hardwood, plan to switch to an impact driver. This initial assessment helps you choose the right approach from the start.
Tip: If in doubt, choose a lighter approach first and test on a scrap piece. - 2
Prepare bits and settings
Select the correct wood bit for pilot holes and a driver bit for screws. Set the drill to a low-torque, drilling/drive mode with the clutch engaged. This reduces risk of cam-out and board damage.
Tip: Use a hex-shank driver bit if your drill supports it for a more secure fit. - 3
Pre-drill pilot holes
Mark the screw locations and drill pilot holes slightly smaller than the screw’s core diameter. Pilot holes reduce resistance and prevent wood from splitting, especially near edges.
Tip: Keep holes straight and perpendicular to avoid misalignment. - 4
Drive screws with controlled speed
Begin driving at a slow speed with steady pressure. If the screw stalls, ease off, back out slightly, and re-engage with a lighter touch.
Tip: Use the clutch to prevent over-tightening and material damage. - 5
Evaluate fit and finish
Check that screws are flush to the surface and that the joint is secure. If resistance increases, switch to an impact driver or widen pilot holes as needed.
Tip: Do not force the screw; forcing can strip heads or break bits. - 6
Finalize and inspect
Inspect all fasteners for alignment and stability. Keep bits sharp and clean for next use. If you anticipate heavy or frequent driving, consider upgrading to an impact driver.
Tip: Replace worn bits to maintain grip and reduce stripping risk.
Got Questions?
What is the key difference between a drill and an impact driver?
A drill primarily supplies rotational torque suitable for drilling and driving with moderate torque. An impact driver adds percussive blows that multiply torque, reducing cam-out and speeding up screw driving in tougher materials.
A drill is great for drilling and light driving, but for tough screws, an impact driver reduces effort and prevents wobbling.
Can I drive screws with a regular drill bit?
You should use a driver bit designed for screws rather than a standard drill bit when driving screws. Pilot holes help, and using the correct bit reduces cam-out. If you’re unsure, switch to an impact driver.
Use the right driver bit and pilot holes; a standard drill bit is not ideal for screwing.
When should I switch to an impact driver?
Switch to an impact driver when screws are long, the material is hard, or you feel persistent cam-out or stall. The impact driver’s percussive action helps drive screws more efficiently.
If the screw won’t bite or the bit keeps slipping, use an impact driver.
Is it safe to use a drill in hammer mode for screw driving?
Hammer mode is designed for masonry and can damage screws and material when used for driving screws. Use standard drill mode with a clutch for wood and metal screws.
Don’t use hammer mode when driving screws; it’s not intended for that task.
What torque settings help when substituting?
Keep torque low to moderate, using the clutch to cap the force. Increase gradually only if the screw seats properly without cam-out.
Start with low torque and adjust as needed to prevent stripping.
What if I don’t own an impact driver?
If you don’t have an impact driver, use a drill with a clutch, select correct bits, pilot holes, and work slowly. For frequent heavy work, consider renting or purchasing an impact driver.
A drill can work for light tasks, but for heavy work, an impact driver helps a lot.
Watch Video
Top Takeaways
- Substitute a drill for light driving tasks with caution.
- Use a clutch and pilot holes to minimize cam-out.
- Switch to an impact driver for high-torce situations or dense materials.
- Always prioritize safety and proper bit selection.