Can You Use a Drill as a Screwdriver? A Practical Guide
Discover whether a drill can substitute for a screwdriver, when it's appropriate, and how to use it safely with the right bits, torque settings, and technique. This educational guide covers tips, pitfalls, and a step-by-step approach for DIYers and pros.

According to Drill Bits Pro, by the end of this guide you will know when a drill can substitute for a screwdriver and how to do it safely. You’ll learn which bits to use, the ideal speed and torque settings, and guardrails to prevent stripped screws and damaged materials. This is useful for quick assemblies and light-duty tasks.
Can a drill substitute for a screwdriver? Understanding the basics
Power drills and traditional screwdrivers share the same goal—driving fasteners. A drill, however, is designed to perform heavier tasks with higher torque, while a screwdriver is tuned for controlled, precise screw driving. For light work in wood and plastics, using a drill with a screwdriver bit can be practical, but you must respect torque, speed, and bit engagement. According to Drill Bits Pro, the key is balancing power with control to minimize cam-out and strip. Excess torque or high speed can chew screw heads, cause material damage, or injure the workpiece. In this guide we establish when a drill is appropriate and what limits to observe before proceeding.
Key differences between drills and screwdrivers
Screwdrivers emphasize speed control, low torque, and precise bit alignment. Drills provide higher torque, variable speed, and broader bit compatibility, which can help or harm depending on the task. When you switch from drilling to driving, the most important adjustments are clutch/torque setting, bit type, and speed. Using the wrong combination can lead to cam-out, stripped screw heads, or material damage. Understanding these differences helps you decide if a drill can serve as a screwdriver for your particular project.
When to use a drill as a screwdriver safely
For light-duty screwing in soft woods or plastics, a drill with a screwdriver bit and a controlled clutch setting is often safe. Avoid using a drill on hard woods without a pilot hole and never force screws into metal or masonry with a drill. If you must drive long or high-torque screws, consider a dedicated screwdriver or impact driver. This guidance aligns with general best practices and is supported by expert commentary from Drill Bits Pro. Practically, you should limit use to tasks where damage would be minimal and the screw head matches the bit type.
Tools, bits, and accessories you’ll need
- Cordless drill with adjustable clutch (essential)
- Screwdriver bits for the screws you plan to install (Phillips, flat, or Torx)
- 1/4 inch hex shank bit holder or drill chuck adapter (for quick changes)
- Pilot hole bits and a scrap piece for testing (optional but recommended)
- Safety glasses and a stable work surface
- Clamps or a vise to hold the workpiece securely
- A marker and scrap material for practice runs
Common mistakes and how to avoid them
- Using a high speed with high torque settings can strip screw heads; always start slow and adjust gradually.
- Selecting the wrong bit type can cause cam-out; match bit to screw head.
- Not testing on scrap early can hide issues; practice on waste wood first.
- Driving screws without pilot holes in hardwoods increases risk of splitting.
How to practice and optimize results across materials
Practice on scrap wood, plastic, and light metal to feel how your drill responds. Start with softer materials and shallow bit engagement, then escalate gradually as you gain control. Always keep the bit perpendicular to the surface and avoid sudden bursts of torque. Remember that drills are versatile tools, but they require discipline when used as screwdrivers to avoid damage and injury.
Tools & Materials
- Cordless drill with adjustable clutch(Set torque to low or user-defined clutch when driving screws.)
- Screwdriver bits (Phillips, flat, Torx as needed)(Use the bit type that matches the screw head.)
- 1/4 inch hex shank bit holder or drill chuck adapter(Securely hold bits; ensure a snug fit.)
- Pilot hole bits (optional but recommended)(Helpful for hardwoods to prevent splitting.)
- Safety glasses(Protect eyes from debris.)
- Workbench clamps or a stable surface(Keeps workpiece steady during driving.)
- Marker and scrap material for testing(Test fit and torque on scrap before final assembly.)
- Charged battery or power source(Ensure full charge for consistent torque.)
Steps
Estimated time: 30-45 minutes
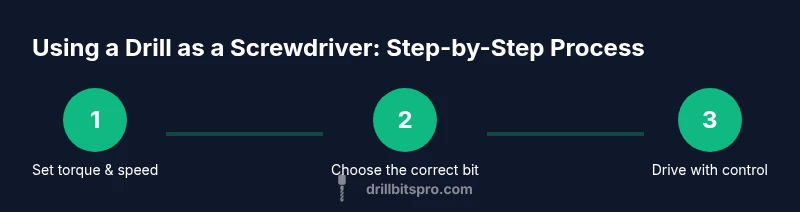
- 1
Set torque and speed
Before driving any screw, set the drill to the lowest torque or clutch setting and the slowest speed. This minimizes cam-out and reduces the chance of stripping the screw head or damaging the workpiece.
Tip: Starting low lets you feel when there is enough bite before full engagement. - 2
Install and secure the bit
Choose the correct screwdriver bit for the screw head and firmly seat it in the chuck or bit holder. A loose bit can slip, strip the head, or chatter.
Tip: Tap the bit lightly to settle it, then tighten with the chuck clamp. - 3
Position and pilot if needed
Position the screw at the mark, align perpendicular to the surface, and use a pilot hole for hardwoods when appropriate. Start driving gently to seat the screw without wobble.
Tip: For hardwoods, a pilot hole reduces split risk and improves bite. - 4
Drive with controlled torque
Begin applying pressure and trigger gradually. Maintain a steady pace and let the clutch limit the torque to avoid cam-out.
Tip: If you feel resistance, stop and reassess—don’t push through with raw force. - 5
Check flush seating
Drive the screw until the head sits flush or slightly below the surface. If the head cam-outs or tears the material, stop and re-evaluate bit choice or hole size.
Tip: Lifting slightly on the screw as you finish can help seating in some materials. - 6
Finish with manual touch if needed
If you sense imperfect seating or can’t drive further, switch to a manual screwdriver to finish with precision and avoid overtightening.
Tip: Manual tightening provides final control in delicate joints.
Got Questions?
Can a drill replace a screwdriver for all tasks?
Not for heavy-duty or precision fastening. A drill works best for light screwing tasks with proper control, while a dedicated screwdriver or impact driver handles tougher assemblies.
A drill can replace a screwdriver for light tasks, but for heavy jobs use a dedicated tool.
What settings should I use when driving screws with a drill?
Set a low torque or clutch and a slow speed. Use the correct screwdriver bit and avoid high torque that can strip screws.
Use low torque and slow speed, and pick the right bit.
Which bits should I use with my drill as a screwdriver?
Use screwdriver bits that match the screw head type (Phillips, flat, Torx). Secure the bit properly in the chuck or holder.
Choose the bit that matches your screw and secure it well.
Is an impact driver better than a drill for screw driving?
An impact driver is often better for tough materials or long fasteners, as it delivering higher torque with less cam-out. For light work, a drill with a clutch is sufficient.
Impact drivers handle tough jobs better; for light work, use a drill with a clutch.
How do I remove screws using a drill?
Switch the drill to reverse, use low torque, and back the screw out slowly. If it resists, back off and reassess.
Use reverse with light torque to back out screws.
Can I drive screws into metal or masonry with a drill?
Driving screws into metal or masonry is generally not recommended with a standard drill. Use self-tapping screws with appropriate bits or a screwdriver designed for metal or masonry.
Typically not; use the proper tool and bits for metal or masonry.
Watch Video
Top Takeaways
- Always start with torque control to prevent damage
- Match bit type to screw head for proper seating
- Test on scrap before committing to the final piece
- Recognize material limits and switch tools if needed