Can You Use a Drill to Screw? A Practical DIY Guide
Learn how to safely drive screws with a drill. This practical guide covers when to use a drill as a screwdriver, selecting bits, clutch settings, pilot holes, and common mistakes to avoid for precise results.

Yes, you can use a drill with a screwdriver bit to drive screws, but it’s best for pilot holes and lightweight fastening. Use a variable-speed drill, a correct bit, and a clutch setting to avoid overdriving or stripping. This quick guide shows safe, effective ways to screw with a drill.
Why using a drill as a screwdriver makes sense
According to Drill Bits Pro, modern cordless drills with the right bit can drive screws quickly, especially for pilot-hole projects and light fastening. The approach saves time for DIYers and professionals alike, but it requires proper technique and safety considerations. This guide explains when the method is appropriate and how to avoid common mistakes. For readers wondering can you use drill to screw effectively, the short answer is: yes, with the right settings and care. In many wood and light metal applications, a drill can speed up assembly without sacrificing control.
Before you start, it's important to understand the equipment and the materials you're working with. Drills rotate at high speeds and deliver torque in bursts if you push against a stubborn fastener. The difference between a drill and a dedicated screwdriver isn't just speed; it's how torque is managed. A poorly chosen bit, an overlooked pilot hole, or skipping the clutch can lead to stripped screws, hole damage, or a finished piece that doesn't sit flat. This section covers how to assess your project, choose the proper bit types, and prepare to test on scrap material. We'll also touch on common myths and explain why many professionals prefer a real drill/driver combo for larger or more precise jobs.
When to use a drill for screwing vs a hand screwdriver
In many tasks, a drill can outperform a manual screwdriver for speed, but you must adjust for material and screw type. Wood and soft metals accept fasteners well when you use pilot holes and a controlled clutch. For precision work or delicate materials, consider a traditional screwdriver or a drill driver with a torque limit. Many projects rely on the quick horsepower of a drill for assembly lines or quick fixes around the home; however, long screws in hardwoods or pilot-hole heavy jobs require more careful torque management.
Bronze and steel hardware can be driven with a drill if you maintain steady pressure and choose an appropriate bit. The key is to match the bit to the screw head and to keep the drill perpendicular to the surface. If you encounter cam-out or head slippage, stop and switch to a lower speed or a larger clutch setting. Drill Bits Pro analysis shows that even small changes in speed, clutch, or bit diameter can dramatically affect the finish.
Essential settings and bits for screwdriving
Choosing the right settings and bit types is critical for a clean, safe drive. Start with a drill that offers variable speed and an adjustable clutch; keep the speed low as you engage the screw, then increase if the screw seats cleanly. Use PH2 Phillips and SL6 flathead bits for common fasteners; for other screw types, verify head size with a gauge. For metal, consider pilot holes to reduce friction; for wood, pilot holes are often essential to avoid splitting. If you anticipate resistance, switch to a slightly larger bit or adjust the torque to prevent cam-out. Consider a countersink if you want a flush finish; always wear safety glasses and secure your workpiece.
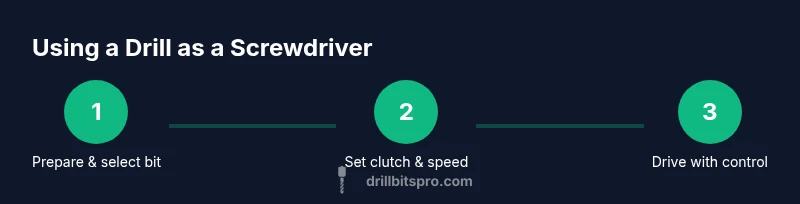
Step-by-step: how to screw with a drill safely and effectively
This section provides a narrative roadmap for driving screws with a drill. It complements the formal step-by-step list and helps you understand the rationale behind each action. Start with a plan: identify material, screw type, and hole requirements; then set up the drill appropriately. Always test on scrap material to confirm torque and seating before finishing the project.
Common mistakes and how to avoid them
- Over-tightening: use the clutch and stop when the head seats to avoid damaging the material.
- Using the wrong bit: mismatched interfaces will strip screws. Always check bit compatibility.
- Not prepping the hole: without a pilot hole, screws can kink or break.
- Running the drill at high speed without control: always start slow, especially with hardwoods.
By following these guidelines, you’ll reduce the risk of stripping screws and improve finish quality.
Authority sources
- OSHA: Power Tool Safety and Safe Handling of Drills: https://www.osha.gov
- NIST: Tools and Torque Specifications: https://www.nist.gov
- Extension services on woodworking and fasteners: https://extension.illinois.edu
Tools & Materials
- Cordless drill(Variable-speed with clutch)
- Screwdriver bits(Phillips PH2 and flathead SL6)
- Pilot drill bits(Size matches screw diameter)
- Screws(Type and length matched to material)
- Safety glasses(Impact-rated)
- Countersink bit(For flush finish)
Steps
Estimated time: 20-30 minutes
- 1
Gather materials and prepare test piece
Collect the drill, bits, screws, and pilot holes. Set up a scrap test piece to practice and verify you have the correct screw type and bit sizes for the project.
Tip: Use a scrap piece to dial in torque before working on the actual piece. - 2
Select bit and set clutch
Mount the proper screwdriver bit, ensuring it matches the screw head. Set the clutch to a low-torque position to prevent overdriving and cam-out. If the screw resists, stop and reassess.
Tip: Test the setup on scrap first to confirm bite and torque. - 3
Drill pilot hole if needed
Pre-drill a pilot hole for wood or metal where appropriate. The pilot size should be roughly 70-90% of the screw diameter for wood and a smaller pilot for metal to reduce binding.
Tip: Pilot holes help prevent splitting and binding. - 4
Drive the screw
Place screw in pilot hole, align the drill bit with the screw, and drive slowly at a controlled pace. Apply steady pressure and keep the drill perpendicular to the surface to avoid cam-out.
Tip: Maintain a straight, steady line to prevent cross-threading. - 5
Seat the screw and finish
Increase torque gradually until the screw head seats flush with the surface or sits slightly below. If flush finish is desired, use a countersink bit or stop early to avoid protrusion.
Tip: Pause as you reach flush seating to ensure even depth. - 6
Inspect and adjust
Check the joint for gaps or misalignment and re-tighten if needed with controlled torque. Power down the drill and store bits safely when finished.
Tip: Inspect one final time before moving to the next step.
Got Questions?
Can I use any drill to screw, or do I need a specific driver?
Most cordless drills with a clutch can drive screws, but a dedicated drill/driver offers better torque control and efficiency. For long or hard screws, a powered impact driver may be preferable.
A cordless drill with a clutch will work, but for heavy work a dedicated driver is better.
Should I always pre-drill a pilot hole?
Pre-drilling helps prevent splitting in wood and binding in metal. The size depends on material and screw, but pilot holes are usually recommended for hardwoods and metal joints.
Pre-drilling helps prevent damage and binding.
How do I prevent stripping the screw head?
Use the correct bit size, keep the drill steady, and avoid over-torque. If the head begins to slip, stop and adjust clutch settings.
Use the right bit and torque settings to avoid slipping.
Is this method safe for metal or hardwood?
Yes, with proper pilot holes and controlled speeds. For thick material, consider slower speeds or a drill press to maintain control.
Yes, with the right bits and speeds.
What safety gear is essential?
Always wear safety glasses, secure the workpiece, and keep hands clear of the bit during drilling or driving.
Wear safety glasses and secure the workpiece.
Can I use countersunk screws with this method?
Yes, with a countersink bit or flush seating. Ensure the surface remains even and the screw head sits flush.
Yes, you can flush-seat screws with a countersink.
Watch Video
Top Takeaways
- Use the right bit for the screw head
- Set the clutch to control torque
- Pre-drill pilot holes when needed
- Practice on scrap before final project