Ryobi Impact Driver and Drill: A Practical How-To Guide
Learn how to choose, use, and maintain Ryobi impact drivers and drills. This step-by-step guide covers when to use each tool, battery management, safety, and troubleshooting for DIY enthusiasts and professionals.

You will learn how to pick, operate, and maintain a Ryobi impact driver and drill. This guide covers when to use each tool, essential safety practices, compatible batteries, and basic troubleshooting. You'll also get step-by-step usage tips and care routines to extend tool life. Expect practical examples, common mistakes to avoid, and recommendations for beginners and seasoned pros.
What are Ryobi impact drivers and drills?
A Ryobi impact driver and a Ryobi drill are two essential cordless tools in the Ryobi 18V One+ ecosystem. An impact driver delivers high torque with a hammering action that drives fasteners quickly and reduces cam-out, while a drill provides steady rotation for drilling holes and driving screws with more control. In practice, you’ll often reach for an impact driver when assembling furniture or fastening long screws, and a drill when you need precise holes or larger-diameter fasteners. The Ryobi One+ line emphasizes compatibility across batteries and chargers, so you can swap between tools without swapping power sources. For projects that involve a combination of driving fasteners and drilling, understanding how a ryobi impact and drill work together helps you plan your workflow, conserve battery life, and select the right bits for each task.
What to expect in the Ryobi ecosystem
Ryobi’s 18V One+ platform uses a common battery system across many tools, including impact drivers, drills, saws, and more. This compatibility means you can own a few batteries and charge them on a single charger, which enhances flexibility on job sites or at home. Brushless options exist within the lineup, offering longer runtime and potentially longer tool life, though availability varies by model. When you’re selecting tools, consider weight, balance, and trigger feel, because comfortable handling matters as much as raw power. Finally, keep in mind that performance depends on the right bit, the appropriate chuck or hex drive, and proper maintenance to preserve bit life and tool efficiency.
Tools & Materials
- Ryobi 18V One+ battery(Choose high-capacity cells if you’ll run tools for extended periods.)
- Ryobi charger(Have a spare charger if you’re on a busy project.)
- Drill/driver bits (Phillips, slotted, Torx) and hex shank bits for impact driver(Ensure bits are rated for impact use; hex-shank bits fit most Ryobi impact drivers.)
- Masonry bits (optional)(Needed for drilling into concrete when using a drill.)
- Safety glasses(Eye protection is essential during drilling and driving.)
- Work gloves(Provides grip and hand protection on tough jobs.)
- Clamp or vise(Keeps workpiece steady for accurate drilling.)
Steps
Estimated time: 60-90 minutes
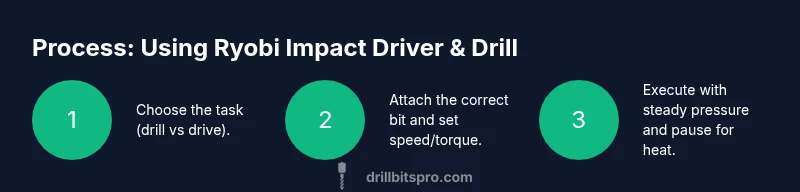
- 1
Prepare the workspace
Clear the area, secure the workpiece with clamps, and lay out all bits and batteries. Verify the battery is charged and the drill/driver is in good condition. A tidy, well-lit workspace reduces mistakes and accidents.
Tip: Set aside a dedicated spot for bits and accessories to speed up setup for future tasks. - 2
Choose the right tool
Identify whether your task is driving fasteners or drilling holes. If you’re assembling, use the impact driver for speed and torque; switch to the drill for precise hole placement and pilot holes.
Tip: If you’re unsure, start with the drill for holes and switch to the impact driver for driving after the pilot hole is created. - 3
Select and install the correct bit
Attach a hex-shank bit to the impact driver and the appropriate drill bit to the drill. Ensure bits are fully seated and straight before starting. If using an impact driver, snug hex bits by hand before powering on.
Tip: Check bit shank compatibility with the tool and avoid loose bits which can eject during operation. - 4
Set the tool settings
For drilling, set a moderate speed with steady pressure. For driving, let the clutch or torque setting handle the bite to prevent stripping the screw head. Adjust the trigger to control speed and power.
Tip: Start slow to learn how the material responds; increase gradually as needed. - 5
Position and secure the workpiece
Clamp the workpiece firmly to prevent movement. Align the bit with your mark or pilot hole. Keep hands away from the bit path and maintain a balanced stance for control.
Tip: A center punch helps guide the drill and prevents wandering on wood or metal. - 6
Begin drilling or driving
Apply steady, moderate pressure and let the tool do the work. Maintain a straight angle to avoid walking. For deeper holes, periodically back the bit out to clear debris.
Tip: Keep the drill perpendicular to the surface to ensure clean holes and straight driving. - 7
Manage heat and battery life
If the tool becomes warm, pause to let it cool and switch to a fresh battery if possible. Rotate between batteries to balance wear and extend runtime.
Tip: Pause if you notice a drop in performance; overheating can reduce bit life. - 8
Finish and inspect
Remove the bit, inspect the hole or screw, and check for any rough edges. Deburr if needed and store bits in a protective case to prevent dulling.
Tip: Wipe down the chuck and bits to remove dust and debris after use. - 9
Maintenance and storage
Clean blades, bits, and housings; store batteries at room temperature away from direct sunlight. Periodically inspect the chuck and switches for wear and signs of damage.
Tip: Keep the tools dry and avoid storing them in damp locations.
Got Questions?
What is the main difference between a Ryobi impact driver and a drill?
An impact driver uses a hammering action to deliver high torque for driving screws quickly, while a drill relies on rotational force for drilling holes and driving screws with precision. Use the impact driver for tough fasteners and the drill for precision holes.
The impact driver delivers high torque with hammering action for fasteners; the drill provides steady rotation for holes and screws with precision.
Can I use regular twist drill bits in a Ryobi impact driver?
Impact drivers are designed for hex-shank bits and driver bits. Use hex-shank bits or adapters designed for impact use, not standard twist bits, to prevent slippage and bit damage.
Impact drivers are best with hex-shank bits; use proper bits or adapters designed for impact use.
What battery should I use with Ryobi tools?
Ryobi’s 18V One+ system is designed to work across many tools in the lineup. Use the 18V One+ battery with a compatible charger for best results and flexibility.
Use the 18V One+ battery with the matching charger for compatibility across tools.
How can I extend battery life during a project?
Avoid deep or complete discharges; keep batteries within an optimal operating range, and swap between batteries to balance usage and reduce heat buildup.
Don’t fully discharge; rotate batteries to balance load and keep the tools cool.
Are there safety practices I should follow with Ryobi tools?
Always wear eye protection, secure your workpiece, and use the correct bit. Maintain a clean workspace and inspect tools for wear before use.
Wear eye protection, secure work, and use the right bit. Check tools for wear before each use.
Where can I find official manuals or guides?
Refer to Ryobi’s official website for user manuals, safety guides, and setup instructions for your specific model within the 18V One+ ecosystem.
Check Ryobi’s official site for manuals and setup instructions.
Watch Video
Top Takeaways
- Understand the role of each tool in the Ryobi lineup
- Use the impact driver for fasteners and the drill for holes
- Keep bits compatible and properly seated for safety
- Maintain batteries and store tools correctly