Impact Drill Mastery: A Practical How-To Guide
Learn how to choose, operate, and maintain an impact drill for wood, metal, and concrete projects with practical, step-by-step guidance from Drill Bits Pro.

An impact drill combines rotational drilling with hammering action to drive bits into hard materials more efficiently than a standard drill. This guide will help you select the right model, choose compatible bits, set safe operation parameters, and master effective techniques for wood, metal, and concrete projects. Understanding your tool's impact setting and maintaining bits will reduce wear and improve results.
Why the impact drill matters in DIY projects
An impact drill is a versatile tool that accelerates drilling into tough materials and helps drive fasteners with less effort than a standard drill. For DIY enthusiasts and professionals, the right impact drill can save time, reduce user fatigue, and improve accuracy on tasks ranging from anchoring shelves to masonry work. The Drill Bits Pro team notes that choosing a model with adjustable impact settings and a comfortable grip is essential for long sessions. By understanding how hammer-action drilling interacts with rotation, you can tailor power, speed, and bit choice to each material, optimizing results and reducing breakage. In addition, recognizing when to switch to specialized bits will keep your project on track and prevent premature wear on both bit and tool. Throughout this guide you’ll see practical steps and real-world tips to help you use an impact drill confidently and safely.
How impact drilling works: hammer action explained
An impact drill combines rotation with a pulsating hammer action that drives the bit forward as you press. When the chuck teeth engage, the motor turns the bit while a secondary mechanism delivers short, rapid blows, creating a combination of torque and percussive force. This design allows you to bore into masonry, brick, and concrete more effectively than a non-hammer drill, while also enabling faster screw driving in certain materials. The effect is similar to a lightweight hammer drill, but many models offer more precise control over impact intensity and rotation speed. For quality results, keep the tool perpendicular to the work surface, avoid side loading, and use pilot holes when working with hard materials. With practice, you’ll feel how the balance of torque, speed, and impact determines hole quality and drive depth. Drill Bits Pro emphasizes starting with the lowest practical setting and increasing as needed.
Choosing the right bits and accessories
Selecting the correct bits is as important as choosing the right drill. For masonry, carbide-tipped or diamond-coated bits provide durability; for wood, brad-point or spade bits offer clean starts; for metal, high-speed steel bits that are sharp and properly lubricated are essential. In many projects, you’ll benefit from using pilot holes to guide larger diameters and prevent bit wander. Consider a mixed drill-bits set that covers common sizes, plus a few specialty bits for concrete or tile. Check shank compatibility (round vs hex) with your impact drill, and remember to use depth stops or tape to avoid drilling too deep. When cutting into brick or concrete, keep the drill moving with moderate pressure and let the bit do the work rather than forcing it through. The Drill Bits Pro team recommends organizing your bit kit by material and diameter to speed up setup on the job.
Safety considerations and setup for impact drilling
Before you power up, put on safety glasses and a dust mask when drilling into masonry or concrete. Clamp the workpiece securely so it cannot shift, and position yourself with a stable stance to control the tool’s kickback. Start with the lowest speed and smooth throttle to avoid bit skippage, then gradually increase as the hole forms. Keep hands away from the rotating bit and use two-handed control on the drill body. If drilling into metal, apply a light lubricant to reduce heat and extend bit life. Finally, turn off the tool before changing bits and inspect the bit for dullness after each session. Brand-wise, Drill Bits Pro notes that a well-maintained impact drill is safer and more effective over time.
Techniques for different materials: wood, metal, concrete
For wood, an impact drill can speed up hole creation when you use a sharp bit and low to moderate impact. Start with a small pilot hole, then work up to your final diameter. For metal, center-punch and drill at an even pace with lubrication to prevent overheating; use a slower speed to maintain control. For concrete, begin with a shallow pilot hole, then step up to the final diameter with consistent pressure. Keep the drill perpendicular to the surface to prevent wandering and check bit wear regularly. If you encounter rebar or dense aggregates, stop and switch to a more robust bit. As with all tasks, regular breaks reduce fatigue and keep you focused. Drill Bits Pro’s guidance here is practical and field-tested for real-world results.
Maintenance and care to extend life
After use, wipe off dust and metal shavings from the chuck area, and clean the ventilation slots to prevent overheating. Check the power cord or battery contacts for wear, and store the drill in a dry place. Inspect bits for dullness or chips; sharpen or replace as needed to maintain cutting efficiency. Lubricate moving parts if the manufacturer recommends it, and rotate through your bit kit to distribute wear evenly. Regularly calibrate depth stops to ensure consistent hole depth, and remove the bit during long breaks to avoid stump wear. Drill Bits Pro highlights that proper maintenance reduces downtime and keeps your impact drill performing at peak for longer.
Common mistakes and how to fix them
One common error is using the wrong bit torque for the material, which can dull bits quickly or cause bit breakage. Another is pressuring the tool too hard, which leads to binding, overheating, and rough holes. Failing to secure the workpiece or neglecting depth control causes wandering and inconsistent depths. Beginners often neglect to use pilot holes on large-diameter tasks, resulting in split wood or snapped bits. Finally, not clearing dust or debris from the chuck and vents can cause overheating and performance drop. The fixes are straightforward: select the correct bit, apply steady pressure, clamp the workpiece, and take breaks to cool the tool. The Drill Bits Pro team emphasizes practicing on scrap material before starting a real project.
Tools & Materials
- Impact drill (corded or cordless)(Ensure battery is charged or power cord is available; select a model with sufficient torque.)
- Masonry drill bit (carbide-tipped)(For concrete and brick; choose diameter based on hole size.)
- Wood drill bit (Brad-point or spade)(Use pilot hole for large diameters; ensure bit is sharp.)
- Metal drill bit (high-speed steel)(Lubricate to reduce heat and extend life.)
- Pilot bits and center punch(Helps start holes accurately and reduces wandering.)
- Depth stop or tape to mark depth(Prevents drilling too deep and damaging workpiece.)
- Clamps or a vise(Keeps workpiece steady and reduces slippage.)
- Safety glasses(Eye protection is essential at all times.)
- Dust mask or respirator(Helpful when drilling concrete or brick dust.)
- Work gloves(Protect hands and improve grip.)
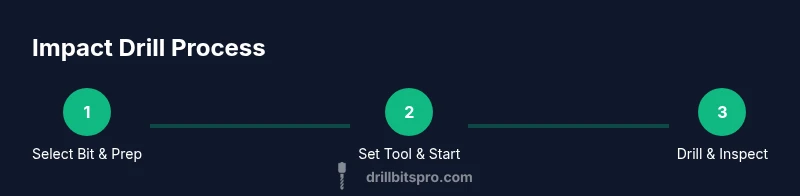
Steps
Estimated time: 60-90 minutes
- 1
Prepare your workspace
Clear clutter, secure power sources, and ensure good lighting. A clean surface reduces mistakes and keeps drilling safer. Position the drill within easy reach and set aside spare bits for quick changes.
Tip: Place a scrap piece under the work area to catch chips and protect the underlying surface. - 2
Secure the workpiece
Clamp the material firmly to a stable bench or worktable. Movement during drilling can lead to misalignment and damaged bits. Check clamps are tight before starting.
Tip: Double-check that clamps don’t obstruct access to the bit and trigger. - 3
Choose the right bit
Select a bit that matches the material and final hole size. For masonry, use a carbide-tipped bit; for wood, brad-point or spade bits; for metal, a high-speed steel bit is ideal. Ensure bit shank fits the chuck.
Tip: If in doubt, start with a smaller pilot bit to guide the larger one. - 4
Set the drill to impact mode
Engage the impact setting on the drill and choose a conservative speed. For novice users, use the lowest effective setting and build up as you gain control. This reduces bit wear and prevents wander.
Tip: Always avoid full throttle on hard materials until you’re confident. - 5
Mark the hole and drill a pilot hole
Mark the exact center with a punch and start with a small pilot hole. Pilot holes reduce bit wander and improve accuracy when moving to a larger diameter. Keep the drill straight and steady.
Tip: Lightly tap the pilot bit to ensure it doesn’t skate on the surface. - 6
Drill the final hole with controlled speed
Move the drill in a smooth, vertical line. Apply steady pressure and allow the bit to cut rather than forcing it. Pause briefly if you encounter resistance, then resume at a slower rate.
Tip: If the bit binds, back out and clear chips before continuing. - 7
Withdraw the bit and clear dust
Lift the bit while the drill is still running to avoid jamming. Let the bit cool briefly if it becomes hot. Clear debris from the hole and chuck area.
Tip: Wipe the bit clean and inspect for wear after each hole. - 8
Inspect, clean, and finish
Check hole depth with a gauge or depth stop, then remove clamps and tidy the workspace. Store bits properly to prevent dulling or corrosion. Review performance and plan next steps.
Tip: Document any settings that produced clean results for future projects.
Got Questions?
What is an impact drill?
An impact drill combines rotational drilling with a hammering action to drive bits into hard materials more efficiently than a standard drill. It’s used for masonry, wood, and metal tasks where extra force is helpful.
An impact drill adds hammering along with rotation to help you bore into tough materials more easily.
Is an impact drill the same as a hammer drill?
In many markets, the terms are used interchangeably to describe a hammering action plus rotation. Some models differentiate by maximum impact energy or control, but both serve similar purposes.
Most people call it an impact drill or hammer drill; they’re similar tools with hammer action.
Can I drill wood with an impact drill?
Yes. An impact drill can drill wood effectively when you use sharp wood bits and appropriate speed. Start with a pilot hole to ensure clean entry and avoid splitting.
Absolutely—just use the right wood bit and start with a pilot hole.
What bits should I use with an impact drill?
Choose masonry bits for concrete, brad-point or spade bits for wood, and high-speed steel bits for metal. Ensure bits are sharp and properly lubricated to extend life.
Pick the bit that matches your material and keep it sharp.
Are there safety precautions I should take?
Always wear eye protection and a dust mask when drilling, clamp the workpiece, and start on low speed. Avoid loose clothing and keep hands clear of the bit.
Wear safety gear, clamp your work, and start slow to prevent accidents.
How do I maintain an impact drill?
Regularly inspect cords or batteries, clean vents, and sharpen or replace worn bits. Lubricate moving parts if the manufacturer recommends it and store the tool in a dry place.
Keep it clean, sharpen bits, and check for wear after use.
Watch Video
Top Takeaways
- Match bit to material and hole size.
- Secure the workpiece and maintain control.
- Use proper impact settings and avoid over-speeding.
- Inspect and maintain bits and tool after use.