Are You Drill? A Practical Guide to Safe DIY Drilling
Decide if you’re ready to drill with a practical, step-by-step approach. Learn gear, safety, setup, and best practices for safe, accurate DIY drilling from Drill Bits Pro.

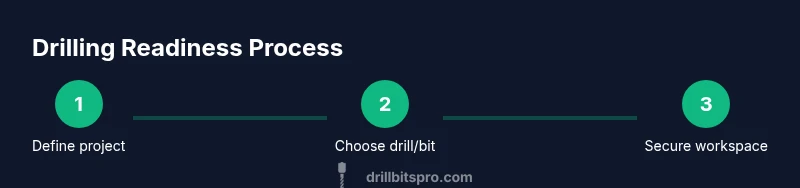
Are you about to drill? This quick answer helps you decide if you’re truly ready and outlines the essential preparations. You’ll confirm your project needs, select the right drill and bit, ensure PPE and a secure workspace, and run a simple pre-drill checklist. Follow these steps for safer, more accurate results.
Are you drill ready? Assessing readiness before drilling
are you drill ready? This first-hand look at readiness is designed to prevent common mistakes and injuries. According to Drill Bits Pro, the safest, most reliable drilling outcomes start with a deliberate readiness check that considers material, tool, workspace, and personal protection. In practice, readiness means validating three core areas: the job scope and materials, the equipment you’ll use, and your personal safety plan. The following sections expand on each area with practical checks you can perform before any hole is created. By running through these checks, you align your approach with best practices in DIY and professional drilling alike.
Selecting the right drill and bit for your project
Choosing the right drill and bit is foundational. For wood, light metals, masonry, or composite materials, there are distinct bits and speed ranges that yield clean holes and minimize bit wear. A standard cordless drill may suffice for light tasks, but masonry or metal often requires a dedicated hammer drill or drill press for precision. Pay attention to bit material (high-speed steel, carbide-tipped), shank size, and flute design. Drill bits should match your material’s hardness and diameter requirements. Drill Bits Pro Analysis, 2026 highlights that using the wrong bit dramatically increases wear and the risk of binding, underscoring the need for proper bit selection.
Safety gear and workspace setup you can rely on
No drilling task should start without proper PPE and a prepared workspace. Safety goggles or a faceshield protect eyes from chips, while a dust mask or respirator keeps particulates out of your lungs when drilling materials that shed fine particles. Hearing protection is advisable for loud tools. A clean, well-lit area with a sturdy workbench, clamps to secure the workpiece, and a cord management plan reduces tripping hazards and movement during operation. Proper ventilation helps any fumes from plastics or coatings. Drill Bits Pro Team emphasizes that a tidy workspace is a safer workspace.
Marking, centering, and securing your workpiece
Marking accurate hole locations is critical for alignment and structural integrity. Use a measuring tape, square, and a center punch or prick punch to create a tiny dimple that guides the bit. Secure the workpiece with quick-release clamps or a vise to prevent shifting during drilling. If you’re drilling multiple holes in a row, consider a jig or template to maintain consistent spacing. A secure setup prevents wandering bits and reduces the chance of kickback or injury. The recommended approach is to recheck your marks after clamping and before any rotation of the drill.
Drilling technique: speed, pressure, and path control
Drilling with the correct speed and steady pressure is essential for clean holes. Start with a pilot hole to guide the larger bit and reduce wandering, especially in harder materials. Maintain a steady feed rate; avoid forcing the bit, which can overheat the tip or snap the bit. If drilling metal, use a cutting fluid to cool the bit and reduce friction. For masonry, the hammer action should be gentle at first to prevent cracking, then gradually increase. Reading your drill’s RPM range and adjusting pressure keeps heat buildup in check. Drills can overheat or dull when neglected, so allow brief rest periods as needed.
Deburring, cleaning up, and inspecting the finished hole
After drilling, deburr the hole with a deburring tool or a larger bit edge to smooth edges. Remove chips and wipe the surface to inspect for burrs or misalignment. A quick measurement with calipers or a drill gauge confirms hole diameter and straightness. Check for consistent depth and edge quality, then store bits in a protective case to prevent dulling. This post-check reduces the need for rework and ensures a neat, professional result. The Drill Bits Pro Team notes that proper post-care extends tool life and maintains accuracy.
Common mistakes and how to avoid them
A few classic errors can derail a project. These include using the wrong drill bit for the material, drilling without securing the workpiece, applying excessive pressure, and neglecting pilot holes. Another pitfall is ignoring heat buildup, which can degrade bit material and accuracy. Always test on a scrap piece first, verify that you have the correct bit and speed, and periodically inspect bits for dullness. Following a consistent sequence—prep, secure, mark, pilot, drill, deburr—reduces errors and increases success rates.
Authority sources for drilling safety and technique
For safety and best practices, refer to official guidance from recognized organizations. These sources reinforce the approach outlined here and provide additional depth on protective equipment, ventilation, and tool maintenance:
- https://www.osha.gov/
- https://www.cdc.gov/niosh/
- https://extension.ucdavis.edu/
These links offer foundational information that complements the practical steps in this guide.
Tools & Materials
- Cordless drill (or hammer drill for masonry)(Battery-powered is convenient; ensure battery is charged and spare battery on hand.)
- Variety of drill bits (wood, metal, masonry)(Include pilot bits and carbide-tipped bits for hard materials.)
- Safety goggles or face shield(Protect eyes from flying chips.)
- Dust mask or respirator(Required when drilling dusty or coated materials.)
- Clamps or vise(Secure workpiece to prevent movement.)
- Measuring tools (tape, square, center punch)(Mark locations accurately to reduce misdrills.)
- Marker or pencil(Marking tool for hole positions.)
- Deburring tool(Used after drilling to smooth edges.)
Steps
Estimated time: 60-90 minutes
- 1
Define project and material
Identify the exact hole size, material, and depth before you begin. This controls drill selection, speed range, and drilling method. If you’re unsure, test on scrap to validate hole fit and edge quality.
Tip: Use a scrap piece to confirm hole diameter before committing to the actual work. - 2
Select drill and bit
Choose the correct drill type for the material and the appropriate bit. For wood, use a sharp wood bit with a brad-point tip; for metal, carbide-tipped bits with cutting oil; for masonry, a masonry bit with a hammer action.
Tip: Pair a pilot hole with the final bit for better guidance and reduced bit stress. - 3
Prepare workspace and PPE
Clear the area, secure lighting, and arrange clamps within easy reach. Put on safety gear: goggles, mask, and hearing protection if using loud equipment.
Tip: Check cords for wear and ensure no loose items within the drill path. - 4
Secure workpiece
Clamp the material firmly to a stable surface. Ensure the area is flat and well-supported to prevent tipping or wobble during drilling.
Tip: Double-check clamping after positioning marks to maintain alignment. - 5
Mark hole location
Use a center punch or prick punch to create a small dimple at the drill point. This guides the bit and reduces wandering.
Tip: Lightly strike the punch to avoid creating a deep dent that could mislead the drill. - 6
Begin with pilot hole
Drill a pilot hole at slow speed with a smaller bit to guide the larger bit, especially on hard materials. Keep the drill steady and perpendicular to the surface.
Tip: Let the bit do the work; don’t push too hard early on. - 7
Drill final hole
Switch to the final bit, maintaining steady pressure and appropriate RPM. If metal, use cutting fluid to cool and lubricate.
Tip: Pause briefly if the bit overheats and inspect for signs of wear. - 8
Deburr and inspect
Remove burrs with a deburring tool or sandpaper and measure hole diameter. Check alignment and depth, adjusting if necessary.
Tip: Trueing a hole early saves rework later. - 9
Cleanup and storage
Wipe surfaces, safely store bits, and coil cords. Return tools to their case and document any wear for future planning.
Tip: Keep a clean workspace to reduce repeat mistakes.
Got Questions?
What does it mean to be ready to drill, and why does it matter?
Readiness means confirming you have the right materials, tools, PPE, and a secure workspace before starting. It reduces the risk of injury and improves hole quality by ensuring proper alignment and controlled drilling conditions.
Being ready means you have the right bits and PPE, a stable setup, and a clear plan, which reduces accidents and ensures a clean hole.
How do I choose the right drill bit for different materials?
Wood requires sharp wood bits with brad points; metal needs carbide-tipped bits with appropriate speed and lubrication; masonry requires masonry bits and a hammer action. Always match bit material and geometry to the material for best results.
Pick the bit type based on material: wood, metal, or masonry, and avoid using a single bit for all materials.
Is PPE really necessary for small projects?
Yes. PPE protects eyes, lungs, and ears from debris and noise. Even small jobs can throw chips, and dust can irritate airways. PPE reduces the risk of long-term injuries.
Even simple projects deserve protection—glasses or a face shield, a mask, and hearing protection make a big difference.
What’s the safest way to start drilling into metal or wood without wandering?
Use a center punch to create a small starter point, begin with a pilot hole, and drill at a steady speed with a perpendicular posture. Secure the workpiece and avoid forcing the bit.
Center punch, pilot holes, and steady pressure keep your drill from wandering.
I’m drilling into masonry—what should I watch for?
Use a masonry bit with a hammer function and start slowly to prevent hairline cracks. Apply light pressure and allow the hammer action to guide the bit without overheating.
For brick or concrete, start slow, then increase pressure gradually as the bit bites.
What maintenance should I do after drilling?
Clean chips, inspect bits for wear, store them properly, and lightly lubricate metal bits if used for metal work. Dull bits should be replaced to maintain performance.
After drilling, clean up and check your bits so you’re ready for the next job.
Watch Video
Top Takeaways
- Assess readiness before drilling to prevent errors
- Choose correct drill and bits to match material
- Secure workspace and workpiece for accuracy
- Use pilot holes to guide final drilling
- Deburr and inspect holes for quality
- Keep tools clean and stored properly