Basketball Drill: A Comprehensive How-To Guide
Learn a practical basketball drill routine with clear steps, tips, and safety considerations. Designed for DIY players and pros seeking efficient practice routines that translate to on-court success.

With this guide, you will run a practical basketball drill that sharpens ball handling, footwork, and shooting rhythm. You’ll need a court or open space, a basketball, cones or markers, and a timer. This step-by-step routine can be performed solo or with teammates, and it scales from beginner to advanced as you progress, helping you train decision-making under pressure.
Why basketball drills matter for skill development
Basketball drills are the engines of skill development on the court. A well-designed basketball drill focuses on specific movements, repeats them under controlled conditions, and builds automatic responses during game situations. According to Drill Bits Pro, structured drills translate to repeatable performance by reinforcing motor patterns and decision-making under pressure. When you practice a basketball drill regularly, you’ll notice improvements in ball handling, footwork, and shooting rhythm. In addition to skill gains, drills improve conditioning, balance, and spatial awareness, all of which contribute to faster reads and smarter choices in live play. This section explores how drills map to on-court outcomes and why a purposeful routine beats random practice. You’ll also learn how to tailor drills to your position, whether you’re a guard sharpening speed or a forward refining post footwork. The goal is to create a repeatable practice routine you can replicate in different environments, from the gym to a small outdoor court, with clear, measurable benefits over time. This approach keeps training consistent and focused, enabling you to see tangible progress after a few weeks.
Core elements of an effective basketball drill
An effective basketball drill blends purpose, structure, and feedback into a tight practice loop. Start with a clear objective: what skill are you building (dribbling under pressure, finishing at the rim, or defensive stance)? Then design the drill to isolate that skill, provide a realistic tempo, and include a deliberate finish. Progression should move from simple to complex, allowing rest to be used for instruction or quick coaching cues. Use variable spacing, with both tight and wide lanes, to simulate different game angles. Provide immediate feedback—either from a coach, a training partner, or via self-assessment—so players adjust before the next rep. Finally, track performance indicators such as time to complete a circuit, number of successful finishes, or successful catches in rhythm. By incorporating these core elements, you can build a robust basketball drill that remains challenging as players improve. This section emphasizes practical details you can apply in every session, from warm-ups to finish sequences, regardless of age or skill level. Keeping the drills tight and purposeful will accelerate learning.
Designing a balanced drill routine
A balanced routine distributes time across ball handling, shooting, footwork, and decision-making. Start with a 5–10 minute warm-up to ensure joints are ready, followed by three to five drill stations that rotate players through key skills. Set a fixed duration for each station (for example, 2–3 minutes) and use a short rest period to review technique or adjust difficulty. Include both isolated skill work and game-like sequences to help transfer practice to real scenarios. If training with teammates, assign roles (ball handler, passer, defender) so players experience tempo and decision-making under pressure. Finish with a short conditioning segment or a cool-down to promote recovery. A well-rounded plan helps athletes build confidence while reducing overuse injuries. The routine should be adaptable to space constraints and equipment availability, so you can keep the drills flowing in almost any practice setting. The result is a sustainable cadence that keeps players engaged and progressing over weeks and months.
Example drill: ball-handling circuit with finishing moves
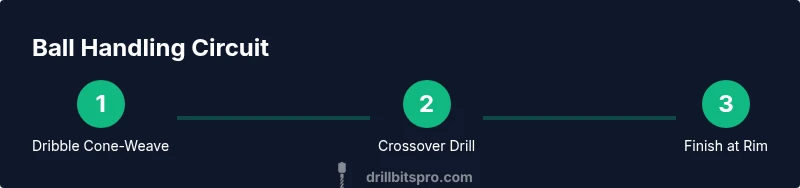
This basketball drill is designed to link ball control with finishing at the rim. Set up three stations: Station A – right-hand dribble around a line of cones in a tight zig-zag; Station B – speed dribbles with crossovers and a left-handed finish at the rim; Station C – finish with a strong reverse move after a drop step. Each station runs 2–3 minutes with 30 seconds of transition. Start with light warm-up and then run the circuit twice. Emphasize keeping eyes up, controlling the ball, and finishing through contact. To adjust for space, widen the cone spacing or reduce the number of reps for beginners; for advanced players, add a secondary defender or use two balls to increase complexity.
Shooting rhythm drills: catch-and-release and off-the-dribble
Shooting rhythm drills build consistency by tightening the time between receiving the ball and releasing it. Begin with a 15–20 minute block of catch-and-release from multiple spots, focusing on a quick, balanced base, square shoulders, and a clean follow-through. Next, add off-the-dribble shots that simulate in-game sequences, using a quick gather, low dribble, and stable landing. Pair each shooter with a passer to provide instant feedback on release timing and arc. Track misses, makes, and the consistency of foot placement, then adjust emphasis for upcoming sessions. The goal is to establish a reliable tempo that players can reproduce under fatigue, contributing to improved scoring efficiency in real game situations.
Defensive footwork and close-out drills
Defensive drills hone stance, foot speed, and closing-out with balance. Practice a low, athletic stance with active knees and hands up. A coach or partner can simulate ball handlers, forcing quick pivots, lateral slides, and a strong close-out without fouling. Add variations like a sprint-to-station and a second burst to the ball to mimic on-court pressure. Emphasize proper hand positioning and maintaining chest alignment toward the opponent. Include recovery steps after each close-out to prevent oversized gaps between movements. These drills train the defensive instincts players rely on to contest shots and deny dribble penetration while maintaining control.
Progression by age and skill level
Progression should match the player’s age and development stage. Beginners benefit from simplified patterns, slower tempo, and ample rest, while intermediate players can handle more reps and faster transitions. Advanced players should encounter quicker decision-making, more complex moves, and game-like pressure. Use clear milestones to track growth, such as increasing the number of clean catches in rhythm or reducing the time to complete a circuit. Regularly adjusting targets keeps drills challenging yet achievable and helps sustain motivation over weeks and months.
How to track progress and adjust intensity
Progress tracking combines quantitative metrics with qualitative feedback. Use a timer to measure circuit times, count successful finishes, and track shooting accuracy from varied spots. Record notes on form, footwork, and decision-making—then review with a coach or teammate. Gradually raise intensity by reducing rest, adding reps, or increasing complexity (faster dribbles, tighter spacing). Energy levels should be monitored to avoid form breakdown; scale back if technique declines. The most effective systems blend data collection with honest, actionable feedback, enabling steady, safe improvement.
Common mistakes and how to fix them
Common drills mistakes include rushing passes, keeping eyes down during dribbles, and exaggerating movements that disrupt balance. Correct by maintaining soft hands on the ball, keeping the head up, and aligning takeoff with the rim. Start with slower reps to ingrain correct mechanics, then progressively increase pace as control improves. Use video reviews or partner feedback to pinpoint errors and map out precise corrections. Always pair practice with proper warm-up and footwear to protect joints and prevent injuries.
Authority sources
To ground these practices in broader sports science and coaching perspectives, consult established sources. For example, NCAA, NIH, and science-based sport outlets provide evidence and guidelines on training structure, progression, and injury prevention. See these references for complementary reading and peer-reviewed insights you can apply to your drills:
- https://www.ncaa.org
- https://www.nih.gov
- https://www.sciencedaily.com
Tools & Materials
- Basketball(Size 7 for adults, size 6 for youth; ensure proper inflation.)
- Cones or markers(Set up 5-6 cones for dribbling patterns and spacing.)
- Court space or open area(Flat surface with clear lines; avoid slick floors.)
- Timer or stopwatch(Pace stations and track reps precisely.)
- Water bottle(Hydration between stations.)
- Whistle(Signal transitions and start/stop cues.)
- Marker bibs or towels(Denote teams or roles when working with others.)
Steps
Estimated time: 30-60 minutes
- 1
Warm up and setup
Light jogging, dynamic stretches, and a quick ball-handling intro to prepare the body. Define stations, lay out cones, and explain expectations so each rep has purpose. Gather participants and assign roles if working with a group.
Tip: Emphasize controlled breathing and loose shoulders to prevent early fatigue. - 2
Station 1: ball-handling pattern
Dribble through a cone sequence using right-hand control, then mirror with the left hand. Focus on keeping eyes up and the ball under tight control. Complete multiple tight patterns to build confidence under pressure.
Tip: Keep the dribble low and eyes up to simulate game decision-making. - 3
Station 2: change of direction
Incorporate crossovers and behind-the-back moves to navigate obstacles, finishing at a designated spot. Ensure footwork stays light and reactive, not coarse or stretched. Repeat until rhythm feels natural rather than forced.
Tip: Reset shoulders after every move to preserve balance. - 4
Station 3: finishing moves
Finish at the rim with a jump-stop and a strong finish through contact. Use both hands to finish on early drives. This builds the mechanics of finishing opportunities created during messier plays.
Tip: Land softly with knees bent to absorb impact and protect joints. - 5
Shooting rhythm sequence
Transition from ball handling to shooting reps at designated spots. Focus on a quick reception, balanced stance, and repeatable release. Track makes and misses to monitor progress over multiple sets.
Tip: Maintain a consistent arc and follow-through on every shot. - 6
Cool-down and review
Finish with light stretches and a brief reflection on performance. Note areas for improvement and set a tiny, achievable goal for the next practice. Hydrate and log any insights.
Tip: Record a quick note on what felt smoother than last time.
Got Questions?
What is a basketball drill and why is it important?
A basketball drill is a structured practice exercise designed to improve a specific skill, such as dribbling, shooting, or defense. Regularly performing drills helps players develop muscle memory and game-ready decision-making.
A drill is a focused practice exercise; doing it regularly builds better ball handling and shooting.
How long should a drill session last for beginners?
For beginners, start with 20 to 40 minutes, including warm-up and cool-down. As comfort grows, gradually extend practice time while maintaining good form.
Beginners should start around twenty to forty minutes and grow from there.
Can drills be done solo without teammates?
Yes. Many drills are designed for solo practice, focusing on technique and speed. If you have a partner, you can add passing and defensive pressure to simulate game flow.
Drills work solo, but a partner makes them more game-like.
What equipment is essential for basketball drills?
A basketball, markers or cones, and a timer are the essentials. A court or clear space and proper footwear complete the setup.
Basketball, cones, timer, and a good space are essential.
How do you measure progress in drills?
Track objective metrics like completion time, number of successful finishes, and shooting percentages from various spots. Use video or coach feedback to add qualitative insight.
Use time, makes, and feedback to measure progress.
How can drills be adapted for younger players?
Reduce pace and complexity, increase rest, and simplify moves. Focus on fundamentals like balance, hand-eye coordination, and proper footwork before adding speed.
Keep it simple and fun for younger players while teaching fundamentals.
What common mistakes should I avoid in drills?
Rushing reps, looking down while dribbling, and letting technique slip under fatigue. Break reps into focused chunks and emphasize fundamentals before speed.
Avoid rushing and keep the basics solid.
Watch Video
Top Takeaways
- Define a clear drill objective before starting.
- Rotate through skills to build a complete game-ready routine.
- Progress drills gradually to match players’ growth.
- Track both speed and accuracy to measure progress.
- Prioritize safety through proper warm-up and technique.