Shooting Drills for Basketball: Master Your Shot
Learn a complete shooting drill routine to improve accuracy and consistency. This guide covers warm-ups, form checks, progression, solo and partner drills, and progress tracking for players at all levels in 2026.

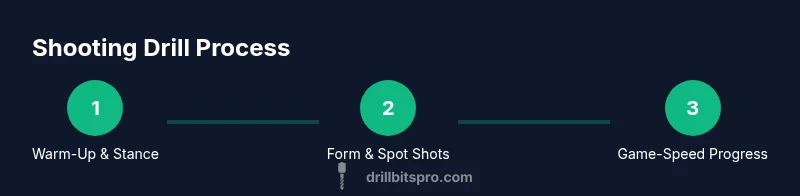
You will design and execute a structured basketball shooting drill routine that builds form, rhythm, and consistency. Start with a clear warm-up, move through stance and release checks, and progress from close-range catch-and-shoot to off-the-dribble and fatigue scenarios. The plan scales from beginner to advanced and can be done solo or with a partner, using simple spots on the floor.
Why shooting drills matter
Basketball shooting is the heartbeat of the game. Repeated, deliberate practice trains the mechanics players rely on under pressure: stance, balance, release angle, and follow-through. According to Drill Bits Pro, a well-structured drill plan translates practice time into game-ready muscle memory, reducing error under fatigue and boosting confidence during late-game moments. Start with a simple, repeatable baseline so every rep has purpose. Emphasize tempo and rhythm: a smooth, repeatable release beats raw power. By prioritizing form first, you create a foundation that supports faster improvement across range, arc, and consistency. This mindset helps both DIY players and professionals stick to a plan even when schedules tighten.
Branding note:DIFFERENTIATION & baseline testing
A practical shooting program begins with clearly defined benchmarks. Use a 10-shot baseline from a few standard spots and record makes, misses, and perceived arc. The goal is not perfection on every shot but reliable patterning—consistent release timing, balanced feet, and a predictable arc. By documenting the baseline, you can see progress over weeks rather than counting single-game performances. Drill Bits Pro emphasizes that progress is incremental and cumulative, not instantaneous. With that mindset, you’ll stay motivated and reduce frustration during plateaus.
Tools & Materials
- Basketball(Size 7 for adults; choose appropriate size for youth.)
- Basketball hoop or target(Rim height as appropriate; backyard or gym setup works.)
- Court or flat practice surface(Dry, unobstructed space; ensure a clear rebound path.)
- Stopwatch or timer app(For pacing and fatigue blocks.)
- Water bottle(Hydration during drills.)
- Markers/cones or tape(Define spots on the floor (top key, wings, corners).)
- Rebounder or wall rebound (optional)(Keeps reps high when practicing solo.)
- Notebook or app for tracking(Log makes, misses, arc, and timing.)
Steps
Estimated time: 45-60 minutes
- 1
Prepare space and warm up
Move to a clear drill area and perform a 5-minute dynamic warm-up to loosen hips, ankles, and shoulders. Establish your stance, balance, and footwork, then transition to light form reps near the rim to prime muscle memory. Finish with two minutes of stationary shooting to lock in a smooth release.
Tip: Keep the ball in a relaxed grip and focus on a smooth, level release. - 2
Check grip and stance
From a comfortable position, review your grip, elbow alignment, and balance on both feet. Ensure your shooting hand is under the ball with fingers spread for control. Practice 10 one-motion shots at close range to confirm consistency before moving farther out.
Tip: Use a mirror or video angle to verify elbow alignment and follow-through. - 3
Form shots near the rim
Stand close to the basket and perform 2 sets of 20 form shots focusing on arc, release height, and wrist snap. Aim for a smooth, high arc and a consistent release timing. Don’t rush; control is the objective at near-range.
Tip: Place a small target on the rim to reinforce precise release direction. - 4
Progress to mid-range spots
Move to 6–8 feet for a dozen shots from multiple spots. Maintain your form and rhythm while increasing distance. Emphasize a full extension and a quiet finishing motion at release. Rebound and reset quickly to maintain pace.
Tip: Keep eyes on the rim, not on the ball, during the shot cycle. - 5
Catch-and-shoot from designated spots
With a partner or rebounder, practice catch-and-shoot from top-of-key and wings. Focus on catching in rhythm, stepping into the shot, and finishing with a consistent follow-through. Complete 3–4 cycles per spot, totaling 40–60 reps.
Tip: Use a brief, controlled step into the shot to simulate game tempo. - 6
Add off-the-dribble and movement
Incorporate one or two off-the-dribble sequences per spot, like a quick jab step or a step-back before release. Maintain balance and keep your hips square to the target. This builds game-like versatility without sacrificing form.
Tip: Limit off-the-dribble reps to avoid breaking your mechanics; maintain the same follow-through. - 7
Fatigue and late-game rhythm
Finish a fatigue block: shoot under mild pressure by counting down or simulating a defender. Alternate 5–6 fatigue sets with short breaks to mimic late-game intensity while preserving form. This helps your body trust the mechanics when tired.
Tip: If form deteriorates, drop back to form shots for a few reps to reset. - 8
Record, analyze, and adjust
Review your rep data after each session: makes, misses, and pattern shifts. Note any consistent misfires (e.g., elbow drift or low arc). Use this to adjust the next session’s focus area and progression level.
Tip: Keep a quick note or log of the key takeaway from each session. - 9
Cool down and mobility
Finish with light cooldown: 3–5 minutes of shoulder and wrist mobility, followed by gentle static stretches. Hydration completes the cycle and supports recovery for the next session.
Tip: Stretch the shooting wrist and forearm to reduce delayed soreness.
Got Questions?
What is the best way to start a shooting drill for beginners?
Begin with form-focused, close-range shots to ingrain mechanics. Keep reps manageable and build accuracy before adding distance. Use a consistent follow-through and a steady rhythm.
Start with form-focused shots near the rim, keeping reps simple and consistent.
How long should a typical drill session last?
Aim for 30-60 minutes including warm-up and cool-down. Break the time into blocks of form work, spot shooting, and fatigue reps to maintain focus.
Most sessions run about half an hour to an hour.
Do I need a partner or rebounder for shooting drills?
A partner or rebounder helps with flow and rhythm, but you can use a wall or rebounder for solo work. Use quick ball retrieval to keep reps high.
A rebounder is helpful, but you can practice solo with a wall.
How do I measure improvement over time?
Track makes from designated spots, shooting percentage, and consistency of release timing. Review weekly to adjust targets and ensure steady progress.
Keep a simple scorecard and check progress every week.
What drills help shooting under fatigue?
Blend shooting with short sprints or ball-handling bursts to simulate late-game fatigue. Return to form shots when fatigued to test mechanics under pressure.
Add short fatigue cycles to practice to mimic game conditions.
How can I adapt drills for left- or right-handed players?
Practice from each spot with both hands to develop symmetrical mechanics. Start with your dominant hand and slowly introduce the non-dominant hand in controlled sets.
Practice the drill with both hands to ensure balance.
Should I use advanced stats or just focus on feel?
Mix objective tracking with feel-based cues. Use makes, misses, and arc as practical indicators while tuning your shooting rhythm.
Balance tracking data with how your shots feel.
Watch Video
Top Takeaways
- Set a baseline and track progress over time
- Prioritize form and consistency before speed
- Progress in small, repeatable steps
- Incorporate fatigue to simulate game conditions
- Review data weekly to adjust drills