Can You Drill Plaster of Paris? Practical DIY Guide
Learn whether you can drill plaster of Paris, how to choose the right bit, and a step-by-step method to avoid cracks. Practical tips from Drill Bits Pro for DIYers and pros.

Yes, you can drill plaster of Paris (gypsum plaster) with proper technique. Use a sharp masonry bit or a brad-point depending on what the plaster covers, drill slowly, and support the area to prevent cracking. Wear eye protection and a dust mask. If the plaster is thick or embedded behind other materials, use a pilot hole and drill on low speed.
Why drilling plaster of Paris is feasible and risks
Drilling plaster of Paris is a common task in DIY mounting projects and retrofit work. Gypsum plaster, the material behind plaster of Paris, is softer than concrete and can accept small drill holes when treated with care. The practical question, can you drill plaster of Paris, has a straightforward answer: yes, with the right method. The risk of hairline cracks or chipping increases if you rush, drill near an edge, or apply excessive pressure. According to Drill Bits Pro analysis, starting with a pilot hole and maintaining a steady, light touch dramatically reduces breakout and dust while improving accuracy. This mindset—planning, testing on scrap, and proceeding slowly—is what separates quick fixes from clean, professional results. By framing the task with respect for the material, you’ll avoid unnecessary damage and create secure placements for hooks, anchors, or wires.
Understanding plaster properties and drill bits
Plaster of Paris is gypsum plaster that sets hard when dry but remains relatively soft when freshly mixed. It bonds to many backings, but its performance varies with thickness and the surface behind it. For small-diameter penetrations, a sharp masonry bit or a brad-point bit can work well, but the choice hinges on the backing and whether you’re drilling into pure plaster or plaster over lath. Drills with dull bits or those run at high speeds tend to cause chipping and crazing. Always test on a concealed area or a scrap sample before drilling the actual mounting hole. The key is to balance bit selection with speed, pressure, and support to minimize surface damage and ensure a clean hole for anchors or screws.
Preparation and safety considerations
Preparation is where most successful plaster drilling starts. Clear the workspace, cover the floor, and protect nearby surfaces. Fit eye protection and a dust mask to guard against gypsum dust. Secure the work piece with clamps to prevent wobble, and mark the hole location precisely with a sharp pencil. Place a scrap piece of wood behind the plaster to reduce breakout on the far side. If you’re drilling through a finished wall, consider laying a protective shield or painter’s tape over the target area to minimize edge chipping. These steps create a controlled environment that supports precise drilling and easier finishing later.
Choosing the right drill bit and speed
For plaster of Paris, the typical recommendation is a sharp masonry bit or a brad-point bit for cleaner entry, depending on whether you’re penetrating pure plaster or plaster backing. Start with a small pilot hole (1/16–1/8 inch, depending on the final hole diameter) at very low speed to guide the drill. Increase pressure gradually only as the bit grinds into the plaster, avoiding aggressive drilling that can cause cracking. Use a depth stop or a piece of tape on the drill bit to prevent going deeper than intended. If the plaster is set over a dense backing, switch to a slightly larger masonry bit and proceed slowly. A controlled, slow approach yields cleaner edges and reduces dust.
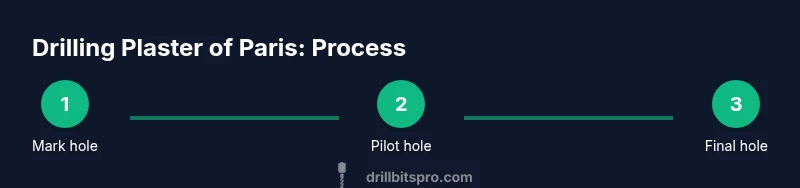
Step-by-step drilling technique on plaster of Paris
- Mark the exact hole location and align your drill perpendicular to the wall. 2) Clamp a scrap board behind the plaster to absorb breakout and keep the surface intact. 3) Start with a pilot hole at a low speed and light pressure to establish a groove. 4) Move to the final drill bit size, maintaining gentle pressure and steady speed; stop if you notice splintering or dust plume. 5) Drill to the required depth, using a depth guide or tape. 6) Clean the hole of dust with a small brush, then install the anchor or screw. 7) Inspect the surrounding area for any cracks and proceed to finish if needed. Pro tip: pause briefly after breaking through to recheck alignment and surface integrity.
Handling holes and finishing: repair options
If the hole shows minor chipping, you can smooth the edge with light sanding and a plaster patch. For larger holes, mix a small batch of plaster of Paris or use a pre-mixed joint compound to fill and shape the repair. Press the patch firmly and allow it to dry before sanding flush with the surface. For installations, set anchors or wall plugs to distribute load, then drive screws once the filler is cured. After finishing, touch up with corresponding paint or wallpaper to conceal the repair. Proper patching not only hides the repair but also strengthens the surrounding area against future stress.
Common issues and troubleshooting
Cracking often results from drilling too close to edges or using too much speed with a dull bit. If you see new cracks, stop, back out, and reassess the location. Dust buildup can wear down drill bits quickly, so pause to clear debris and inspect bit sharpness. If the hole begins to wobble or drift, retract and realign before continuing. When drilling into plaster near electrical boxes or studs, use a stud finder and proceed with caution. Always wear PPE and work slowly to avoid brittle edges that invite cracks.
Maintenance and aftercare
After drilling, keep the area clean and avoid placing heavy loads immediately. For frequent mounting tasks, consider using self-drilling anchors appropriate for plaster or plaster-over backing. Periodic inspection helps you catch hairline cracking before they expand. If you plan more drilling in the same wall, test on a spare patch to gauge how the plaster responds to repeated penetrations. With routine care and proper technique, plaster drilling remains a durable, repeatable process.
Case studies and practical tips for pro and DIY
Case studies show that a light touch and careful backing make a significant difference. A DIYer mounting a picture rail used a pilot hole, scrap backing, and a small finish bit to avoid edge cracks. A pro installing a wall anchor behind plaster found that using a depth stop and periodic pauses preserved the surface and ensured a snug fit. Practical tips: always test on a scrap piece, keep bits sharp, and use a backer board when possible to reduce breakout. Lightroom-level prep and a deliberate approach dramatically improve outcomes.
Tools & Materials
- Cordless drill with variable speed(Ensure a comfortable grip; use low speeds for plaster.)
- Masonry drill bits (1/8(Choose carbide-tipped or high-quality steel for longevity.)
- Brad-point bits (for wood-backed plaster)(Helpful for guiding entry on surfaced plaster.)
- Pilot drill bit (smaller than final hole)(A 1/16)
Steps
Estimated time: 25-40 minutes
- 1
Mark the hole location
Precisely mark the hole with a pencil. Use a level or square if mounting multiple items to ensure alignment.
Tip: Double-check measurements and use a backup guide to prevent drift. - 2
Clamp and back the work
Secure the plaster panel with clamps and place a scrap board behind the target area to reduce breakout.
Tip: A backer board dramatically improves edge integrity on plaster. - 3
Start with a pilot hole
Begin with a small pilot hole at low speed to establish a groove and reduce risk of cracking.
Tip: Keep the drill perpendicular to the wall to avoid angled holes. - 4
Switch to final bit and finish
Move to the final hole size, apply gentle pressure, and drill to the desired depth.
Tip: Pause to remove debris and recheck depth periodically. - 5
Clean and prepare for mounting
Clear dust from the hole, install the anchor or screw, and verify fit.
Tip: Use a depth stop or tape to prevent over-penetration. - 6
Patch if needed
If cracking occurs, apply plaster patch or joint compound and sand smooth after curing.
Tip: Match texture and paint for a seamless finish.
Got Questions?
Can plaster of Paris be drilled without cracks?
Cracking can occur if you drill too fast, without a pilot hole, or too close to edges. A slow, controlled approach with a pilot hole and backing reduces the risk.
Yes, cracks can be avoided with a slow, pilot-hole approach and proper backing.
What drill bit should I use for plaster of Paris?
A sharp masonry bit or brad-point bit works well, depending on backing. Avoid dull bits and high speeds which cause chipping.
Use a sharp masonry or brad-point bit for plaster with careful speed control.
Do I need a pilot hole before drilling plaster of Paris?
Yes. Start with a small pilot hole to guide the drill and reduce cracking, then step up to the final bit size.
Yes, start with a pilot hole to guide your drill.
How should I finish the hole if I need to mount something?
Install a suitable anchor or wall plug, then screw in. Patch any minor chips after installation and touch up with paint.
Install an anchor, then patch and paint to finish.
Is it safe to drill near electrical wiring in plaster walls?
Always use a stud finder and drill slowly. If unsure, consult a professional to avoid hitting electrical wires.
Be cautious and check for wires before drilling.
What should I do if the plaster cracks after drilling?
Stop drilling, assess the crack, and repair with plaster patch or joint compound. Reassess mounting if cracks widen.
If cracks appear, repair and re-evaluate mounting before continuing.
Watch Video
Top Takeaways
- Plan and test on scrap before drilling
- Use pilot holes and slow speed to avoid cracks
- Back the surface to reduce breakout
- Choose the right bit for plaster and backing
- Finish with proper patching if needed