Drill American: A Practical How-To Guide for Safe Drilling
Learn a practical, step-by-step method for drilling with imperial measurements, the right drill bits, and safety best practices. This Drill Bits Pro guide covers setup, technique, and maintenance for wood, metal, and masonry.

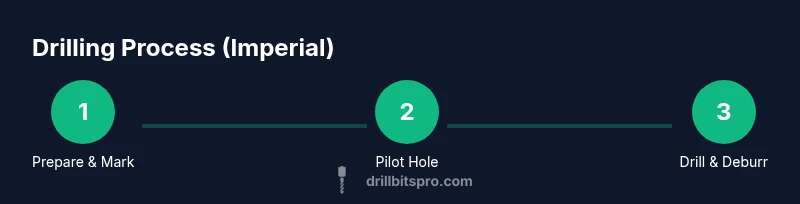
In this guide, you’ll learn a safe, effective way to drill using common American practices. You’ll verify material, choose the right bit size, set the correct speed, and use clamps and lubrication for a clean hole. The steps emphasize imperial (inch) measurements and practical drilling for DIYers and professionals. We’ll cover pilot holes, hole deburring, and verifying depth, plus safety checks and tool maintenance. Follow the full guide to master accurate hole placement, depth control, and safe tool handling.
Understanding Drill American: Imperial Precision in the US
In many American DIY and professional projects, drilling success hinges on precise measurements, proper bit selection, and disciplined technique. The term drill american denotes working with imperial sizing, inch-based bit designations, and setups tailored to US tool standards. This section explains why imperial measurements matter, how to convert common fractions into usable drill sizes, and how to map projects to the right bit family. By embracing these practices, you reduce splitting, wandering, and overheated bits, and you improve hole roundness and consistency.
Key idea: Start with a plan that aligns bit type, size, and speed to the material and finish you want. This approach is the core of practical, repeatable drilling in real-world environments.
Types of Drill Bits for American Projects
The United States market favors a broad range of drill bits for wood, metal, and masonry. For wood, brad-point bits and twist bits provide clean entry; for metal, high-speed steel (HSS) or cobalt bits excel in tougher alloys; for masonry, carbide-tipped bits and SDS options handle concrete. In drill american practice, selecting the correct size in inches matters more than metric labels. When you choose a bit, check flute geometry, point angles, and flute length to balance holes and reduce wandering. Having a labeled bit set in inches is essential for measurement accuracy.
Tip: Keep a labeled inch-sized bit set (e.g., 1/16, 1/8, 3/16, 1/4) so you’re aligned with imperial planning.
Pilot Holes, Hole Size, and Depth Control
Pilot holes reduce splitting in wood and help guide bits in metal. In drill american technique, starting with a smaller hole than your final diameter improves accuracy and reduces torque. A general rule is to choose a pilot hole about 60-70% of the final hole diameter for soft woods, and 25-50% for metals, depending on material toughness. Deburring after drilling yields smoother edges and a cleaner finish. Use a depth stop or a marked bit to avoid drilling too deep, especially on thin materials.
Pro tip: Always measure depth with a caliper or a marker on the drill bit for consistent results.
Setup: Clamps, Speed, and Lubrication
Secure the workpiece with clamps to prevent movement. Start with a low speed when using larger bits and increase gradually as depth grows. For metal, apply light cutting fluid to reduce heat and extend bit life; for wood, cutting oil or even water can help with certain species. Ensure the drill chuck grips the bit firmly and that the bit is perpendicular to the surface before starting. Short, controlled bursts reduce chatter and prolong bit life.
Why this matters: Proper setup minimizes tear-out and extends tool life.
Safety First: PPE, Environment, and Safe Drilling
Wear safety glasses, hearing protection, and a dust mask when appropriate. Keep hands clear of the rotating bit and never wear loose clothing. Clear the area of nails, staples, and project debris that could become projectiles. Use clamps, vacuum, or a brush to manage chips, and unplug the drill when changing bits. A well-lit workspace reduces mistakes and injuries.
Warning: Do not bypass PPE; bit failures can shed shrapnel and cause injury.
Real-World Scenarios: Wood, Metal, and Masonry
Wood: precision depends on clean entry and minimal tear-out; use a brad-point bit for clean corners and a pilot hole when joining with screws. Metal: maintain steady pressure, use coolant, and avoid overheating; carbide-tipped bits last longer on stainless steel. Masonry: orientation and constant pressure matter; overheating can burn tips and wear them quickly. For each material, choose bits in inch sizes to align with imperial plans.
Note: In drill american projects, always cross-check with a caliper or ruler for inch-based sizes.
Maintenance and Aftercare
Keep bits clean and dry after use; wipe away chips that can cause corrosion. Store bits in a labeled case with inch sizes visible. Sharpen dull bits or replace worn ones to maintain performance. Periodically inspect the chuck for slippage, and lubricate the spindle as needed to keep operations smooth.
Tip: A quick, lightweight cleaning with a nylon brush preserves bit life between jobs.
Tools & Materials
- Corded or cordless drill(Chuck size and torque suitable for the material)
- Assorted drill bits set (HSS, carbide-tipped)(Include inch sizes: 1/16", 1/8", 3/16", 1/4" etc.)
- Center punch or marking tool(Marks center and prevents wandering)
- Clamps or vise grips(Secure the workpiece firmly)
- Tape measure or ruler (inches)(Imperial sizing reference)
- Caliper or depth gauge(For precise depth control)
- Lubricant or cutting fluid (metal)(Reduces heat on metals)
- Dust mask and safety glasses(Eye and respiratory protection)
- Workbench or sturdy surface(Stable drilling base)
- Vacuum or brush for chips(Keeps work area clean)
Steps
Estimated time: 30-45 minutes
- 1
Inspect and prepare
Check your material type and thickness. Confirm you have the correct inch-sized bit and a clean, dry surface. Gather clamps, a center punch, and the drill. This preparation reduces misalignment and improves hole quality.
Tip: Verify bit sharpness before starting to prevent wandering. - 2
Mark and center
Use the center punch to create a small dimple at the drill point. Position the workpiece securely and align the mark with the drill bit to ensure a precise entry.
Tip: If you’re drilling on a curved surface, clamp a straightedge to guide the bit. - 3
Choose bit size and plan the pilot hole
Select a pilot hole size roughly 60-70% of the final hole diameter for wood and 25-50% for metal. Mark the final depth on the bit or use a depth stop to prevent over-penetration.
Tip: Always start with a pilot to reduce heat and friction. - 4
Secure setup and set speed
Clamp the piece, perpendicular to the surface, and set the drill to a conservative speed. Gradually increase if the bit advances smoothly without catching.
Tip: Perpendicular alignment minimizes chip-out and wandering. - 5
Drill with controlled passes
Apply steady pressure and allow the bit to cut. For deep holes, withdraw occasionally to clear chips and prevent binding. Use light cutting fluid for metal when needed.
Tip: Avoid forcing the bit; let the tool do the work. - 6
Deburr, inspect, and clean up
Remove burrs with a deburring tool or sandpaper. Inspect the hole for roundness and finish, then clean chips and store tools properly.
Tip: A clean hole looks professional and accepts fasteners neatly.
Got Questions?
What does 'drill american' mean in practice?
It denotes drilling using imperial inch-based sizing, US standard bit types, and setup practices common in American workshops. Emphasizing precise measurements and straightforward tooling helps achieve consistent results.
Drill american means drilling with inch-based sizes and US-standard bits for reliable results.
Which drill bit should I use for wood in the US?
For most soft woods, start with a brad-point or twist bit in an inch size that matches your pilot hole plan. For hardwoods, use sharp HSS or carbide bits with slower feeds to avoid tear-out.
Use a sharp brad-point or twist bit in inches, especially for wood; hardwoods need careful feeding.
Is a pilot hole always necessary?
A pilot hole reduces splitting in wood and minimizes bit wandering in metal. The final hole can be larger than the pilot, but starting small improves accuracy and control.
Yes. A pilot hole helps accuracy and reduces wandering.
What safety gear is essential for drilling?
Always wear safety glasses and hearing protection; use a dust mask when cutting or creating dust. Keep clothing tight and tie back long hair to avoid snagging.
Safety glasses and ear protection are essential; tie back loose clothing.
How can I prevent drill wandering?
Mark the center, use a center punch, clamp the workpiece, and start with a small pilot hole. Ensure the bit remains perpendicular to the surface during drilling.
Center mark, clamp, and start with a pilot hole to stop wandering.
How do imperial sizes affect ordering drill bits?
Imperial sizes are measured in inches; keep a labeled set of inch sizes to match your plans. Convert fractional sizes as needed and store bits in inch-specific organizers.
Imperial sizes are inches; keep an inch-size bit set handy.
Watch Video
Top Takeaways
- Plan in imperial units and verify material type before drilling.
- Choose the right bit and pilot hole to prevent tear-out.
- Secure the workpiece and control speed for accuracy.
- Maintain and store bits properly for longevity.