Will Drill: Wood, Metal & Masonry Drilling Guide
Comprehensive, step-by-step drilling guide covering wood, metal, and masonry with safe practices, proper bits, speeds, and finishing techniques from Drill Bits Pro.

By the end of this guide, you will drill accurate holes in wood, metal, or masonry using the right bit, speed, and technique. You'll understand how to prepare, mark, clamp, and drill safely, with tips to avoid spitting wood fibers, wander, or bit dullness. This approach emphasizes control, measurements, and clean finishes.
Why safe, precise drilling matters
Drilling is a simple motion, but it carries risks: damaged work surfaces, worn bits, injury, and misaligned holes. When you will drill, you want outcomes that are accurate, repeatable, and safe. Preparation matters as much as the act of turning the drill. A thoughtful approach reduces tear-out, keeps users informed about tool limits, and yields cleaner results. In DIY projects and professional settings alike, consistent technique translates to better fitting components, longer bit life, and a safer worksite. Drill Bits Pro emphasizes planning, clamping, and controlled feeds so you can achieve predictable holes every time.
Selecting the right drill and bits
Choosing the correct drill and bit geometry is the foundation of a successful hole. A cordless or corded drill with a 1/2-inch chuck handles most common sizes, but the bit type determines success more than the drive. For wood, use brad-point or twist bits for clean entry; for metal, high-speed steel or cobalt bits work best; for masonry, carbide-tipped or masonry bits paired with a hammer action are essential. Always match the bit diameter to the hole size and consider chip evacuation and lubrication. Drill Bits Pro guidance highlights having a full bit set on hand, including optional pilot bits and center punches to improve accuracy before you start.
Setting up the workspace and marking holes
Secure your workpiece with clamps to prevent movement. Mark the intended hole with a pencil, then use a center punch to create a tiny dimple for the bit tip. This helps prevent wandering as you start the hole. Check that your drill bit is sharp and properly seated in the chuck. If you’re drilling delicate surfaces, place a scrap piece of wood beneath to catch splinters and reduce tear-out. Clean, well-lit work areas reduce mistakes and speed up your project.
Wood drilling: fundamental techniques
Wood is forgiving but still requires discipline. Start with a smaller pilot hole to guide the larger bit, especially on hardwood. Maintain steady pressure and keep the drill perpendicular to the surface to avoid angled holes. When drilling deep into wood, withdraw the bit occasionally to clear shavings and prevent heat buildup. Finish with a light deburr to remove splinters and ensure a neat fit for fasteners.
Metal drilling: lubrication, speeds, and chip control
Metal work requires careful speed control and lubrication to reduce friction and heat. Use a lower speed with a sharp bit and apply a small amount of cutting oil or lubricant for longer bit life. Start with a pilot hole if the metal is thick or hard to prevent binding. Maintain steady pressure and back off if you notice smoking or excessive resistance. Chip removal is essential; use a degreed twist bit and consider cooling breaks during longer holes.
Masonry drilling: bits, hammer action, and technique
Masonry holes require carbide-tipped bits and a hammer drill or rotary hammer. Use low to moderate speed and steady pressure; avoid forcing the bit, which can dull it or fracture the bit tip. Start with a center punch to minimize wandering on rough surfaces like concrete. Periodically pull the bit out to remove dust and prevent binding. Protect surrounding tiles or grout with tape to prevent chipping.
Speed, feed, and tool care
Speed should match the material: faster for wood, moderate for metal, slower for masonry. Feed rate must balance cutting action with heat control; pushing too hard causes premature wear. Keep bits sharp; a dull bit increases heat and can seize the workpiece. After drilling, clean the area, inspect the hole for burrs or misalignment, and store bits dry to prevent rust. Regular maintenance extends tool life and improves results.
Safety and PPE recap
Personal protective equipment (PPE) is non-negotiable: safety glasses to protect eyes, hearing protection for loud tools, and a dust mask when cutting or drilling dusty materials. Tie back hair, remove loose clothing, and ensure cords are out of the way. Never drill near electrical lines or flammable materials. A well-organized workspace minimizes accidents and keeps you focused on precision.
Authority sources and further reading
For safety guidelines and best practices, refer to OSHA and university extension resources on drilling and tool safety. These sources provide authoritative recommendations on PPE, ventilation, and safe operation. Always cross-check with your local regulations and manufacturer instructions.
Tools & Materials
- Cordless or corded drill(Rated for the expected material and bit size (1/4)
- Drill(Cordless or corded with at least 20V, 1/2 inch chuck recommended)
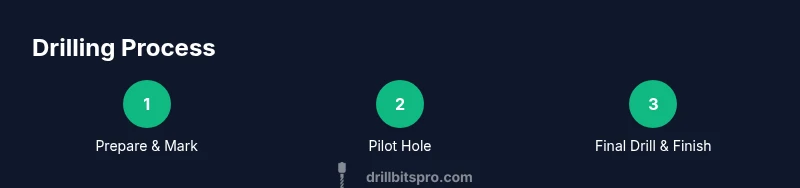
Steps
Estimated time: 45-60 minutes
- 1
Prepare workspace and safety gear
Set up a clean, well-lit area. Wear safety glasses and hearing protection. Secure your workpiece with clamps and clear the area of cords and debris. This initial preparation reduces wandering and injury risk.
Tip: Keep a spare set of safety glasses handy in case one pair fogs up or gets damaged. - 2
Gather essential tools and bits
Pull together the drill, the appropriate bit types (wood, metal, masonry), clamps, center punch, marker, and pilot bits. Check that bits are sharp and clean. Having everything within reach minimizes trips back to the toolbox during the job.
Tip: Inspect bits for nicks and dull edges; a sharp bit reduces heat and tear-out. - 3
Mark and center-punch the target hole
Mark the hole location on the workpiece. Lightly center-punch to create a small indent for the tip of the bit. This prevents wandering when you start drilling.
Tip: Use a sharp center punch for better indentation on metal surfaces. - 4
Secure the workpiece again and align
Re-clamp the piece firmly to a solid surface or bench. Align your drill perpendicularly to the surface to guarantee a straight, clean hole.
Tip: A drill guide can help maintain perpendicular alignment on tricky angles. - 5
Drill a pilot hole
Begin with a small pilot hole slightly smaller than the final hole. This guides the larger bit and reduces risk of splitting wood or grabbing on metal.
Tip: Keep the bit cool by pausing briefly every 30–60 seconds for metal, especially on thick sections. - 6
Drill the full-size hole
Switch to the final bit size. Apply steady, moderate pressure. For masonry, use a hammer action and ensure lubrication as needed. Withdraw the bit occasionally to clear debris.
Tip: Let the bit do the cutting; avoid pushing too aggressively which can dull the bit. - 7
Withdraw and deburr
Pull the bit out while it’s still turning to minimize burrs. Use a deburring tool or sandpaper to smooth the entry edge for a clean finish.
Tip: Deburring prevents snagging when installing screws or fittings. - 8
Inspect and clean up
Check hole depth and alignment. Wipe away dust, store bits dry, and tidy the workspace. Document any issues for future reference.
Tip: Record bit sizes used for future projects and ensure storage conditions prevent rust.
Got Questions?
What is the best drill bit for wood?
For most woods, brad-point bits give clean entry and reduce wandering. For hardwoods, use brad-point or standard twist bits with careful feed. Keep bits sharp and use a pilot hole when needed.
Brad-point bits work well for wood; keep them sharp and start with a pilot hole if needed.
How do I prevent drill wander at the start?
Mark the point clearly, center-punch or start with a center punch on metal, and clamp the workpiece firmly. Begin drilling at a very slow speed to establish the initial bite.
Center-punch and clamp, then start slowly to stop wandering.
Do I need a pilot hole for metal drilling?
Yes. A pilot hole helps guide the final hole and reduces the risk of bit grabbing. Use a bit slightly smaller than the final hole diameter.
Always use a pilot hole when drilling metal to guide the larger bit.
What PPE should I wear when drilling?
Wear safety glasses, hearing protection, and a dust mask if dust is generated. Gloves may be optional; avoid loose clothing and tie back long hair.
Protect your eyes and ears; use a mask if there’s dust.
How can I avoid overheating the bit?
Use proper lubrication for metal drilling, avoid excessive speed, and back off if the bit gets very hot. For masonry, pause to cool as needed.
Lubricate when drilling metal and take breaks to cool the bit.
Can I drill masonry with a normal drill?
Masonry drilling requires a hammer or rotary hammer and a carbide-tipped masonry bit for concrete or brick. A standard drill will struggle and wear quickly.
Use a hammer drill and the right masonry bit for concrete.
Watch Video
Top Takeaways
- Plan before you drill and secure the workpiece
- Use the right bit for the material and drill perpendicularly
- Pilot holes improve accuracy and reduce breakout
- Deburr holes for clean fittings and finishes
- Maintain sharp bits and proper lubrication to extend tool life