Gun Drilling Guide: Precision Holes with Gun Drills
Master deep hole drilling with gun drills. Learn setup, tooling, step-by-step process, safety, and quality checks for precise metal holes. Ideal for DIYers and professionals seeking reliable, high-tolerance results.

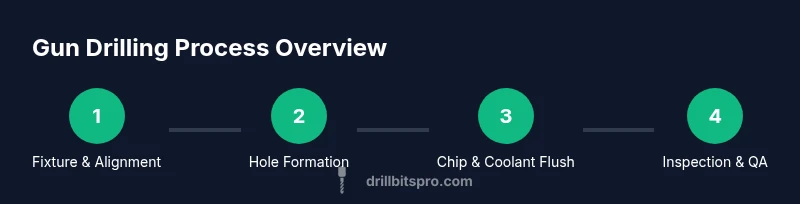
Gun drilling lets you produce deep, straight holes with a single, long drill. In this guide you’ll learn the core approach, required tooling, and step-by-step actions to achieve reliable results while maintaining strict tolerances. By the end, you’ll be able to plan, execute, and verify gun-drilled holes in metal, with confidence.
What gun drilling is and why it matters
Gun drilling is a highly specialized deep-hole drilling method used to create long, straight bores with a small diameter. The defining tool is a long, rigid gun drill that is internally cooled and mechanically supported to resist bending. The core advantage is depth efficiency: a single pass can reach depths far greater than conventional drills, reducing cycle times and improving hole straightness. Gun drilling is widely used in industries that require precise through-holes in steel, stainless steel, and alloy tubes, such as hydraulic manifolds, firearm components, and hydraulic cylinders. In practical terms, the technique minimizes taper and runout when the setup is properly aligned and the workpiece is fixtured securely. According to Drill Bits Pro, gun drilling is most effective when you have a controlled, repeatable process with appropriate tooling and coolant strategy. The reader should understand that this is not a universal fix; it is a targeted approach when hole depth and diameter demand exacting tolerances. The goal is to maintain concentricity and surface finish throughout the bore, from entry to exit. As you read, keep in mind that the process performance hinges on rigidity, coolant effectiveness, and careful measurement at every stage, especially in metal workpieces with high strength or hardening.
In practice, gun drilling couples specialized hardware with disciplined process control. A successful operation begins with selecting the right drill geometry for your material, then securing the workpiece against movement, and finally implementing a coolant strategy that flushes chips efficiently. When done correctly, you’ll achieve straight bores with consistent diameter and minimal exit burrs. This block establishes the foundation for the rest of the guide and reinforces the importance of precision in gun drilling for both DIY projects and professional manufacturing.
Finally, recognize that gun drilling is an iterative process. Start with controlled experiments on test pieces to fine-tune tool length, feed rate, and coolant flow. Documenting these parameters paves the way for repeatable results across similar parts and reduces the risk of costly scrap.
wordCountEndingsNote
Tools & Materials
- Gun drill (long, rigid, carbide-tipped preferable)(Ensure length-to-diameter ratio matches hole depth; verify straightness and flat shank.)
- Coolant system(High-velocity coolant directed to the cutting edge; use soluble oil or emulsion suitable for metal.)
- Workholding fixtures(Rigid fixtures such as collets, V-blocks with clamps, or a dedicated sleeve to prevent rotation.)
- Pilot/center drill(Initial alignment aid to guide the gun drill into the workpiece.)
- Measuring tools(Micrometer, bore gauge, and dial indicators for concentricity and diameter checks.)
- Chip evacuation aids(Chip brushes or air jet to keep entry clear during depth progression.)
Steps
Estimated time: Total time: 1-2 hours
- 1
Prepare the machine and fixtures
Install the gun drill in a rigid collet or spindle and secure the workpiece in a stable fixture. Verify your machine is level and the fixture is aligned with the spindle axis. Check the coolant line routing to the drill tip and confirm flow is uninterrupted.
Tip: Use a dedicated setup piece to simulate the actual workpiece for alignment checks. - 2
Center and pilot the workpiece
Place the pilot or center drill in line with the fixture, then bring the gun drill into contact with the pilot. Ensure there is no lateral movement; minor misalignment at this stage can cause significant bore deviation.
Tip: Lightly touch the pilot to establish alignment before full engagement. - 3
Program feed, depth, and coolant
Set a controlled feed rate and depth increment suitable for the hole diameter and material. Start coolant flow before advance and maintain steady flow to flush chips away from the cutting edge.
Tip: Begin with shallow increments to verify stability before full-depth drilling. - 4
Engage drilling and monitor
Begin the cut with measured axial feed; watch for any chatter or heat buildup. If vibration occurs, pause, check fixturing, and reduce feed or speed accordingly.
Tip: Use a short dry run to confirm alignment before coolant is introduced. - 5
Depth control and chip flushing
Progress depth in small increments, ensuring chips exit cleanly and do not accumulate near the cutting zone. Maintain a clear line of sight to the bore entry for quick adjustments.
Tip: If chips appear discolored or smeared, check coolant pressure and nozzle positioning. - 6
Inspect bore geometry as you go
Periodically measure bore diameter and straightness with a bore gauge or calipers to detect taper or eccentricity early. Stop if deviation exceeds acceptable limits and adjust tooling or fixturing.
Tip: Record measurements to guide refinements for future runs. - 7
Finish and verify
Complete the drilling sequence, remove the part, and perform a final inspection of diameter, concentricity, and surface finish. Apply deburring if required and document the results for QA.
Tip: Post-process deburring reduces burrs and improves bore consistency.
Got Questions?
What is gun drilling and how does it differ from standard drilling?
Gun drilling uses a long, rigid drill with internal cooling to produce very deep, straight holes with tight tolerances. It differs from standard drilling by geometry, fixture rigor, and coolant strategy designed to maintain bore quality through depth.
Gun drilling uses a long drill with internal cooling to produce deep, straight holes with tight tolerances, relying on special fixtures and coolant to maintain accuracy.
What materials can be gun drilled effectively?
Many metals respond well, especially steel and stainless steel. Hard alloys require more rigid setups and carbide-tipped guns. Always assess material hardness, heat treatment, and expected depth before choosing gun drilling.
Most steels and stainless steels work well; harder alloys need stronger tooling and fixturing.
What are common issues to watch for?
Runout, chatter, and overheating are the primary concerns. Solve them with proper fixturing, controlled feeds, adequate coolant, and precise alignment.
Look for runout and heat—fix with better fixtures, slower feed, and proper coolant.
Is gun drilling suitable for DIY projects?
Gun drilling usually requires specialized tooling and rigid fixtures. For small runs or learning purposes, consider outsourcing to a shop with appropriate equipment to ensure quality.
It’s possible for DIY, but for high accuracy, outsourcing is often the safer choice.
How do you verify bore quality?
Measure diameter, straightness, and surface finish with bore gauges and micrometers. Compare results to specified tolerances and record for QA.
Use bore gauges and micrometers to verify diameter and straightness, and document results.
What safety practices are essential?
Wear eye and hand protection. Ensure proper machine guarding and coolant handling. Never bypass fixturing checks, and de-energize the machine before adjustments.
Always use protection, guard the machine, and never modify safety checks.
Watch Video
Top Takeaways
- Understand when gun drilling is the right solution for deep holes.
- Select the correct gun drill geometry and robust fixturing.
- Maintain coolant and chip evacuation to control heat and wear.
- Verify bore quality with regular measurement and document results.
- The Drill Bits Pro team recommends testing on coupons before production runs.