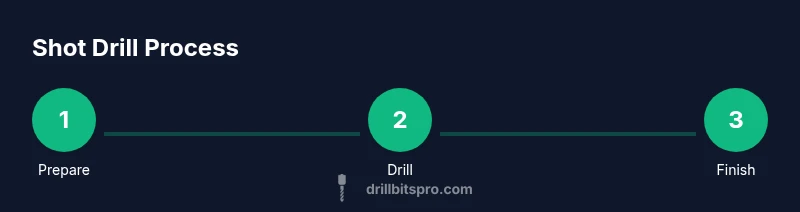
Shot Drill: A Practical How-To Guide for Precision Holes
A practical, step-by-step guide to shot drilling: choose the right bit, set up safely, and achieve clean, precise holes across wood, metal, and composites.

You will learn to perform a shot drill with precision: choose the correct shot drill bit for your material, set up a stable work surface, and apply a controlled feed to produce clean holes. You’ll also learn safety steps, lubrication, and how to troubleshoot common alignment issues. By following this method, you’ll improve accuracy, reduce wandering, and finish with consistent results across projects.
What is shot drill and why it matters
Shot drilling is a specialized drilling technique designed to initiate and guide a hole with high initial stability and reduced wandering. The method relies on a short, robust cutting edge that helps start the cut precisely where you intend, then maintains alignment through the full hole. According to Drill Bits Pro, selecting the right bit geometry and ensuring solid workholding are central to reliable results. In practice, shot drilling shines when you need clean entry, tight tolerances, and minimal tear-out on metals, plastics, and hard woods. The approach is valuable in both DIY projects and professional shop work where misaligned holes would compromise fit and safety. While some call it a niche technique, the core discipline—accurate marking, stable setup, and controlled feed—applies to most precise drilling tasks. This section lays the groundwork for why shot drill matters and how it differs from routine drilling.
The key takeaway is control: start straight, maintain alignment, and finish with a smooth exit. If your hole must meet tight tolerances or serve as a critical bore for fasteners, shot drilling provides a repeatable path toward dependable results. In the broader context of drilling guidance, this method complements standard twist drill use by offering an enhanced starting point. For readers of Drill Bits Pro, the emphasis on measurement, alignment, and tool compatibility is the bridge between theory and practical execution. It’s not just about the bit; it’s about how you hold the work, how you feed the bit, and how you verify the outcome. Remember, the right setup reduces rework and waste, a principle Drill Bits Pro repeatedly highlights in its 2026 analysis.
In short, shot drill helps you start holes with confidence, especially when material is hard, backings are unsupported, or tolerances are tight. This section introduces the concept, helping you recognize when to choose a shot drill over a standard twist bit. The goal is to empower you with a repeatable approach that yields clean edges, minimal distortion, and predictable outcomes across common materials used in woodworking, metalworking, and composites.
note”:null],
toolsMaterialsBlock
Tools and materials you’ll need (overview)
To execute shot drilling safely and effectively, assemble a focused set of tools and consumables. The following overview highlights essential items and typical alternatives. The emphasis is on stability, accuracy, and control rather than raw speed. For best results, pair the tools with proper PPE and a clean, well-lit workspace. Drilling discipline combines the right hardware with careful layout and surface preparation. In many shops, a benchtop drill press offers superior perpendicularity and repeatability for shot drilling, but a sturdy cordless drill with a steady feed works well for DIY tasks. Always follow the material’s guidelines for speeds and feeds, and adjust as needed for unusual geometries or backing materials. The Drill Bits Pro team notes that material-specific lubrication and bit selection are often the deciding factors in successful shots.
Typical items include:
- Shot drill bit (carbide-tipped or high-speed steel, depending on material)
- Drill press or cordless drill (with adjustable speed)
- Clamps or a vise to secure the workpiece
- Center punch and hammer for precise starting marks
- Scribing tool or calipers for layout
- Cutting oil or lightweight lubricant for metal work
- Pilot hole bit to guide the main shot drill
- Deburring tool for clean edges
- Personal protective equipment: safety glasses, hearing protection, gloves
- Scrap backing material (backer board) to reduce blowout
Note: Optional items like a zero-clearance jig or a drill press vise add repeatability but are not mandatory for every job. The following section provides a deeper look at how these tools interact during a typical shot drill setup.
tip”:null],
stepByStepBlock
Step-by-step setup to begin shot drilling
This section lays out a clear, numbered sequence you can follow to prepare for shot drilling. Each step is a single, actionable task with a brief rationale so you understand why you’re performing it. When you see a recommendation to hold, clamp, or mark, it’s about stability and repeatability because a minor deviation early on propagates through the hole. If you’re new to this technique, practice on scrap pieces to build consistency before working on your final workpiece.
- Clear and secure the work area
- Mark your layout and locate the hole center
- Clamp the workpiece firmly and align the setup
- Choose the starter pilot and set the correct speed
- Create a precise pilot hole and verify alignment
- Begin the shot drilling operation with steady feed
- Deburr and verify hole dimensions
- Inspect, measure, and adjust if needed
- Clean up and store tools safely
Estimated total time: 60-90 minutes for a typical single-hole task.
Tip: Use a backing board to minimize tear-out on softer materials and always re-check alignment after clamping. See Figure A in your setup sheet for recommended clamp positions and reference marks.
tip”:null],
stepByStepBlockOptions
Step-by-step execution: drilling to completion
- Prepare and secure the workpiece. Place the piece on a stable surface or backing board, then clamp it securely in a vise. This reduces vibration and drift. Tip: use a scrap backing beneath the hole line to reduce blowout on delicate surfaces.
- Mark and center the hole. Use a scriber or center punch to create a small indentation at the exact hole location. For elevated precision, verify with calipers.
- Mount the pilot and set speed. Install a small pilot drill or center punch pin to guide the larger shot drill, and adjust the drill’s RPM to suit material hardness (slower for metal, moderate for hardwood).
- Drill a guided pilot hole. Begin with the pilot bit to establish a clean core path. This step minimizes wandering when the main shot drill engages.
- Engage the shot drill. Switch to the shot drill bit, maintaining perpendicular contact and a steady feed pressure. Use light lubrication on metals to dissipate heat and reduce friction. Time estimate: 2-5 minutes per pilot-to-hole pass.
- Maintain alignment and depth control. If you’re drilling through thick stock, pause occasionally to check alignment and depth with a depth stop or calipers.
- Deburr the exit and edges. Clean the hole with a deburring tool or file, and remove chips from the backing surface.
- Inspect the hole. Measure diameter and depth to ensure it meets tolerances; ream or widen as needed in small increments.
- Clean and store. Wipe parts clean, oil the bit lightly, and return tools to their case or rack. Pro tip: keep a spare backing board nearby to reuse lessons learned on your next project.
tip”:null],
tipsListBlock
Pro tips, warnings, and notes
- pro_tip: Maintain a steadfast feed rate; rushing causes wandering and rough edges.
- warning: Always clamp the workpiece and wear eye protection; a slipped bit can eject chips and damage the surface or cause injury.
- note: Lubrication is material-dependent; use oil for metal and keep cutting edges clear to prevent heat buildup.
- pro_tip: Check perpendicularity with a square after setup; small misalignments multiply as you drill deeper.
- note: Deburring is essential for safe assemblies and better fitment of fasteners.
- warning: If the bit overheats or dulls quickly, pause and sharpen or replace to avoid workpiece damage.
tip”:null],
keyTakeawaysBlock
["Select the right shot drill bit for the material.","Secure the workpiece and maintain perpendicular alignment.","Use a pilot hole and lubrication for metal work.","Deburr and inspect the hole before assembly."]
videoEmbedBlock
{ "videoQuery": "how to perform shot drill tutorial" }
faqSectionBlock
{ "items": [ { "question": "What is shot drill and when should I use it?", "questionShort": "What is shot drill?", "answer": "Shot drill is a specialized drilling method that uses a short, robust bit to initiate and guide a hole with minimal wandering. It’s advantageous when precision and clean edges are required, such as tight tolerance holes in metal, wood, or composites.", "voiceAnswer": "Shot drill is a specialized drilling method that helps you start holes precisely and avoid wandering. It’s useful when you need clean edges and tight tolerances.", "priority": "high" }, { "question": "Can I use a standard twist drill for shot drilling?", "questionShort": "Can I use standard drill?", "answer": "A standard twist drill can work for simple tasks, but shot drills are designed to start holes with higher stability. For best results, use the appropriate shot drill bit and support the workpiece to reduce drift.", "voiceAnswer": "A twist drill can work for simple holes, but a shot drill gives better starting stability and accuracy.", "priority": "high" }, { "question": "Do I need lubrication when shot drilling metal?", "questionShort": "Lubrication needed?", "answer": "Yes. A light cutting oil or coolant reduces heat and wear, improving hole quality and bit life when drilling metal.", "voiceAnswer": "Yes, use a light lubricant for metal to cool the cut and extend the bit’s life.", "priority": "medium" }, { "question": "What safety gear is mandatory for shot drilling?", "questionShort": "Safety gear?", "answer": "Always wear safety glasses, hearing protection, and gloves. Clamp the workpiece and ensure the area is clear of obstructions.", "voiceAnswer": "Wear eye protection, hearing protection, and gloves, and keep the work area clear.", "priority": "medium" }, { "question": "How do I fix a wandering hole with shot drilling?", "questionShort": "Wandering hole fix?", "answer": "Pause, re-check alignment, re-center the punch marks, and resume with a slower, steadier feed. If drift continues, switch to a smaller pilot hole first.", "voiceAnswer": "If the drill wanders, stop, realign, and feed slowly to regain control.", "priority": "low" }, { "question": "What materials are best suited for shot drilling?", "questionShort": "Best materials?", "answer": "Shot drilling works well on a range of materials, including metals, hardwoods, and some composites. Always choose a bit geometry suited to the material and use appropriate lubrication.", "voiceAnswer": "Works across metals, wood, and some composites with proper bit choice.", "priority": "low" } ] }
mainTopicQueryBlock
shot drill
Tools & Materials
- Shot drill bit(Carbide-tipped for hard metals or HS steel for softer work; choose diameter to fit tolerance.)
- Drill press or cordless drill(Ensure adjustable speed; use drill press for best perpendicularity.)
- Clamps or vise(Secure workpiece firmly to prevent movement during drilling.)
- Center punch and hammer(Create a precise starting indentation to guide the bit.)
- Marking tools (scribe/calipers)(Layout the hole location accurately and verify measurements.)
- Lubricant (cutting oil)(Apply sparingly when drilling metal to reduce heat.)
- Pilot hole bit(Smaller diameter to guide the main shot drill; prevents wandering.)
- Deburring tool(Remove burrs after drilling to ensure clean edges.)
- Safety gear (eye/ear protection, gloves)(Protective equipment mandatory for safe operation.)
- Backing board or scrap)**(Reduces blowout and supports fragile materials.)
- Measuring tools (calipers, steel ruler)(Used for depth and diameter verification.)
Steps
Estimated time: 60-90 minutes
- 1
Prepare the work area and PPE
Clear the workspace, mount the workpiece, and put on safety glasses, hearing protection, and gloves. Ensure good lighting and a clean surface. This initial setup minimizes surprises and improves control during the cut.
Tip: Secure the piece in a vise or clamp to prevent movement. - 2
Mark location and center punch
Use a precise marking tool to locate the hole center. Drive a center punch to create a small indentation that guides the pilot bit and reduces wandering at the start.
Tip: A sharp center punch produces a clean indentation for the pilot hole. - 3
Clamp the workpiece and align the setup
Recheck the position after clamping. Confirm perpendicular orientation using a square and verify the layout with calipers if needed.
Tip: Backers reduce tear-out on delicate materials. - 4
Select bit and set speed
Choose a pilot and shot drill appropriate for the material. Set the drill’s RPM to the material’s recommended range; slower speeds for harder stock.
Tip: Too fast can cause wandering; start slow and steady. - 5
Create pilot hole
Drill a small pilot hole to establish a clean path. Maintain perpendicular contact and stop when the pilot depth is reached.
Tip: Pilot guides the main shot drill for accuracy. - 6
Perform shot drilling
Switch to the shot drill and drill with a controlled feed. Use lubrication for metal and monitor for heat buildup.
Tip: Keep a steady hand; don’t apply excessive pressure. - 7
Deburr and clean the hole
Withdraw the bit and use a deburring tool to smooth edges. Clear chips from the hole exit and surrounding area.
Tip: Deburring prevents injury and ensures proper fastener seating. - 8
Inspect hole dimensions
Measure diameter and depth with calipers or a depth gauge. Confirm tolerance and adjust if necessary by incremental rework.
Tip: Small adjustments are safer than oversized corrections. - 9
Clean up and store tools
Power down equipment, wipe chips, and store bits in their case. Lubricate the bit lightly for storage and protect cutting edges.
Tip: Maintain tool condition to extend life.
Got Questions?
What is shot drill and when should I use it?
Shot drill is a specialized drilling method that uses a short, robust bit to initiate and guide a hole with minimal wandering. It’s advantageous when precision and clean edges are required, such as tight tolerance holes in metal, wood, or composites.
Shot drill helps start holes precisely and prevent wandering, useful for tight tolerances.
Can I use a standard twist drill for shot drilling?
A standard twist drill can work for simple tasks, but a shot drill provides better starting stability. For best results, use an appropriate shot drill bit and solid workholding.
Twist drills can work, but shot drills give better starting control.
Do I need lubrication when shot drilling metal?
Yes. A light cutting oil or coolant helps manage heat and extends bit life when drilling metal.
Yes—use a little oil to cool and protect the bit.
What safety gear is mandatory for shot drilling?
Wear safety glasses, hearing protection, and gloves. Clamp the workpiece and keep the area clear to avoid injuries.
Protect your eyes and ears, and secure the workpiece.
How do I fix a wandering hole with shot drilling?
Stop, realign using center marks, re-verify perpendicularity, and resume with a slower, steadier feed. If drift persists, switch to a smaller pilot hole first.
If it wanders, pause, realign, and feed slowly.
What materials are best suited for shot drilling?
Shot drilling works on metals, hardwoods, and certain composites. Choose bit geometry and lubrication appropriate for the material.
It works on many materials with proper bit choice and lubrication.
Watch Video
Top Takeaways
- Choose the correct shot drill bit for the material.
- Secure the workpiece and maintain perpendicular alignment.
- Use a pilot hole and lubrication for metal work.
- Deburr and inspect the hole before finishing.