How to Drill Accurately: A Practical Guide
Learn to drill accurately with a step-by-step method, choosing the right bits, aligning with guides, and depth control. Built for DIYers and professionals, this guide from Drill Bits Pro delivers practical tips, safety, and verification methods.

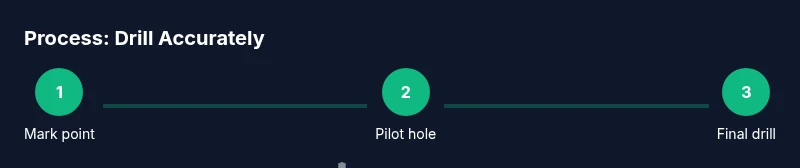
By following this guide, you’ll drill accurately every time. Start by securing the workpiece, marking the drill point, and selecting a sharp bit and pilot hole. Keep the drill perpendicular, feed steadily, and check depth with a stop or gauge. Verify alignment with a square and practice on scrap material first.
Why accuracy matters in drilling
Accuracy in drilling isn't optional—it's foundational. A precise hole ensures fasteners seat correctly, joints align, and assembly strength remains intact. For woodworking, a misdrilled hole can ruin a plank or compromise a mortise. In metalwork, even a slight drift can ruin threads or create burrs that hinder fit. According to Drill Bits Pro, disciplined alignment and controlled feeding reduce wasted material and rework. Start by visualizing the hole as part of a larger system: every hole coordinates with dowels, screws, or hardware that must line up perfectly. The goal is to establish a repeatable starting point, not a single lucky cut. Practice on scrap material to train your eye and your touch before touching the real workpiece. The best drill projects combine reliable workholding, sharp bits, and a steady hand. This approach saves time, materials, and frustration while delivering professional results even on casual hobby projects.
Core factors that influence drilling accuracy
Precision is influenced by how you hold and guide the drill, the bit geometry, and the material behavior. Runout from the chuck and bit wobble causes holes to drift. Proper workholding—clamps, a vise, or a drill stand—holds everything steady. Marking accurately is essential; use a sharp center punch and crisp marks. For deep holes, a pilot hole helps keep the bit tracking true. Material hardness and grain direction affect entry and exit. In wood, grain can guide or mislead; in metal, lubrication reduces heat and protects the edge. Keep the workspace clean to prevent stray debris from nudging the bit. Your choice of speed and feed rate also shapes chip formation and hole quality. The result is that accuracy comes from careful preparation and consistent technique, not luck.
Tools and materials for precision drilling
To drill accurately, assemble a focused toolkit. You need a drill with reliable speed control and a straight chuck; a set of bits appropriate for your material; a pilot or brad point bit for initial guidance; a center punch; clamps or a bench vise; a drill guide or straightedge; depth stop or tape; calipers or a depth gauge; safety gear; and a scrap piece for practice. For metal, use a cutting fluid or lubrication to reduce heat and extend bit life; for wood, a brad point helps prevent wandering. Consider a drill press or a guide jig for repeatable perpendicular holes; if you must rely on a handheld drill, use a drill guide or align with a square and straight edge. Sharp bits are essential; dull bits wander and scorch. Always match bit shank size to the chuck and prefer carbide-tipped variants for tougher materials. This setup minimizes drift and improves hole concentricity.
Marking the drill point and starting with a center punch pilot hole
Begin with precise marks. Use a sharp pencil or marking knife to label the exact hole center and entry point. In metal, establish a small indentation with a center punch to guide the bit and prevent skidding. For wood, a brad point can start a shallow pilot groove. Double-check alignment with a square before touching the surface. Start with a light touch; let the bit establish its path rather than forcing it. The accuracy you gain at this stage reduces drift later in the cut and makes subsequent steps faster and more reliable.
Perpendicular alignment: using guides, squares, and jigs
Perpendicularity is the secret to straight holes. Use a drill press if possible; otherwise clamp a straightedge or a drill guide to keep the bit on axis. Check that the chuck is perfectly vertical and that the bit points at the center mark. A carpenter’s square against the workpiece edge helps verify alignment, with a re-check after the bit progresses a few millimeters. If you detect deviation, back out, realign, and re-clamp. Small nudges early in the cut save you from major misalignment later.
Drill technique: speed, pressure, and lubrication
Control the feed rate by maintaining steady pressure and allowing the bit to cut instead of digging. Start at a conservative speed and increase only as needed; excessive speed or pressure can burn the edge and degrade accuracy. For metal, use cutting fluid or oil to keep the bit cool and reduce wear; for wood, clear chips frequently to prevent binding. Avoid twisting the wrist or leaning the drill; keep a straight, controlled line with both hands. Proper technique reduces heat buildup and improves hole quality across materials.
Depth control and measurement
Plan the hole depth before you start. Mark depth on the bit or use a depth stop, tape, or a dedicated gauge. Stop feeding when the depth mark is reached and verify with a caliper or ruler. If the stop slips, stop and recalibrate. For blind holes in wood, stop early to avoid piercing the back face; in metal, ensure the surface behind is clear to prevent over-penetration. Depth discipline protects both the workpiece and your tooling.
Drilling different materials: wood vs metal vs plastic
Each material behaves differently. Wood requires clean entry and attention to grain direction; use a brad point bit to minimize wander. Metal requires slower speeds, sharp bits, and lubrication to reduce heat and prevent work hardening. Plastic demands support to prevent deformation and cracking; avoid excessive force that causes tear-out. Always adjust your technique to the material, including bit selection and feed rate, to maintain accuracy across projects.
Troubleshooting common issues and quick fixes
Wandering at entry is often caused by lack of center guidance or a dull bit; create a small pilot and reaffix your guide. Bit binding indicates either too slow a speed, too much forcing, or a hard material—pause, re-dress, and re-align. Exit burrs can be minimized with a chamfer or deburring tool. If the hole isn’t perpendicular, re-mark and restart with proper guidance. Regularly inspect bits for wear and replace as needed to maintain accuracy.
Quick-start checklist before you drill
Clamp the workpiece securely. Re-check marks and center points. Choose the correct bit, install it firmly, and verify perpendicularity with a square. Set a depth stop or tape at the planned depth. Start at low speed and feed with control. Clear chips frequently and inspect the hole after drilling to confirm accuracy.
Tools & Materials
- Cordless or corded drill with variable speed(Prefer a drill with a stable chuck and good torque control)
- Assorted drill bits (wood, metal, carbide-tipped)(Match to material; have pilot/brad point for wood)
- Center punch and marking tools(Center punch helps track the bit)
- Clamps or a bench vise(Keeps workpiece immobile)
- Drill guide, straightedge, or drill press when available(Improves perpendicularity)
- Depth stop, stop collar, or masking tape for depth(Controls hole depth)
- Calipers or a ruler for depth verification(Accurate measurement is essential)
- Safety gear (eye protection, gloves)(Always wear PPE)
- Lubricant or cutting fluid for metal(Reduces heat and wear)
- Scrap material for practice(Practice before working on final piece)
Steps
Estimated time: 60-90 minutes
- 1
Secure the workpiece
Clamp the material firmly to a stable surface to prevent movement during drilling. Ensure clamps do not obstruct the drill path. Recheck alignment after securing.
Tip: Double-check clamps before starting; a moved piece is a major source of inaccuracy. - 2
Mark the drill point and center-punch
Precisely locate the center and strike a small indentation with a center punch to guide the bit. For wood, start with a light pencil mark and a small starter groove.
Tip: Use a sharp center punch; it reduces wandering at the start. - 3
Install the pilot bit and begin a shallow hole
Select a pilot bit or brad point to establish the hole's axis. Drill at a slow speed with light pressure to create a guiding hole.
Tip: Pilot holes improve accuracy and prevent split-outs in wood. - 4
Check perpendicularity and align with guides
Use a square or drill guide to ensure the bit remains on the desired axis. Re-check after the bit enters the material.
Tip: Realigning early saves time and material. - 5
Drill with controlled feed and speed
Maintain steady pressure and let the bit cut. Increase speed only if needed and as the bit clears chips; avoid forcing.
Tip: Keep your elbows close to your body for steadier control. - 6
Set depth and stop drilling at the planned point
Use a depth stop or tape marker to avoid over-penetration. Verify depth with calipers.
Tip: If the stop slips, pause and re-zero before continuing. - 7
Deburr and finish the hole
Remove burrs with a deburring tool or light chamfer to prevent snagging. Clean chips from the area.
Tip: Deburring greatly improves the fit of hardware. - 8
Inspect alignment and test fit
Place the fastener or mating part to confirm proper alignment and depth. Re-drill if necessary and adjust technique for future holes.
Tip: Use scrap pieces first to refine technique. - 9
Clean up and store tools properly
Wipe bits clean, remove debris, and store sharp bits in a protective case. Re-hone or replace as needed.
Tip: A sharp, well-organized toolkit boosts accuracy next time.
Got Questions?
What is the most important factor for drilling accuracy?
securing and holding the workpiece is foundational; without solid workholding, even a sharp bit cannot maintain the correct path.
Securing the workpiece is the cornerstone of accuracy; without it, the drill wanders.
Can I achieve accurate holes with a handheld drill?
Yes, with guides, squares, and careful technique; a drill press improves repeatability and perpendicularity.
Yes, you can be precise with a handheld drill, but a drill press makes it easier to stay perfectly perpendicular.
What is a center punch and why use one?
A center punch creates a precise dimple for the bit to track, reducing wandering at the start.
A center punch gives the bit a definitive starting point, preventing wandering.
How do I choose the right drill bit?
Match the material, bit type (twist, brad point, carbide), and shank size to your chuck. Sharp bits last longer and perform better.
Choose the bit based on material, type, and chuck size for best results.
How can I check that a hole is perfectly perpendicular?
Use a square against the workpiece edge and verify with a level or test piece; re-check after drilling deeper.
Check with a square or drill guide to confirm perpendicularity.
What about safety warnings?
Always wear eye protection, keep hands clear, and unplug power before changing bits.
Wear safety glasses and keep hands away from the bit.
Watch Video
Top Takeaways
- Clamp the workpiece securely before drilling.
- Start with a sharp pilot hole for tracking accuracy.
- Keep the drill perfectly perpendicular to minimize drift.
- Use depth stops and measure depth accurately.
- Verify hole quality with a test fit on scrap first.