How to Drill Without Stud Finder: A Practical DIY Guide
Learn practical, safe methods to drill without a stud finder using wall cues, tapping tests, and smart anchoring. This step-by-step guide helps DIYers and pros drill accurately without specialized tools.

With no stud finder, you can still locate solid spots for mounting by reading the wall's clues, tapping for density, and using nearby outlets as anchors. Begin by outlining your target location, then confirm height with a level, and test edges of typical stud zones. Once you have a likely area, drill a small pilot hole to verify before using the final bit.
Understanding Studs and Drywall
Studs are vertical framing members placed 16 inches apart on center in most residential walls. Drywall is typically 1/2 inch thick, attached to studs with nails or screws. When you can't rely on a stud finder, understanding these basics helps you pick safer drilling locations. The Drill Bits Pro team emphasizes that a systematic approach—mapping the room, noting outlet and switch plate locations, and checking baseboard patterns—significantly reduces the risk of misdrills. For DIYers and professionals, recognizing where the wall is most likely solid guides safer anchoring decisions. Remember: your goal is to locate a spot that can take the load or a spot where a reliable anchor will work.
Tools & Materials
- Cordless drill(Variable speed, hammer mode for masonry if needed)
- Drill bits (1/8" for pilot holes, masonry bit for concrete)(Keep a set of bits handy for different materials)
- Hammer(Light use for tapping guidance or tapping to locate dense areas)
- Pencil(Mark accurate positions on the wall)
- Tape measure(Measure 16-inch center spacing and verify heights)
- Level(Use a small spirit level to confirm horizontal alignment)
- Wall anchors (plastic toggles or screw anchors)(Choose anchors appropriate for drywall or masonry as needed)
- Drywall screws(For securing anchors if required)
- Safety glasses(Protect eyes from debris)
- Magnet (optional)(To find nails along studs)
Steps
Estimated time: 30-60 minutes
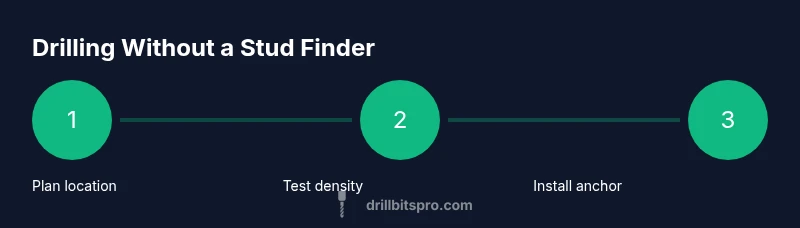
- 1
Plan the location and mark the spot
Decide exactly where you want to mount or hang a fixture. Use a tape measure and level to ensure height and horizontal alignment. Mark the spot with a pencil, then double-check from multiple reference points (e.g., other fixtures or outlets) to reduce the chance of hitting a miscue later.
Tip: Always plan with at least two references to confirm the intended position. - 2
Locate likely stud zones using cues
In most walls, studs run vertically and are spaced 16 inches on center. Look for outlets or switch plates as clues—their boxes are often anchored to studs nearby. Use tapping or listening techniques to sense denser areas behind the drywall where a stud is likely.
Tip: If you’re unsure, test a few inches left or right of the outlet for denser, harder walls. - 3
Probe the wall to confirm density
Lightly probe the wall with a thin nail or awl to feel resistance. Stop if you encounter hard material; avoid forcing the tool. This helps you confirm the presence of a stud edge and prevent wall damage when you drill.
Tip: If you hit soft plaster or hollow sound, adjust location by a few inches and test again. - 4
Drill a shallow pilot hole
Use a small pilot bit (1/16"–1/8") to create a tiny guide hole at your marked spot. Drill straight and slow to avoid wandering. The pilot hole helps you verify the wall’s structure before committing to a larger bore.
Tip: Start slow and pull out the bit to prevent tearing the drywall around the hole. - 5
Switch to the final bit and complete the hole
If you located a stud, switch to a bit appropriate for wood or the fixture’s mounting requirements. If you’re anchoring in drywall, insert the correct wall anchor before drilling deeper. Maintain a steady, perpendicular angle for clean holes.
Tip: Avoid drilling at an angle; a straight hole ensures anchors seat properly. - 6
Test the anchor and mount
Insert the anchor and drive a screw to test hold. If using drywall anchors, ensure the screw engages the anchor firmly. If you’re mounting into an actual stud, drive a pilot screw to confirm solid support.
Tip: Always test load with a light wiggle before full mounting. - 7
Verify alignment and repeat if needed
Check that your hole lines up with the intended position and is level. If not, adjust by re-marking and drilling another small pilot hole nearby. For heavier loads, consider multiple anchors or hitting a stud when possible.
Tip: Small adjustments near the original hole can save rework later. - 8
Finish and clean up
Clear debris, inspect for safety, and reinstall trim if removed. Record the exact hole location for future reference in case you relocate or re-hang items.
Tip: Keep a small note with measurements for easy reuse later.
Got Questions?
Can I reliably find studs without a stud finder?
Yes, you can locate studs by reading wall cues, outlets, and wall density through tapping, but it isn’t as precise as using a finder. Treat it as a best-possible method rather than a guaranteed method.
Yes. You can use wall cues and tapping to estimate stud locations, but don’t expect the precision of a dedicated stud finder.
What should I do if I can’t locate a stud?
Use appropriate drywall anchors rated for the load you intend to support. For heavier items, spread the load across multiple anchors or consider mounting into a stud if you locate one nearby.
If you can’t find a stud, use drywall anchors or spread the load across several anchors to keep the mounting secure.
Is it dangerous to drill near electrical wires?
There is risk of hitting live wires. Avoid drilling near outlets, switches, or where wiring runs behind the wall. If in doubt, pause and check the wall with more caution or consult a professional.
Yes. Be cautious near outlets and wires; better to stop and reassess before drilling.
What type of anchors should I use for drywall?
Plastic expansion anchors or metal toggle bolts are common. Choose anchors rated for the fixture’s weight and the wall material. Always follow manufacturer recommendations for best results.
Use drywall anchors like plastic toggles or metal toggles that match the load and wall material.
Can I mount heavy objects without hitting a stud or using anchors?
Heavy loads should mount to a stud if possible. If not, use multiple anchors or a mounting plate that distributes the load over a larger area.
For heavy items, a stud is best; otherwise, combine anchors or use a mounting plate to spread the weight.
How accurate can tapping tests be for stud location?
Tapping helps distinguish dense wood from hollow drywall but isn’t perfect. Use tapping results with other cues (outlets, patterns) for better accuracy.
Tapping helps, but combine it with other cues for better results.
Watch Video
Top Takeaways
- Plan the mounting spot with multiple references
- Use wall cues to infer studs when a finder isn’t available
- Start with a pilot hole before larger drilling
- Choose anchors suitable for drywall or masonry
- Always prioritize electrical safety and re-check alignment