How to Know If Your Drill Is a Hammer Drill
Learn to identify a hammer drill quickly, understand how it works, and test safely for concrete projects. This practical guide covers visual cues, operation, and maintenance with expert, AI-assisted insights from Drill Bits Pro.

To know if your drill is a hammer drill, check for a hammer-mode switch, a mechanism that delivers percussive blows, and a masonry-bit chuck. Hammer drills typically offer two modes—drill and hammer—and often display a hammer icon on the selector. This quick check helps you choose the right tool for concrete work and avoid damaging bits or the surface.
What makes a hammer drill different from a standard drill
According to Drill Bits Pro, a hammer drill is a standard rotating drill with an added percussive action that helps break through hard materials like concrete and brick. This distinction matters for DIY enthusiasts and professionals who work with masonry because the hammering action reduces the effort required and prevents stalling when the bit encounters tough surfaces. In most models, you’ll find three core components: the mode switch, the impact mechanism, and the chuck. The mode switch is usually on the body near the grip and uses icons or text to distinguish drill-only, hammer, and sometimes percussion modes. The impact mechanism delivers rapid, short blows to the bit tip, enabling masonry drilling without applying excessive pressure. The chuck must securely grip the bit; loose bits lead to slip and mis-drilled holes. By understanding these parts, you can quickly verify whether your tool is configured for hammer drilling and set it correctly before starting a masonry task.
Visual cues to identify a hammer drill
Look for a dedicated hammer mode on the selector switch, often labeled with a hammer icon or word “HAMMER.” Many hammer drills also show a dedicated high-speed percussion setting, meaning the tool can strike the bit while rotating. Some models feature an additional impact selector that lets you adjust the number of blows per minute. Inspect the forward end of the drill: the chuck should grip bits securely, and some models have a slightly heftier build to accommodate the percussion mechanism. If you can’t see a hammer setting or you don’t feel percussion when spinning a masonry bit against concrete, you may be holding a standard drill rather than a hammer drill. For accuracy, compare your model to the user manual or the manufacturer’s spec sheet; this confirms whether hammer action is present and adjustable.
How a hammer drill differs from a standard drill in operation
The key difference is the percussive action synchronized with rotation. In hammer mode, the drill’s hammering mechanism delivers rapid impact strokes that chisel through masonry as the bit rotates. This reduces the amount of pressure you must apply and helps prevent bit binding. A standard drill relies solely on rotational force; when hitting hard stone or concrete, it can stall, overheat, or wear out bits quickly. In practice, a hammer drill behaves like a hybrid tool: it spins to drill and simultaneously pounds to break up the material, making it ideal for forms of concrete, brick, and block work. The effectiveness depends on the impact rate and travel distance per stroke, so higher-end models offer adjustable hammer settings and a variable-speed trigger for precision.
Quick field checks you can perform on your tool
Before diving in, ensure your drill is unplugged or battery-off. Inspect the mode selector in daylight; confirm there’s a hammer option. If you can, test on a scrap concrete block with a masonry bit: set to hammer mode, lightly press the bit into the surface, and watch for a short, controlled percussion as the bit advances. If percussion is noticeable, you likely have a hammer drill. If not, switch to drill-only mode and try again; the tool should drill without the hammer strikes. Finally, listen for factory-supplied indicators such as a loud, repetitive thump when in hammer mode, and verify by consulting the manual for the exact mechanism description. Carry out these checks with safety glasses and secure footing.
How to safely test hammer action on a scrap block
To test safely, clamp a scrap concrete block on a stable work surface. Put the drill in hammer mode, attach a masonry bit, and apply light pressure while the bit starts to cut in. Observe whether you feel a vibration and hear a rhythmic hammering sound as the bit advances. Do not push hard; let the tool do the work and stop if the bit binds or the drill overheats. If the block chips evenly and the bit penetrates with less effort than expected, you’re likely using the hammer setting correctly. If you don’t notice any impact or the bit binds aggressively, re-check the mode selector and refer to the manual. After testing, switch the drill back to drill-only mode to avoid unnecessary percussive wear on non-masonry tasks.
Common myths and mistakes that fool DIYers
A common myth is that any drill with a ‘hammer’ label is a hammer drill; some tools are built for light percussion only or have a dedicated impact drill mode that differs from true hammer action. Another mistake is using a non-masonry bit in hammer mode; this can damage the bit and material. Finally, relying on a loud sound as proof of hammer action is unreliable—listen for the actual percussion feel and confirm with the switch position and icon indicators. Correct operation requires a masonry bit and proper feed pressure; using too much force can cause bit binding even in hammer mode. Always consult the manufacturer’s guidance for your exact model.
Choosing the right hammer drill for concrete tasks
When selecting a hammer drill, prioritize models with adjustable impact rate and a reliable clutch to prevent bit breakage. Consider the motor power and weight, especially for overhead work; heavier tools can cause fatigue but often deliver smoother impact. If you drill large-diameter holes in dense masonry, you may want a higher torque rating and a longer life hammer mechanism. For occasional home use, a mid-range tool with at least 7-9 amps or equivalent is usually sufficient. Professional concrete work benefits from brushless motors and vibration-reduction features that minimize user fatigue. Finally, verify compatibility with common masonry bits and accessories, and review the warranty.
Maintenance and care to keep hammer drills performing
Maintenance begins with keeping the ventilation ports clean and the chuck free of debris. After heavy work, inspect the bit for wear and replace as needed. Lubricate moving parts only as the manufacturer recommends; excessive lubrication can attract dust and reduce efficiency. Store the tool in a dry location away from moisture and temperature extremes, and periodically check the power cord for damage. If you notice reduced hammer action, check the mode selector for smooth switching, inspect the impact mechanism for wear, and consult a technician if the action feels sluggish or inconsistent.
Troubleshooting if hammer action fades or stops
If hammer action fades, start by ensuring the drill is in hammer mode and the bit is suitable for masonry. Check the mode selector for any stiffness or misalignment and verify the electrical supply if powered by corded equipment. Inspect the bit for wear or damage; a dull or chipped masonry bit can appear to fail hammer action. In some cases, debris may lodge near the impact mechanism, reducing effectiveness. If problems persist, consult the manufacturer’s service guide or a qualified technician to avoid improper repairs that could compromise safety.
Tools & Materials
- Your drill (any model)(Ensure the drill is unplugged or battery removed when inspecting the mode selector and chuck.)
- Safety glasses(Protect eyes during inspection and any test drilling.)
- Manual or model number check(Having the exact model helps confirm hammer capability via the spec sheet.)
- Masonry drill bit(Helpful for live testing on concrete if available.)
- Scrap concrete or masonry block(Use to test hammer action safely in hammer mode.)
Steps
Estimated time: 25-40 minutes
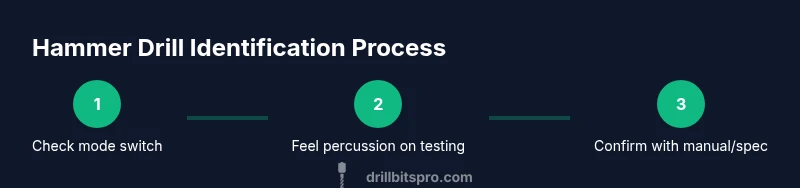
- 1
Locate the mode selector
Inspect the switch on the drill body to identify the drill, hammer, and any impact settings. If a hammer option exists, it is usually clearly labeled with an icon or the word HAMMER. Verify the switch operates smoothly without sticking.
Tip: If the switch feels gritty, stop and consult the user manual before forcing movement. - 2
Look for hammer indicators
Check for a hammer icon or text near the selector. Some models also show a small window or indicator that reveals the current mode. Confirm the presence of a dedicated hammer mode before proceeding.
Tip: Take a photo of the current setting for future reference. - 3
Test with a masonry bit in a safe area
In hammer mode, mount a masonry bit and apply light pressure on scrap material to observe percussion. If you feel and hear a rhythmic impact, the tool supports hammer action. If there’s no percussion, switch to drill-only mode to compare performance.
Tip: Always wear safety glasses during testing. - 4
Confirm via manual or model data
If the mode switch is ambiguous, check the operator’s manual or the manufacturer’s site for exact hammer capability and specs. Some tools offer adjustable hammering with limited range.
Tip: A quick online search with your model number often yields the correct hammer capability. - 5
Document and store the result
Record whether hammer mode exists and how to adjust it. This helps future tasks and ensures you select the right setting for masonry work.
Tip: Keep the manual in the tool case or digital folder for quick reference. - 6
If uncertain, consult support
When the selector is unclear or performance seems inconsistent, contact the manufacturer or a qualified technician to avoid damage or unsafe operation.
Tip: Do not attempt disassembly to locate internal hammer components unless you are trained.
Got Questions?
What exactly defines a hammer drill?
A hammer drill adds a percussive action to rotational drilling, allowing the bit to hammer while it turns. This helps penetrate masonry more efficiently than a standard drill.
A hammer drill combines rotation with percussive blows to help you drill into masonry more easily.
Can I convert a regular drill into a hammer drill?
No. Hammer action is built into the drill’s mechanism and requires a tool designed with a hammering function. You can upgrade to a dedicated hammer drill if you frequently work with masonry.
You can’t convert a regular drill into a hammer drill; you’d need a tool that’s specifically designed with hammering.
Why does hammer action matter for masonry work?
Hammer action reduces the effort needed to bore into concrete, brick, or stone, decreases bit wear, and minimizes stalling. It makes masonry projects faster and cleaner.
Hammer action helps you drive through masonry faster and with less wear on the bit.
Are there different types of hammer drills?
Yes. Some drills offer rotary hammer action (more intense and better for heavy-duty concrete), while others provide standard hammer mode suitable for lighter masonry tasks. Check the tool’s spec sheet to confirm.
There are different hammer drill designs, including rotary hammer types and standard hammer drills.
How can I verify hammer capability on older models?
Look for a mode selector with a hammer icon or text. If the model lacks clear indicators, search the manual or manufacturer site using the model number to confirm hammer capability.
For older tools, check the mode selector and model specs to confirm hammer capability.
Watch Video
Top Takeaways
- Identify the hammer mode on the drill switch.
- Look for a hammer icon or label on the selector.
- Test on masonry with a masonry bit to confirm percussion.