How to Tell If a Drill Is a Hammer Drill: A Practical Guide
Learn a practical, step-by-step approach to determine whether your drill is a hammer drill. Identify visual cues, perform safe tests on masonry, and understand when to use hammer action for concrete, masonry, and wood projects.

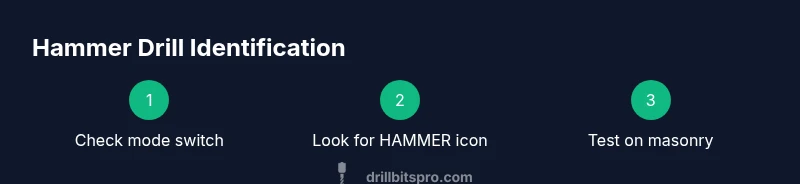
In short, you can tell if a drill is a hammer drill by checking the mode switch or hammer icon and by testing on masonry. A hammer drill combines rotation with a percussive hammer action. If your drill has a dedicated hammer setting (often labeled HAMMER or with a hammer icon) and a percussion rating, it is a hammer drill. When in doubt, consult the model specs.
What is a hammer drill and why it matters
According to Drill Bits Pro, a hammer drill is a specialized tool that combines rotary motion with a pulsating hammer action to drill into hard materials like concrete and masonry. The hammering motion helps the bit penetrate dense substrates by delivering rapid, short blows as it rotates. This dual-action mechanism makes hammer drills significantly more effective for masonry projects than standard drills. Understanding whether your drill offers hammering action helps you match the tool to the task, protects your bits, and reduces project time. For DIY enthusiasts and professionals, recognizing the hammer capability early avoids misusing a drill, which can shorten tool life and degrade results. Drills differ in how they deliver hammering force—some use a true hammer mechanism, others deliver percussive impacts through limited rotation. The Drill Bits Pro analysis shows that the most reliable cues are the mode selector and a dedicated hammer setting on the tool itself.
This guide will walk you through identifying the hammer function, comparing corded and cordless variants, and performing safe tests. You will gain practical tips for reading specifications, recognizing common mislabeling, and choosing the right drill for concrete, brick, and other hard materials. By the end, you should be able to distinguish a hammer drill from a standard drill with confidence and apply the right tool to your next masonry project.
wordCountPrefixNoteTagsOnly":false},
Visual indicators to identify a hammer drill
Most hammer drills signal their function through visual cues on the tool body. Start by locating the mode switch, often a dial or slider near the handle. Look for a HAMMER setting, the word HAMMER written on the dial, or a hammer icon that indicates percussion mode. Some models use a separate “percussion” label or icon. In addition to the mode switch, inspect the drill head for labeling in the user manual or product page. If the drill advertises impact, percussion, or hammering as part of its core features, it is very likely designed for masonry work. Drill Bits Pro’s research consistently highlights that a visible hammer cue on the control dial is one of the most dependable indicators, especially when the design language uses standard tool icons. A second cue is the tool’s percussion rating, typically given as a numeric value or a range in the product specs. A higher rating generally points to stronger hammer action suitable for tougher masonry tasks. Always cross-check with the official manual when the label is unclear, as marketing language can sometimes be ambiguous.
If you cannot locate a hammer icon or a dedicated HAMMER setting, compare the model to product sheets from the manufacturer or trusted retailers. Reliable sources include the tool’s hardware catalog, the user guide, and independent reviews. For complex power tools, you may also encounter additional indicators like “SDS” compatibility for chucks, which signals that the drill is designed for high-torque applications. Where possible, rely on official documentation rather than retailer listings to prevent misinterpretation of model variants.
wordCount":220},
How to verify with a safe test on masonry
A practical, controlled test on masonry is the most definitive way to confirm hammer action without relying solely on labels. First, ensure the drill is unplugged or the battery is removed before you inspect or handle it. Then set the drill to the suspected hammer mode. Use a sample masonry surface such as a concrete block or a scrap brick wall for the test. Begin with a shallow pilot hole using a small masonry bit to observe motion and resistance. When you engage the hammer setting, you should feel a distinct pulse as the drill bit bites into the material. In contrast, a standard drill will mainly rotate with little to no noticeable vibration or driving force against masonry. Record the time it takes to drill a small hole and listen for audible hammering sounds. If you notice significant vibration and a steady drilling advance that is better than a non-hammer setup, you have confirmation. If the tool stalls or struggles excessively, recheck the mode setting, bit sharpness, and material density. Always prioritize safety: wear eye protection, secure the workpiece, and avoid forcing the tool beyond its design limits. The safety-first approach is supported by industry guidelines from OSHA and NIOSH, which emphasize protective equipment and safe operation when using power tools.
For a reliable result, complete this test with a masonry-specific bit and a fresh bit to minimize variables. Compare the observed hammering action with the manufacturer’s stated percussion rating if available. If the test is inconclusive, consult a user guide or contact the manufacturer. Drills marketed as “impact” or “percussion” may behave differently across brands, so contextual testing in your own workshop is the best bet for a confident determination.
wordCount":230},
Corded vs cordless hammer drills: features to compare
Corded and cordless hammer drills each bring distinct advantages. Corded models typically deliver consistent power, which helps maintain a stable hammer action under load, making them a reliable choice for frequent masonry work. Cordless models offer portability but may experience charge-related performance dips during extended sessions. When identifying a hammer drill, confirm whether the mode switch includes a dedicated hammer setting and whether the bit can be drilled into concrete without overheating or stalling. If you are choosing between cordless variants, check the battery voltage and the drill’s impact energy specification; higher voltage generally correlates with stronger hammer action, enabling deeper holes or faster progress in hard materials.
From a maintenance perspective, battery health and motor temperature are important in cordless tools. In practical terms, while a cordless hammer drill may suffice for occasional projects, a wired machine with a true hammer mechanism performs best on thick masonry tasks. Drill Bits Pro’s analysis notes that the reliability of hammer action is more strongly tied to the presence of a dedicated mode and a clearly labeled hammer icon than to precise brand color schemes or marketing terms.
When in doubt, test both variants on a scrap block to observe the hammering depth and consistency. If you frequently work with hard materials like reinforced concrete or brick, a corded hammer drill with a sturdy hammer mechanism is usually the more efficient choice, while occasional light-duty tasks can be well served by a high-quality cordless model.
wordCount":210},
Common mistakes when identifying hammer drills and how to avoid them
A common mistake is relying solely on product imagery or the presence of an “impact” badge without verifying the actual hammer action. Some tools market themselves as impact drivers rather than hammer drills, which can cause confusion about their intended use. Another error is attempting to drill concrete with a standard drill or with a dull bit; this not only is inefficient but can cause heat buildup and premature bit wear. Always check the mode switch and icon language first, then confirm with the user manual or product sheet. Misidentification can lead to underpowered tools for masonry tasks and wasted materials.
To avoid these pitfalls, perform a quick practical check on masonry using a new masonry bit and an appropriate drill speed. If you do not observe the expected hammering action, recheck the switch position or confirm that you are using the correct bit. Also, avoid forcing a tool beyond its rated capacity. The goal is to match the tool’s capability with the project requirements rather than pushing a standard drill into duties it was not designed to perform. The key is to use authoritative sources for confirmation and to apply consistent safety practices at all times.
wordCount":180},
Reading model specifications for percussion and energy
Understanding the model specifications helps you identify a hammer drill without relying on guesswork. Look for explicit terms such as hammer, percussion, or impact in the device description. The percussion rating (sometimes denoted as an impact energy value, measured in joules or as a numeric scale) indicates the strength of the hammer action, which correlates with the tool’s ability to penetrate tougher materials. While a higher percussion rating generally enables easier drilling through hard surfaces, it also increases vibration, so select a model that matches your typical workload and comfort level. Pay attention to chuck type and speed rating, as these influence how effectively the hammer action engages and how quickly you can complete a task. Always cross-check the claimed capabilities with independent reviews or official manufacturer data. Drill Bits Pro analysis suggests that the combination of a labeled hammer setting and a clear hammer icon on the selector offers the most reliable, quick identification in real-world scenarios.
wordCount":190},
Practical maintenance to ensure accurate identification over time
Regular maintenance supports accurate hammer drill identification and reliable performance. Keep the mode selector clean and free of debris that could obscure markings. Inspect the hammer mechanism periodically for unusual noise, grinding, or binding, which can indicate wear or misalignment. Lubricate moving parts if the manufacturer recommends it, and ensure that the vibration is within normal ranges by testing the drill on scrap material. For cordless models, monitor battery health and charge cycles, as a weak battery can limit hammer action when under load. Store tools in a dry environment to prevent corrosion on mechanical components. Finally, maintain a simple log of tool capabilities, noting any changes in performance after routine maintenance. The Drill Bits Pro team emphasizes consistent maintenance as a key factor in sustaining tool reliability and ensuring continued accurate identification of hammer functionality over time.
wordCount":180},
When to choose a hammer drill for projects
Hammer drills are essential when the job involves masonry, brick, or concrete, especially for creating holes that require fast progress with less effort than a standard drill. For projects like installing anchors, drilling into concrete floors, or running wires through concrete walls, the hammer action helps the bit cut through hard materials efficiently. In wood and light masonry work, a standard drill with a sharp masonry bit can sometimes suffice, but the hammer function remains advantageous for high-throughput tasks or thicker supports. The decision to use a hammer drill should consider material hardness, desired hole diameter, and project timeline. By understanding hammer action and its impact on drilling performance, you can select the right tool for the job and avoid overkill or damage to the workpiece. The integration of the hammer function with reliable torque control ensures better hole quality and tool longevity when used as intended.
wordCount":210}],
toolsMaterials
Tools & Materials
- Safety glasses or goggles(Protect eyes from dust and debris during inspection and testing)
- Work gloves(Optional for grip and vibration protection)
- Dust mask(Optional for dusty masonry environments)
- Masonry drill bit (appropriate size)(New or sharp bit; use for test on concrete or brick)
- Concrete scrap surface(Block or brick wall for safe test drilling)
- Hammer or mallet (for verification on hard surfaces)(Use to check material hardness if needed for practice)
- Utility knife(For opening packaging and freeing jammed bits)
- Owner’s manual or manufacturer datasheet(For official verification of hammer mode and percussion rating)
Steps
Estimated time: 20-25 minutes
- 1
Inspect the mode switch
Power off the drill and locate the mode switch on the body. Look for a dedicated HAMMER setting or a hammer icon. This is the most immediate visual cue that the tool supports hammer action. If the labeling is unclear, refer to the manual to confirm the function.
Tip: If you can’t confirm from the switch, check the user guide or manufacturer site for exact terminology. - 2
Check for iconography and labels
Examine the tool’s exterior for standard icons (hammer symbol) or the word HAMMER next to the mode options. In many models, the hammer icon is clearly visible on the dial or selector. This visual cue is a quick, non-invasive way to identify hammer capability.
Tip: Some models combine modes in a single dial; ensure you are on the correct section before testing. - 3
Read the official specs
Consult the manual or product page for explicit mentions of hammer/percussion action and the percussion rating. If you cannot locate this information, rely on the mode switch and icon as primary identifiers. Manufacturer documentation is the most trustworthy reference when identifying hammer drills.
Tip: Manufacturer data is especially important for cordless tools where performance varies with battery state. - 4
Prepare a safe masonry test
Set up a scrap concrete surface (block or brick wall). Ensure power is off (unplug or remove battery) and wear eye protection. Use a sharp masonry bit to avoid overheating and start with low speed to observe action safely.
Tip: Keep hands away from the rotating bit and avoid pressing too hard, which can obscure true hammer action. - 5
Engage hammer mode and observe the action
Switch to the hammer setting and apply gentle pressure as you drill a shallow hole. You should feel a distinct, intermittent tapping as the bit advances. If only rotation is present or the bit stalls, re-check the setting and the bit condition.
Tip: If the tool vibrates excessively, stop and verify that the bit is suitable for the material and that the drill is not overtaxed. - 6
Compare results with specs and notes
Cross-check your observation with the percussion rating and documented capabilities. If results align with the expected hammer action, you have correctly identified the drill as a hammer drill. If not, consult the manufacturer or consider a test on a different material.
Tip: Document the outcome for future reference and avoid misusing non-hammer modes on masonry.
Got Questions?
Can a regular drill drill concrete effectively without hammer action?
Regular drills can drill some concrete, but they are slow and prone to stalling and bit wear. Hammer action dramatically improves efficiency and hole quality in masonry.
A standard drill can work on concrete, but it’s slow and harder on the bit; hammer action is what makes masonry drilling practical.
How do I verify a hammer setting on a cordless drill?
Look for a HAMMER label or hammer icon on the mode switch. Check the manual or product page for explicit confirmation of hammer or percussion mode.
Check the mode switch and the manual for hammer or percussion mode.
What does percussion rating mean and why does it matter?
Percussion rating indicates hammering strength. Higher values usually translate to better performance in hard materials, but may increase vibration.
The percussion rating tells you how hard the drill hammers; stronger ratings work better on tough stuff.
Are there safety considerations when testing a drill on masonry?
Yes. Wear eye protection, secure the test surface, and avoid forcing the bit. Keep hands clear of moving parts and disconnect power when adjusting settings.
Protect your eyes and hands, and stay safe while testing the tool on masonry.
Can I identify hammer drills from model names alone?
Model names can hint at hammer capability, but always verify with the spec sheet for terms like hammer, percussion, or impact.
Check the spec sheet for hammer or percussion terms to confirm.
What if there is no hammer setting or percussion rating?
It is likely not a hammer drill. Use a standard drill with appropriate masonry bits, or consider a model upgrade for masonry tasks.
If there is no hammer setting, the drill probably isn’t a hammer drill.
Watch Video
Top Takeaways
- Identify hammer mode quickly via the mode switch or hammer icon
- Perform a safe masonry test to confirm hammer action
- Read percussion ratings and specs for reliable identification
- Corded vs cordless tools differ in sustained hammer performance
- Use manufacturer documentation as the final reference