How to Use a Power Drill: A Complete DIY Guide
Learn to safely operate a power drill, choose the right bits, set speeds, clamp your work, and drill clean holes in wood, metal, plastic, and masonry with confidence.

Learn how to safely use a power drill to bore accurate holes and drive fasteners in wood, metal, and plastic. This quick guide covers choosing the right drill and bit, setting speed and torque, clamping work, and basic safety practices so you can work confidently on most DIY projects. By the end, you’ll know how to select bits, align holes, and avoid common mistakes.
Why a Power Drill Is Essential for DIY Projects
A power drill is one of the most versatile tools in a DIYer’s toolkit. It can bore holes, drive screws, and even mix small amounts of material with the right accessory. If you’ve ever wondered how to use a power drill with confidence, you’re in the right place. According to Drill Bits Pro, mastering power drills begins with choosing the right drill and bit, plus prioritizing safety and setup. The Drill Bits Pro team found that clean, accurate holes start with a stable work area, proper bit selection, and controlled feed pressure. In this guide we’ll cover material differences, tool anatomy, and the basics that apply to most common tasks. By the end of this guide you’ll have a practical framework for how to use a power drill across wood, metal, plastic, and light masonry. This guide is structured to help beginners and seasoned DIYers alike understand the core concepts behind proper drilling technique, whether you’re hanging shelves or building a birdhouse. As you read, remember to control speed, pressure, and bit choice to avoid heat buildup and bit wear. How to use a power drill is as much about preparation as it is about technique.
Whether you’re hanging shelves or building a birdhouse, the core idea remains the same: set the drill to the right speed, secure the work, and apply steady pressure. This is a foundational skill for any project, and with practice you’ll improve your accuracy and finish.
Feature Overview: The Anatomy of a Drill
A modern power drill combines several components that influence performance. The chuck holds the bit, the motor provides torque, and the clutch helps regulate drilling depth and power. Corded drills deliver constant power, while cordless models offer portability. A variable-speed trigger lets you tailor speed to the material, and a reversible chuck makes screw driving easy. Understanding these features helps you answer the question of how to use a power drill effectively in different materials. Always check that the bit is secure and that the chuck is clean before starting. Proper maintenance of the chuck reduces wobble and improves hole accuracy. The essentials below set the foundation for better results in every project.
Material Matters: Wood, Metal, Plastic, and Masonry
Different materials require different approaches. Wood usually tolerates higher speeds and requires sharp bits; metal benefits from cutting oil or lubrication to reduce heat, and masonry work often needs specialty bits and controlled pressure. For plastic, you’ll want to use a slower speed to prevent melting. Drill technique varies by material, but the core principles stay the same: secure the work, start with a pilot hole if needed, and maintain steady pressure while the bit does the work. As you learn how to use a power drill, you’ll develop a sense for when to speed up, slow down, or back out to clear chips.
Safety First: PPE, Setup, and Workspace
Personal protective equipment (PPE) should be your first consideration. Safety glasses protect your eyes from chips, and a dust mask or respirator helps with fine particulates. Wear snug-fitting clothing and tie back long hair to avoid entanglement. Ensure you have a stable work surface, clamps to secure the piece, and good lighting. Keep cords out of the way to prevent trips and accidental snags. When drilling into masonry or metal, use the appropriate bit and consider using a center punch to prevent wandering. This section also covers how to use a drill press securely if you have one, and how to adapt techniques for different tool types.
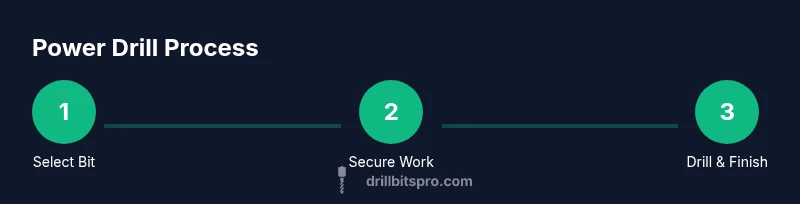
Step-by-Step Use: Core Techniques for Beginners
If you’re learning how to use a power drill, start with simple holes in scrap wood. Gradually move to screws and more challenging materials. The most important steps involve bit selection, clamping, pilot holes, and consistent feed pressure. In this section we’ll cover preparatory checks, bit installation, speed and torque settings, and how to drill clean holes without tear-out. Remember that accuracy improves with preparation and practice—start slow, test on scrap, and adjust as needed.
Troubleshooting and Common Mistakes
Common mistakes include wandering bits, overheated bits, stripped screw heads, and drill chatter. Wandering can be prevented with center punches or pilot holes and by using a sharp bit. Overheating is mitigated by reducing pressure and pausing to cool the bit. Keep an eye on the drill’s temperature and replace dull bits promptly. This section covers quick fixes and how to avoid these issues in future projects.
Maintenance and Longevity: Keeping Your Drill Ready
Maintenance keeps your drill performing at its best. Clean the chuck, inspect the power cord or battery contacts, and store bits in a labeled case. Regularly sharpen or replace dull bits to maintain clean cuts. For cordless drills, follow manufacturer guidance on charging cycles and storage. A well-maintained drill reduces the risk of surprises during a project and extends the life of the tool.
Tools & Materials
- Power drill (corded or cordless)(Ensure battery is charged or cord is long enough for the job; test trigger and speed control before use.)
- Assorted drill bits (wood, metal, masonry)(Include common sizes and a masonry bit for concrete tasks; keep bits sharp.)
- Safety goggles(ANSI Z87.1 compliant or equivalent.)
- Clamps or a workbench vise(Secure the workpiece firmly to prevent movement.)
- Center punch(Marks the spot to prevent bit wandering.)
- Measuring tape and pencil(Accurate layout reduces misalignment.)
- Dust mask or respirator(Use for dusty materials like drywall or concrete.)
- Lubricant or cutting oil (for metal drilling)(Optional but helps reduce heat and wear on bits.)
Steps
Estimated time: 45-60 minutes
- 1
Prepare workspace and PPE
Clear the area, remove obstacles, and put on safety glasses and a dust mask if needed. Inspect the drill, battery, and bits for damage. Ensure your workpiece is clean and flat, and that you have adequate lighting.
Tip: Keep a scrap piece handy to test bit feel before starting the actual hole. - 2
Choose the correct drill bit and accessory
Select a bit suited to your material and hole size. Install the bit fully into the chuck and tighten securely. If using a screw driving bit, choose the appropriate //Phillips/flat/etc. complement and ensure the bit is compatible with the chuck.
Tip: Verify the bit shank fits the chuck without wobble; a good fit prevents wandering. - 3
Secure the workpiece
Clamp the material firmly to the work surface or a jig. For round or irregular pieces, use a vise or a jig to prevent movement. A secure workpiece reduces mis-drilling and improves hole quality.
Tip: Place a sacrificial scrap underneath to prevent splintering on exit. - 4
Mark the hole and create a pilot
Use a pencil or center punch to mark the exact point. For larger holes, drill a small pilot hole first to guide the larger bit. This helps prevent walking and ensures accuracy.
Tip: Center punching creates a small dimple that catches the bit’s tip. - 5
Set speed and torque for the material
Dial in the correct speed: slower for hard materials, faster for soft ones. If your drill has a clutch, start with low torque and gradually increase as needed. Keep the drill perpendicular to the work to ensure a straight hole.
Tip: Start at a low speed to control the bite and reduce tear-out. - 6
Begin drilling with steady pressure
Bring the bit to the work and apply steady, even pressure. Let the bit do the cutting; avoid forcing the drill. If you feel binding, stop, retract, and clear chips before resuming.
Tip: Pause briefly to prevent overheating on thick pieces. - 7
Drill through and deburr
Drill fully through the material, then back the bit out smoothly. Use a deburring tool or sandpaper to clean rough edges. For metal and plastic, examine the edge for burrs and trim as needed.
Tip: Back out slowly after breaking through to minimize tear-out. - 8
Finish up and clean the bit
Remove the bit, inspect the hole and bit for heat or wear. Wipe away dust and store bits in their case. Recharge or replace batteries as needed to avoid mid-project power loss.
Tip: Label used bits by material and size so you can reuse them quickly.
Got Questions?
Corded or cordless: which is better for beginners?
Both have advantages. Corded drills deliver constant power and are reliable for continuous work, while cordless models offer portability for small projects and tight spaces. Start with a cordless drill for ease of use and move to a corded model for longer jobs if needed.
Corded drills give steady power; cordless are portable. Start with cordless for beginners, then switch to corded for longer tasks.
What bits should I start with for a new drill?
Begin with a small set of twist bits for wood and metal, a masonry bit for concrete, and a brad-point bit for precise wood holes. Keep a few screw-driving bits ready for quick fastening.
Start with wood and metal twist bits, a masonry bit, and a brad-point for wood.
How can I prevent a drill bit from wandering?
Center punch the target point, drill a small pilot hole, and clamp the workpiece firmly. Use a sharp bit and start at a slow speed to maintain control.
Center punch, pilot hole, and clamp the piece; start slow to prevent wandering.
Can I use a power drill for masonry?
Yes, but you need a masonry bit and an appropriate speed. Use a slower speed, steady pressure, and consider water cooling or short bursts to manage heat.
Yes, with a masonry bit and slower speed; drill in short bursts to manage heat.
How do I maintain battery life on a cordless drill?
Charge batteries only when needed, avoid letting them fully discharge, and store them at moderate temperatures. Follow the manufacturer’s guidelines for storage and charging cycles.
Charge when needed and store properly to extend battery life.
Watch Video
Top Takeaways
- Choose the right drill and bit for the material.
- Secure the workpiece with clamps before drilling.
- Start with a pilot hole or center punch for accuracy.
- Maintain steady pressure and appropriate speed to avoid overheating.
- Inspect and maintain bits and drill after each use.