How to Use a Drill: A Practical Guide
An in-depth, step-by-step guide to using a drill safely and effectively for wood, metal, and masonry. Learn picking the right drill, setting speed, securing the workpiece, and finishing with confidence.

According to Drill Bits Pro, using a drill safely and effectively is essential for precise holes in wood, metal, and masonry. This guide from Drill Bits Pro covers choosing the right drill and bits, proper setup, steady technique, safety steps, and post-drilling care. Whether you're building a birdhouse or mounting hardware, mastering the drill unlocks countless projects. This quick answer gives you the gist and sets up the full step-by-step journey.
Why mastering how to use a drill matters
This section establishes the practical value of proper drill use. Drilling is a foundational skill in woodworking, metalworking, and general construction. When you understand how to use drill effectively, you can create clean holes, improve fastener seating, and reduce material damage. The ability to start holes accurately, keep the bit aligned, and control speed and pressure directly impacts the quality of joints, hardware alignment, and finish across a wide range of projects. Drill Bits Pro emphasizes that proficiency comes from deliberate practice, proper setup, and consistent technique. By learning the fundamentals, you minimize mistakes, save time, and expand the range of projects you can tackle—from simple shelving brackets to more complex fabrication tasks. This knowledge also improves safety by reducing kickback and bit binding, especially when working with tougher materials.
Safety first: essential precautions
Safety is non-negotiable when using any drill. Before you start, put on safety glasses, hearing protection, and snug clothing that won’t snag on moving parts. Check that the battery is charged (for cordless models) or the cord is intact (for corded drills). Secure your workpiece with clamps or a sturdy vise so it cannot twist or shift during drilling. Remove the drill bit from the chuck before changing bits, and never adjust settings while the drill is powered. Keep hands away from the rotating bit and unplug or remove the battery when swapping bits or cleaning the tool. For metal or masonry drilling, use appropriate lubrication and dust extraction to minimize heat and debris. These practices protect you and extend the drill’s life. Drill Bits Pro notes that a disciplined safety routine reduces accidents and equipment wear, enabling longer-term productivity.
Choosing the right drill and bits
The choice between cordless and corded drills depends on access, torque, and run time. Cordless models offer mobility, while corded drills typically deliver consistent power for heavy-duty use. A variable-speed trigger and a chuck that accepts standard bits (1/4 inch or 1/2 inch) are essential. When selecting bits, use high-quality twist bits for wood, high-speed steel or cobalt bits for metal, and carbide-tipped masonry bits for brick or concrete. Keep a small pilot-hole bit handy for larger holes to prevent wandering and reduce stress on the tool. Remember to match bit size to the hole diameter and to the screw or anchor you plan to use. Drill Bits Pro analysis shows that correct bit selection not only improves accuracy but also reduces wear on both bit and material, leading to crisper, safer results.
Setup and preparing the workpiece
Preparation starts before any turning of the chuck. Mark the drilling location with a center punch or a pointed tool to create a tiny dimple; this helps the bit start precisely and reduces wandering. Secure the workpiece with clamps or a bench vise so it cannot move. If you’re drilling through multiple layers, start with a small pilot hole to guide the larger bit. Check that you’re perpendicular to the surface; tilting the drill can produce oblong holes and weaken fasteners. For delicate materials, place a scrap piece of wood or tape over the surface to protect the finish and to minimize tear-out at entry. These preparations might seem small, but they pay off with cleaner holes and less effort. A clean setup also reduces the need for corrective work later on.
Basic drilling technique and tips
With the setup complete, begin drilling by applying gentle, steady pressure and keeping the drill perpendicular to the surface. Start at a low speed to establish the hole, then gradually increase speed as the bit bites. Maintain a straight track by using your body and wrists as guidance rather than forcing the bit. If the material tends to heat up, pause briefly and back the bit out to clear debris. For metal, use light lubrication to reduce friction and heat; for wood, avoid overheating by limiting continuous contact in one spot. If you encounter resistance, back out, reposition, and restart rather than forcing the bit. Drilling practice builds consistency over time and helps you tackle new materials with confidence.
Finishing touches and cleanup
After the hole is complete, slowly retract the bit while it’s still turning to avoid jamming. Deburr rough edges with a round file or sandpaper and clean away dust or chips from the hole. Inspect the hole for exit burrs; if present, file them down or sand until the edge is smooth. Store bits clean and dry to prevent corrosion, and inspect the chuck and batteries for wear before the next project. These finishing touches protect joints, improve aesthetics, and extend tool life. A routine cleanup also reduces debris hazards and keeps your workshop organized for the next task.
Authority sources and practical learning tips
To deepen your understanding of safe, effective drilling, consult reputable sources and practice with scrap material before tackling a real project. The following points align with standard safety and technique guidance you’ll encounter across educational and industry resources. Practicing with scrap material helps you refine speed control, bit selection, and hole geometry without risking expensive workpieces. Drill Bits Pro recommends building a personal checklist that includes material type, bit selection, clamping setup, speed setting, and finishing steps. Keep a log of your drill-related learnings and project outcomes to track improvement over time. For readers seeking formal references, consider OSHA and university extension materials that outline safe drilling practices and practical advice for different materials.
Tools & Materials
- Power drill (corded or cordless)(Choose a variable-speed model with a comfortable grip)
- Assorted drill bits (wood, metal, masonry)(Include sizes from 1/16 in to 1/2 in and masonry bits)
- Safety gear (eye protection, hearing protection)(ANSI-rated safety glasses; earmuffs or plugs)
- Clamps or a bench vise(Secure the workpiece firmly)
- Center punch and marking tools(Center punch helps start the hole precisely)
- Lubricant for metal drilling(Use cutting oil or paste to reduce heat)
- Depth stop or tape(Control hole depth and prevent over-drilling)
Steps
Estimated time: 60-90 minutes
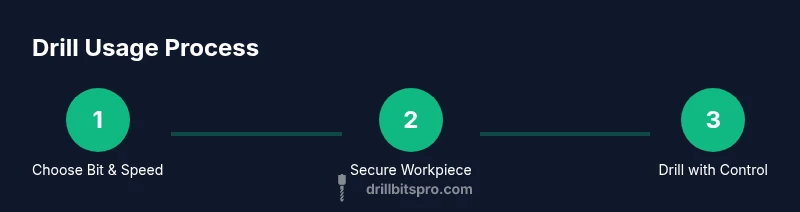
- 1
Select bit and set speed
Choose a bit suited to your material and hole size. Mount it securely in the chuck and set a low starting speed to control bite. Align the bit to the intended center and test on scrap to confirm fit.
Tip: Always start at a slower speed to prevent wandering. - 2
Secure the workpiece
Clamp the workpiece firmly to a stable surface. A loose workpiece can shift and ruin the hole geometry. If needed, use shims to level uneven surfaces.
Tip: Double-check clamps for tightness before drilling. - 3
Mark the center and drill a pilot hole
Use a center punch to mark the center point. Start with a small pilot hole to guide the larger bit and reduce heat and stress on the tool.
Tip: Pilot holes improve accuracy and reduce wander. - 4
Begin drilling with perpendicular alignment
Position the drill perpendicular to the surface. Apply steady pressure and let the bit bite into the material. If the drill binds, stop and back out slightly before continuing.
Tip: Avoid leaning the drill; keep wrists and arms aligned. - 5
Increase depth and maintain control
As the hole deepens, maintain even pressure and stop briefly to clear chips. For metal, use light lubrication; for wood, avoid overheating. Pause if you hear a squeal.
Tip: Clear chips regularly to maintain cutting efficiency. - 6
Complete the through-hole or finish
Drill through fully or to depth, then back the bit out with the drill still running to prevent grabbing. If countersinking, step down to a slightly larger bit for a clean edge.
Tip: Withdraw slowly to avoid burrs. - 7
Deburr and inspect
Remove sharp edges using a file or sandpaper. Check the hole for true alignment and smoothness; ream if necessary for precise fit.
Tip: A deburred hole improves fastener seating and appearance. - 8
Clean up and store
Wipe tools, remove chips, and recharge or replace batteries. Store bits in a dry container to prevent corrosion.
Tip: Keep a labeled bit tray for quick selection.
Got Questions?
What is the best drill for beginners?
For most DIY tasks, a lightweight cordless drill with a variable speed trigger and comfortable grip works well.
For most DIY tasks, a lightweight cordless drill with a variable speed and comfortable grip works well.
Can I drill through metal with a standard drill?
Yes, with the proper metal-drilling bit and cutting fluid, and by using low speed and steady pressure.
Yes, with the right metal bit, slow speed, and steady pressure.
Why does my drill bit wander?
Wandering occurs when the tip isn't centered; use a center punch and start with a small pilot hole.
Wandering happens when the tip isn’t centered; use a center punch and pilot hole.
How can I extend drill bit life?
Keep bits sharp, use appropriate pressure, and lubricate when drilling metal.
Keep bits sharp, use steady pressure, and lubricate when drilling metal.
Is it safe to drill into brick or concrete?
Yes, with a masonry bit and hammer drill or percussive mode, plus protective equipment.
Yes, with the right masonry bit and protective gear.
Watch Video
Top Takeaways
- Choose the correct bit for material
- Secure the workpiece before drilling
- Start with a pilot hole for accuracy
- Keep drill perpendicular and apply steady pressure
- Deburr and inspect the finished hole