How to Use Disk Drill: A Practical Data Recovery Guide
Learn how to use Disk Drill to recover lost or deleted files on Windows and macOS. This step-by-step guide covers installation, scanning, previewing, and safe recovery, plus tips to protect data with backups.

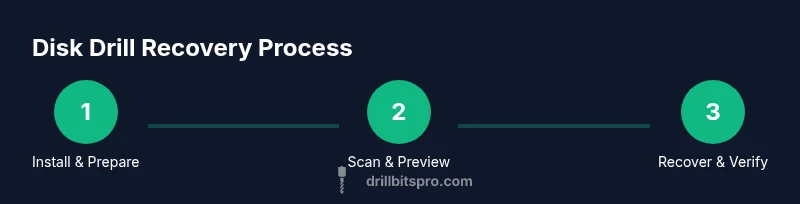
This guide shows how to use Disk Drill to recover lost files from Windows or macOS drives. You'll learn how to install, scan, preview, and recover data safely while avoiding overwriting existing data. By following these steps, you'll maximize your chances of a successful recovery with Disk Drill. The workflow is practical for DIYers and professionals alike, focusing on safety and verifiable results.
What Disk Drill Is and Why It Helps
Disk Drill is a data recovery utility designed to help you locate and restore files that appear lost after deletion, corruption, or a failing drive. For DIYers and professionals, understanding how to use disk drill effectively reduces downtime and protects important work. According to Drill Bits Pro, success hinges on a clear workflow, careful drive handling, and validating results before saving. If you’re asking how to use disk drill, the core idea is to move from a risk-free scan to a targeted recovery, keeping safety and data integrity at the forefront. Disk Drill supports multiple file systems, detects large classes of file types, and provides both quick scans and deep scans. In practice, the tool acts like a guided compass: it leverages metadata, file previews, and smart filtering to narrow down recoverable items without forcing you to guess. For a typical project, you’ll start by ensuring you’re working on copies rather than the original drive to prevent overwriting. This block sets the stage for the practical steps that follow and explains the rationale behind Disk Drill’s core features, including its ability to create disk images and surface previously hidden file fragments during a scan.
Preparing Your System and Data Safely
Before you dive into a recovery, prepare both your system and your data to maximize chances of success. First, avoid writing new data to the drive you’re trying to recover from. Even small writes can overwrite fragments that are still recoverable. Second, create a fresh backup of your current state whenever possible. This provides a safety net if something goes wrong during the recovery process and allows you to retry with a clean slate. Third, consider using a separate storage device (external drive or another internal partition) to store recovered files. Disk Drill can work well in environments with multiple drives, but the safest practice is to isolate where you save recovered data. Finally, make sure your operating system and Disk Drill are up to date. Updates often include bug fixes, improved file previews, and better support for newer file systems. This preparation reduces risk and improves the reliability of the whole workflow.
Getting Disk Drill Installed and Activated
Installing Disk Drill is typically straightforward, but a smooth setup helps you avoid problems later. Start by downloading the official installer from the developer’s site and running it with administrator permissions. If you’re on Windows, choose a compatible installer for your OS version; on macOS, grant the necessary permissions in System Preferences when prompted. After installation, launch Disk Drill and activate it if you have a license key. If you’re evaluating the software, take note of any trial limitations that might affect recovery quantities. Once active, take a moment to configure safety settings such as choosing a default recovery destination (preferably not the source drive) and enabling native drive health checks where available. This step ensures the rest of the workflow proceeds without interruptions and that Disk Drill’s features are ready to use when you need them most.
Scanning for Lost Data: Quick Scan vs Deep Scan
Disk Drill offers multiple scan modes, each with different strengths. Start with a Quick Scan to rapidly identify obvious recoverable items, especially if the data loss was recent and the file system is intact. If the quick pass yields few results, switch to a Deep Scan. Deep Scan traverses more sectors and reconstructs fragments from file system metadata, making it valuable for complex recoveries or when standard previews fail to surface what you need. Keep in mind that Deep Scans take longer and consume more system resources, so plan accordingly. During scanning, you can often filter results by file type, date, size, and folder paths to streamline your decision-making. If you are unsure about a file, review the preview pane—Disk Drill can show thumbnails and metadata that help you verify authenticity before recovery. This section emphasizes pacing and strategy: start small, escalate only when necessary, and always save to a separate drive to avoid overwriting.
Previewing and Selecting Files for Recovery
Previewing is the bridge between scanning and actual recovery. In Disk Drill, previews allow you to inspect file contents, metadata, and thumbnails without restoring them to the original location. Use previews to confirm file integrity, especially for documents, photos, and multimedia. When you’re confident a file is recoverable and useful, select it for recovery. For large recoveries, consider batching items into smaller groups to monitor success and to mitigate errors. The preview window also supports filtering by file type and size, helping you prioritize the most important data first. Remember to keep the recovered items in a dedicated folder on a different drive, and periodically check for file corruption signs (partial data, garbled content). This diligence reduces the risk of re-losing data after a failed recovery attempt.
Recovering and Verifying Data Safely
Recovery is not complete until you verify the integrity of restored files. Start by restoring to a temporary location on a separate drive, then perform a quick integrity check—open documents, play media, and verify images. If something looks corrupted, re-run a scan and try a different recovery set. It’s also wise to preserve a backup of the recovered data as soon as possible, in case you need to re-access it later. Finally, once you confirm everything is intact, relocate the data to its final destination and consider creating a fresh backup plan to guard against future losses. This phase emphasizes validation, careful storage, and documentation of what was recovered and where it’s stored.
Common Pitfalls and How to Avoid Them
No guide is complete without addressing common missteps. Avoid overwriting data by always saving to a different drive than the source. Don’t rely solely on the first result from a scan—deep scans often reveal additional recoverable items. Be mindful of aggressive filtering that might exclude important but less obvious files. If you’re recovering from a failing drive, pause intensive write operations and consider cloning the drive first. Finally, don’t skip the importance of backups: Disk Drill is a powerful tool, but a robust backup habit is the best defense against data loss. By preplanning and validating results, you maintain momentum and reduce frustration during a recovery.
Advanced Tips: Disk Imaging and Regular Backups
For professionals and power users, disk imaging is a best-practice discipline that complements data recovery. Before attempting major recoveries, create a disk image of the affected drive. An image preserves a consistent copy of the original state, enabling multiple recovery attempts without further risk to the source. Disk Drill supports image creation and can streamline the process with built-in tools. In addition to imaging, establish a regular backup routine using multiple destinations (local and cloud) and schedule periodic scans of critical drives. This proactive approach minimizes downtime and ensures you have a reliable copy of your data when problems arise. By combining disk imaging, validated recoveries, and routine backups, you build resilience into your workflows and protect both personal and professional projects.
Tools & Materials
- Disk Drill software (installer and license)(Download from official site; ensure OS compatibility and license is active if required)
- Computer (Windows or macOS) with internet access(Admin rights may be required for installation)
- External drive or safe storage location for recovered data(Always save recoveries to a different drive from the source)
- Source drive or disk image to recover from(Do not modify the source during recovery)
- Backup media (optional but recommended)(If possible, back up current data before starting)
Steps
Estimated time: 60-120 minutes
- 1
Install Disk Drill and prepare workspace
Download the official Disk Drill installer and run it with administrator rights. Complete the initial setup, connect any external drives you’ll use for recovery, and configure a safe destination for recovered files.
Tip: Verify OS compatibility before installation to avoid compatibility issues. - 2
Connect the target drive securely
Attach the drive you want to recover from via a reliable port. If it’s an internal drive, ensure the computer is powered down during connection; if external, use a solid USB connection.
Tip: Avoid using hubs; connect directly to reduce transfer errors. - 3
Run Quick Scan first
Open Disk Drill and initiate a Quick Scan to surface obvious recoverable files. Review results in the previews pane and mark items you recognize or need.
Tip: Start with small batches to test the workflow before larger recoveries. - 4
If needed, run a Deep Scan
If Quick Scan doesn’t find enough files, switch to Deep Scan for a more thorough pass. Deep Scan can take longer but often recovers more data, including fragmented files.
Tip: Be prepared for longer run times and higher CPU usage. - 5
Preview and select files for recovery
Use the preview pane to verify file integrity before recovery. Select the subset you need to minimize risk and save time.
Tip: Prioritize documents and high-value media first. - 6
Recover to a safe location
Choose a different drive or location for the recovered files. Do not save back to the source drive to prevent overwriting.
Tip: Create a folder named with the date or project to keep organized. - 7
Verify integrity and back up
Open a sample of recovered files to confirm integrity. Create a backup copy and consider setting up an ongoing backup routine.
Tip: Document what was recovered and where it’s stored for future reference.
Got Questions?
Is Disk Drill free to use for data recovery?
Disk Drill offers a free version with limited recovery capabilities. For larger recoveries or advanced features, a paid license may be required.
Disk Drill has a free version with basic recovery, but you may need a license for more functions and larger recoveries.
How long does a typical Disk Drill scan take?
Scan time depends on drive size, speed, and whether you use a Quick Scan or Deep Scan. Quick Scans are faster; Deep Scans can take significantly longer.
Scan time varies with drive size and scan type; quick scans are quicker, deep scans take longer.
Can I recover data to the same drive I’m recovering from?
It is strongly recommended to recover to a different drive to avoid overwriting data you are trying to recover. Do not write back to the source drive.
No—the safest practice is to recover to another drive to prevent data loss.
What file types does Disk Drill support?
Disk Drill supports a wide range of common file types, including documents, images, videos, and archives. Check the software’s file type filters for a current list.
Disk Drill covers many file types; you can filter by type to focus on what you need.
Does Disk Drill work on Linux or require Windows/macOS?
Disk Drill is primarily designed for Windows and macOS. Linux support is not standard; consider alternative recovery tools for Linux systems.
It mostly runs on Windows and macOS; Linux users may need other solutions.
Should I clone a drive before recovery?
Cloning a drive before attempting recovery preserves the original state and allows multiple attempts without risking further data loss.
Cloning the drive first helps safeguard the original data during recovery.
Watch Video
Top Takeaways
- Start with a safe scan before deep recovery attempts.
- Always save recovered data to a separate drive.
- Verify file integrity before finalizing the recovery.
- Back up important data regularly to prevent future losses.